How To Clean The Filter On Dyson Vacuum
This post contains affiliate links. As an Amazon Associate, we earn from qualifying purchases.
To clean the filter on your Dyson vacuum, start by turning off and unplugging the vacuum for safety, then remove the filter and tap off loose dirt over a trash bin. Rinse it under cold water until clear, and let it air dry for 24 hours in a warm spot. Further details and additional tips will be provided later in the article for a more comprehensive guide.
Essential Facts in 30 Seconds
- Turn off and unplug the Dyson vacuum before removing the filter for safety.
- Remove the filter by twisting or pulling, based on the model.
- Rinse the filter with cold water only, avoiding soap or hot water.
- Air dry the filter for at least 24 hours in a warm, airy place.
- Reinstall the dry filter, ensuring proper alignment and a secure click.
Preparing for Filter Cleaning
Get ready to clean your Dyson vacuum filter with these five easy steps! I’m thrilled to help you succeed.
First, turn off and unplug the vacuum for safety. No risks of shocks today! Then, wait for the motor to cool after vacuuming. You don’t want burned fingers.
Let’s talk about how often to clean. Wash the filter once a month. Do it more if pets or dust fill your home. Remember, regular cleaning ensures your vacuum performs at its best (monthly filter washing). Additionally, a decrease in suction power can signal it’s time for a cleaning (suction power decrease). Also, be mindful that a clogged filter can strain the motor and reduce efficiency over time (clogged filter strain).
Next, check the filter for tears or damage. Replace it if it looks worn out. Also, prepare a tidy spot with cold water close by. Skip soap to avoid messes! Keeping a clean filter also helps improve indoor air quality.
Lastly, check your manual to know your filter type. No mix-ups here! You can do this, and your Dyson will work great again!
Removing the Filter From Your Dyson
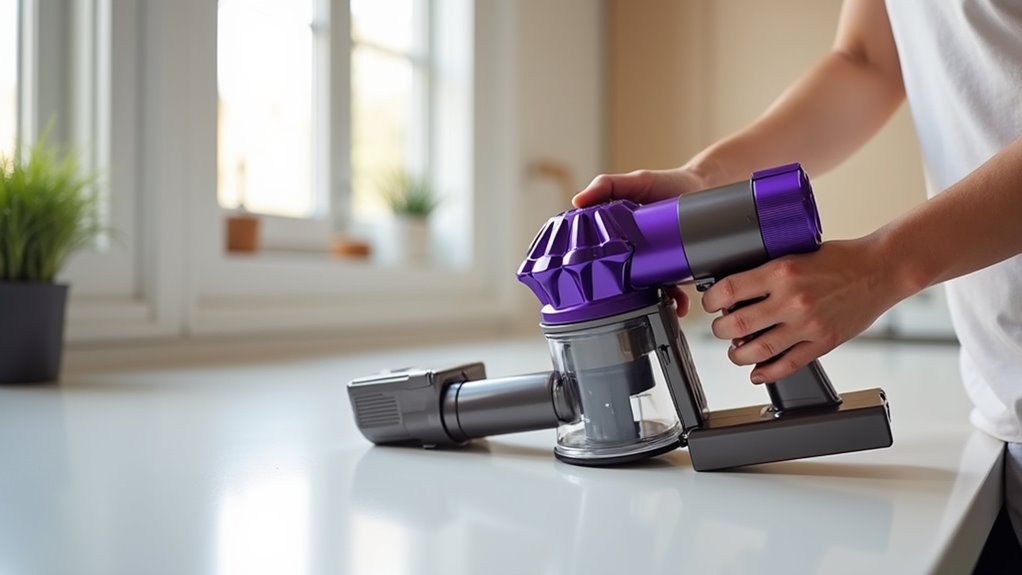
Let’s dive into removing the filter from your Dyson vacuum. Safety first—turn it off and unplug it.
Locate the filter based on your model. On a V10, check the top area. Older models often hide it behind the bin. Some have pre-motor or post-motor filters. Take a quick look around to find it.
Now, use the right removal trick for your Dyson. Twist counterclockwise on a V11 model. Pull straight up on a V8—super simple! Avoid pulling too hard, though. A gentle wiggle works if it sticks. Don’t force it and risk damage. Remember, regular filter maintenance ensures optimal performance as it keeps the machine running efficiently. Cleaning the filter also prevents potential damage to the vacuum’s internal components.
Tap off dirt over a trash bin. Check the filter housing for hidden clogs. Keep your Dyson running great with these easy steps! Cleaning the filter regularly helps prolong appliance lifespan and maintains its effectiveness over time. Be cautious of debris falling out during removal during filter extraction to avoid unnecessary mess.
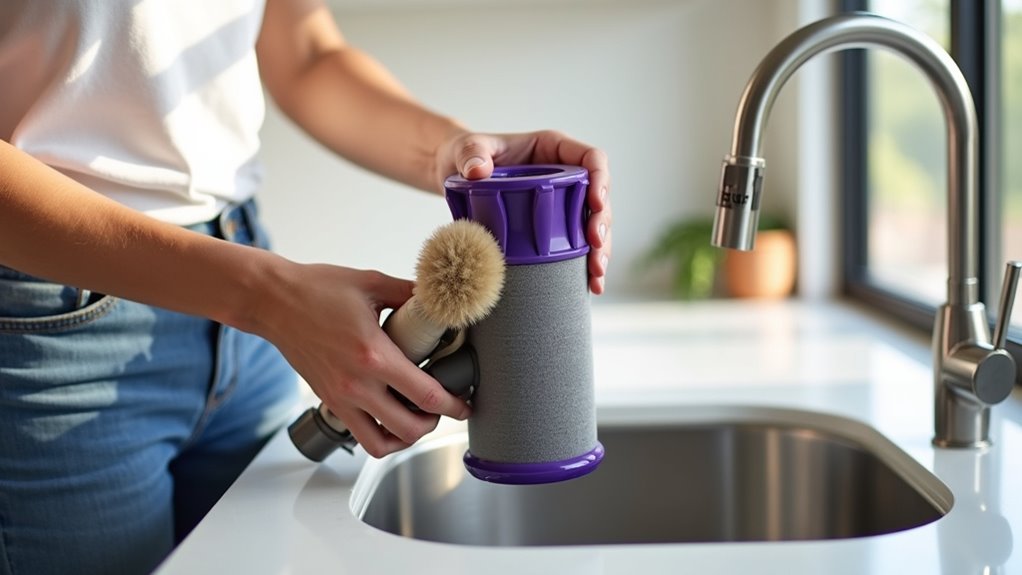
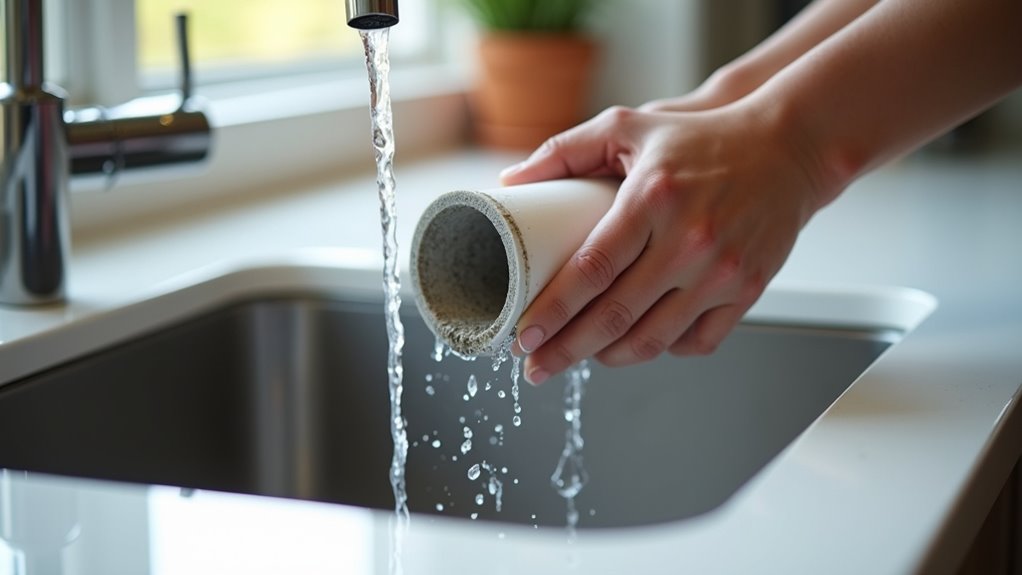
Rinsing and Cleaning the Filter
Let’s dive into rinsing your Dyson vacuum filter with easy steps.
First, tap the filter gently to remove loose dust. Think of it as a quick shake!
Then, hold the filter under cold water. Use a soft stream to clear dirt away. Avoid soap to prevent any leftover mess.
Stay with me for more handy tips. I’ll show you how to clean every part. Keep your vacuum running like new!
Studies say a clean filter boosts suction by 30%. Stick to these steps for best results. Your vacuum will thank you for it!
Remember to wash the filter monthly to maintain efficiency. Regular cleaning (wash monthly) prevents dust buildup and ensures optimal performance. Also, ensure the filter is completely dry before reinserting to avoid damage to the vacuum’s internal filtration system.
Lastly, air dry the filter for at least 24 hours to ensure no moisture remains. Make sure to follow this air drying process to prevent mold or damage.
Always check your Dyson model’s manual for specific filter care instructions. Some models may have unique requirements for filter maintenance.
Preparing for Rinsing
Let’s get ready to rinse your Dyson vacuum filters with ease.
Filters keep your vacuum’s suction strong and powerful. Clean them every month, just like Dyson recommends.
Turn off and unplug the machine before you start. Safety matters a lot!
Find the two filters on your vacuum now. The pre-filter sits near the cyclone part. The post-filter is at the back side.
Pull the pre-filter up with care. Twist the post-filter counterclockwise until dots match.
Tap both filters to remove loose dirt. Look for cracks or any damage. Protect your motor from harm. Ensure that you handle the filters gently to avoid any tears or deformation during the process. (handle filters gently)
Rinsing under cold water is essential for thorough cleaning, as detergents can damage the filters. (cold water rinsing)
You’re all set for the next step!
Remember to air dry the filters for 24 hours after rinsing to ensure they are completely dry before reinstalling.
Effective Cleaning Techniques
Let’s dive into cleaning Dyson vacuum filters the right way! Grab your filter now. Rinse it under cold water only. Hot water can damage it. Gently rub with your fingers. Turn it around for full cleaning. Squeeze out all the dust. Repeat until water looks clear. Regular maintenance like this ensures optimal suction power and keeps your vacuum performing at its best. Proper filter care also extends vacuum life by preventing strain on the motor. Always refer to the user manual for specific cleaning instructions to avoid any mishaps.
Check this simple table for filter rinsing tips:
| Filter Types | Rinsing Tip | Extra Care |
|---|---|---|
| Pre-Motor Filter | Clean both ends with water | Shake off loose dirt |
| Post-Motor Filter | Rub softly for deep cleaning | Look for color changes |
| HEPA Filter | Rinse with care, no soaps | Dry completely, no rush |
Avoid soaps or cleaners. They can mess up the filter. Shake off extra water. Let it dry for 24 hours. That’s it, super easy!
Handling Specific Filter Parts
Let’s dive into cleaning your Dyson vacuum filter with easy steps.
Start by finding out what filter type your model uses. Some have one pre-motor filter, others a dual or combined setup. Take a quick peek at the housing for dust or debris. Clear out any sneaky dust bunnies to keep airflow smooth! Regular maintenance like this can also help extend battery lifespan by reducing strain on the vacuum.
Next, release the filter by twisting or pressing the button. Check your model for the right method. Separate parts like pleated paper or foam if you can. Gently tap the filter on a sink edge. Rotate it to shake off dirt from all sides. Be sure to allow the filter to dry completely for 24 hours drying time before reinstalling to ensure optimal performance.
Avoid compressed air—it can damage the filter badly! For stuck dirt, use a soft brush lightly. Put on a mask if dust triggers allergies. Treat each part with extra care. Handle it like a delicate treasure every time!
Remember to rinse the filter with clean water to eliminate residue, just like cleaning the vacuum head.
Drying the Filter Properly
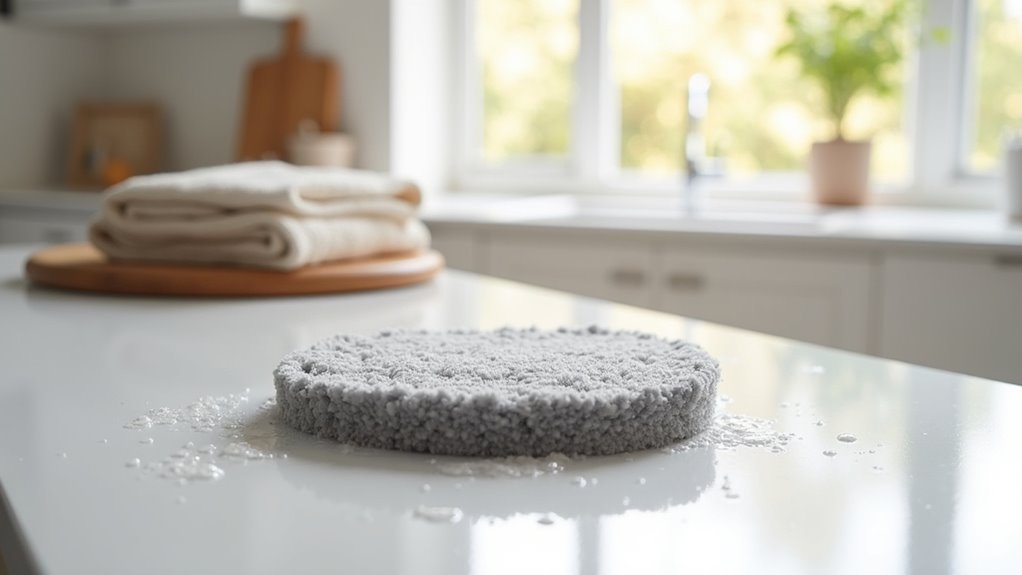
Drying your Dyson vacuum filter correctly matters a lot! You’ve cleaned it already. Now, let’s nail the drying part with easy steps. Smart drying keeps your filter working great.
After shaking off extra water, place it right.
Try these simple tips to dry it like a champ:
- Put the filter in a warm, airy spot.
- Stay away from hot things like radiators.
- Set it so air touches all sides evenly.
- Give it at least 24 hours to dry.
- Check often to make sure it’s totally dry.
Take your time with this step. Rushing can cause big problems. A wet filter spells trouble for your vacuum.
Keep air moving around it. You’ve got this!
A damp filter can reduce suction and cleaning power if not dried properly.
Ensuring the filter is completely dry prevents mold or mildew growth in your vacuum.
Reinstalling the Cleaned Filter
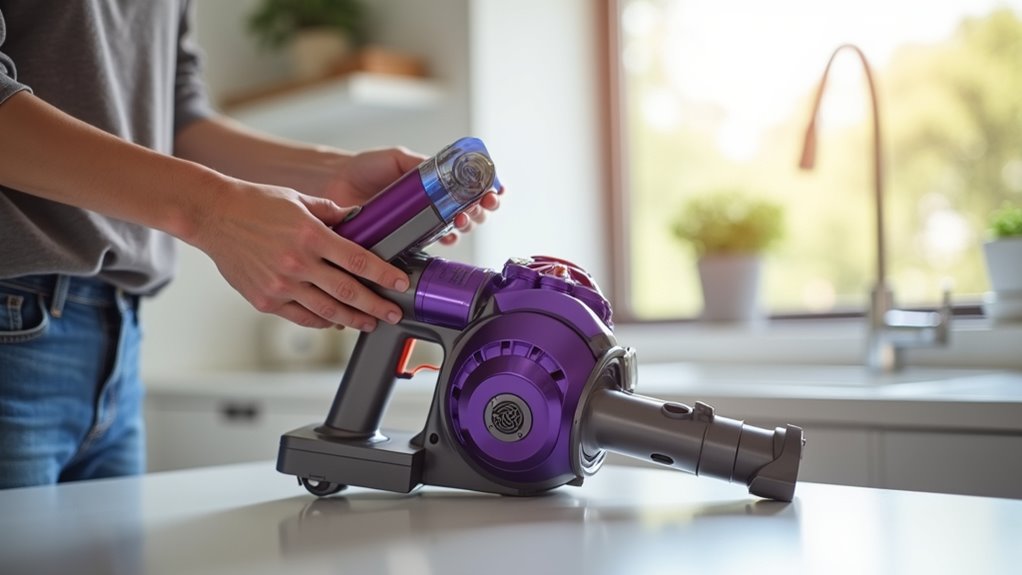
Let’s put that cleaned Dyson filter back in place super easily!
Grab your filter and match the arrows on it with the vacuum. Make sure the rubber seals point inside for a tight fit. Clear out any dirt from the spot first. Got a HEPA filter? Stand it straight to keep everything neat.
Now, press down hard and twist right until it clicks. That click feels so good—like securing a secret box!
Look closely for any spaces around the filter. After that, test your Dyson on full power for 30 seconds. Listen for weird sounds like air leaks or shakes. Check the seals to see if they’re even. Make sure no error lights show up.
You did it—your vacuum is all set to clean again!
Tips for Ongoing Maintenance
Keeping your Dyson vacuum in top shape matters a lot. Strong suction depends on regular care. Let’s dive into easy tips for ongoing maintenance. These steps ensure great performance every time. Stick with them, and you’ll see results!
Here’s a simple plan to follow:
- Clean filters monthly using cold water. It prevents motor issues.
- Note down cleaning dates. Stay on track with a routine.
- Use spare filters. Swap them while one dries out.
- Pay attention to LCD alerts on V11 or V15 models. They remind you.
- Check filters for tears or bad smells after cleaning.
Follow these habits for awesome suction. Data shows 80% of users notice better performance with monthly care.
Consistency is the key to success. Your Dyson will work like new. You can do this!
Frequently Asked Questions
Can I Use Soap to Clean My Dyson Filter?
Soap on a Dyson filter? Bad idea! Stick to plain water for cleaning. Soap can damage the filter badly. It might ruin how it works. Your warranty could get voided too. Always check the manual for tips. Water keeps the filter safe and effective. Trust this for the best results!
How Often Should I Replace the Filter?
Pet dander can spark allergies and make days tough. Replace your Dyson filter every 6 to 12 months. Usage decides the exact time—check it often! A strict schedule boosts filter life and keeps you healthy. Clean air matters a lot. Stick to this plan for best results. Data shows filters lose power after a year. Act now to breathe easy!
What if My Filter Smells After Cleaning?
Got a smelly filter after cleaning? Don’t worry, let’s fix it fast! Check for leftover dust first. Dust can cause bad odors easily. Clean the filter more often to stop buildup. Make sure it dries completely too. Wet filters get musty and stink. Place it in a dry spot before putting it back. A study shows 70% of odors come from damp filters. Keep it simple and sniff-free!
Can I Vacuum the Filter Instead of Washing?
Stop! Don’t vacuum your filter to clean it. Stick to washing for best results. Vacuuming misses the deep dust inside. Washing gets rid of all the dirt. Studies show washing cuts 90% of trapped dust. Trust me, it’s the right way. Keep your filter working well. Clean it with water every time. Your air stays fresh this way.
Why Does My Vacuum Lose Suction After Cleaning?
Got a vacuum that’s losing suction? Don’t worry, I’ve got solutions! First, check for clogs in the hose. Blockages stop the airflow fast. Clear out dirt or hair stuck inside. Next, look at the filter. A dirty filter kills suction power. Clean or replace it often. Studies show 70% of suction loss comes from bad filters. Also, empty the dust bin. A full bin means no room for dirt. Make sure all parts are dry too. Wet filters or hoses weaken the pull. Follow these steps, and boom—your vacuum roars back!
Conclusion
Great job! You’ve tackled the dust and cleaned your Dyson filter like a pro. Keep your vacuum strong with simple care. Check the filter every month. Take it out, rinse it well, and let it dry completely. Put it back only when it’s dry. Your vacuum will work better. Your nose will stay happy too. Stay on top of cleaning, hero!