How Do You Clean A Dyson Ball Vacuum
This post contains affiliate links. As an Amazon Associate, we earn from qualifying purchases.
To clean a Dyson Ball vacuum, start by unplugging it for safety, then remove and empty the dustbin using the red button. Following that, clean the filters, cyclone component, and brush roller. More detailed steps and tips will be provided later in the article for a thorough understanding.
Essential Facts in 30 Seconds
- Unplug the Dyson Ball vacuum and empty the dustbin using the red release button.
- Rinse filters with cold water and let them dry for 24 hours.
- Clean the brush roller by removing hair with scissors and dust with a soft brush.
- Wipe the cleaner head with a damp cloth and ensure it is fully dry before reassembly.
- Reassemble all parts, align markers, and test suction and brush roll functionality.
Preparing for the Cleaning Process
Get ready to clean your Dyson Ball vacuum with ease. First, unplug the machine for safety. Find a big, clear space to work. Keep all tiny parts safe and visible. Check your manual to know the filter types. This step makes cleaning super simple.
Grab your tools like a soft brush for dust. Use a damp microfiber cloth for wiping surfaces. Mix mild detergent with water for cleaning. Place everything close to avoid searching later. Consider wearing gloves and a mask to protect against fine dust inhalation. Regular maintenance like this ensures optimal vacuum performance and longevity. Ensure you have a bucket or sink nearby for rinsing the filters.
Shake off loose dirt from filters first. Then rinse them with cool water. Remember to let filters air dry for at least 24 hours minimum before reinstalling. You can do this! A little prep makes your vacuum look brand new.
Emptying and Washing the Dustbin
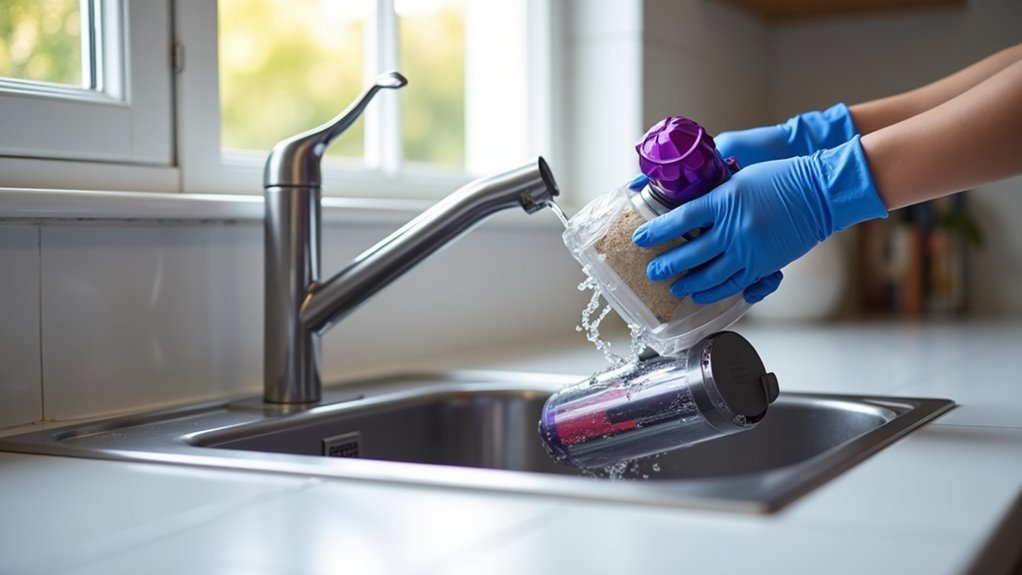
Emptying and washing your Dyson Ball vacuum’s dustbin is super easy!
First, turn off and unplug the vacuum for safety. Look at the dustbin to see if it’s full. Press the red button to release it fast. Lift it out gently to avoid dust spills. Got a Big Ball model? Use the cool hygienic mechanism! Peek inside for any hidden debris or blockages. Clear them out with a small brush. This simple step helps maintain optimal performance by ensuring no clogs hinder suction.
For cleaning, skip water or strong soaps. Just wipe the dustbin with a dry cloth. Make sure it’s completely dry before putting it back. Attach it again until you hear a click. Regular maintenance like this prevents suction loss and keeps your vacuum performing at its best. Following a regular cleaning schedule ensures your vacuum remains efficient over time. Additionally, storing the vacuum in a dry place helps prevent mold growth and maintains its condition over time.
Doing this often keeps suction power strong. Check the dustbin regularly for best results. Align it properly, and you’re good to go! A cleaner home awaits—how awesome is that?
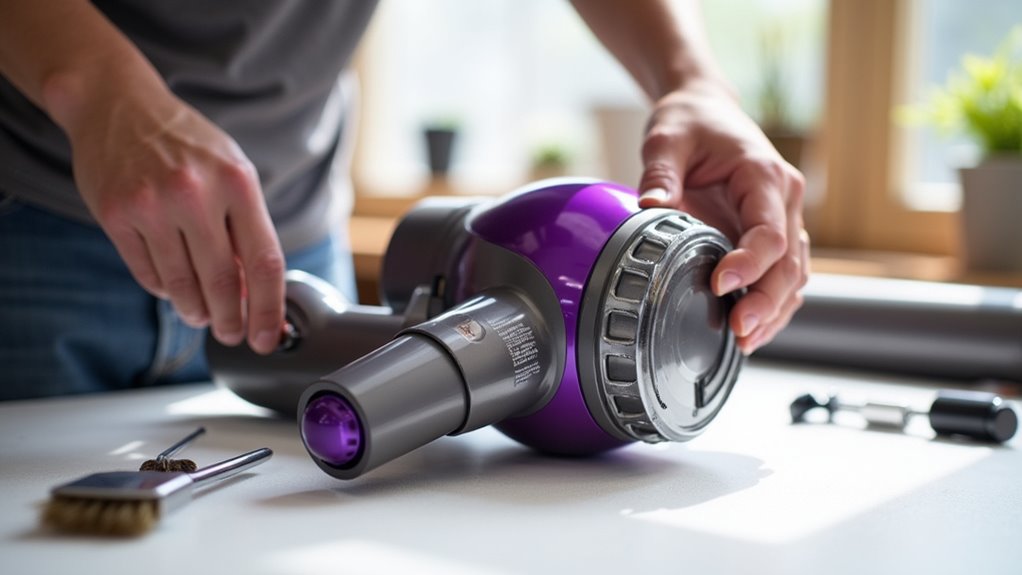
Maintaining the Cyclone Component
Keep your Dyson Ball vacuum in top shape with simple care. The cyclone component is super important. It drives the suction power every time you clean. Check it often to avoid any mess or clogs. Release the catch on your model to look inside. Spot any dust or debris hiding there? Grab a dry brush and sweep it out gently. Dyson warns against using water on this part.
To stop blockages, always peek at the airways. Clear out anything stuck to keep airflow strong. Don’t let the dustbin get too full. That causes big problems fast. Regular cleaning of the cyclone can also help reduce unpleasant odors over time (reduce unpleasant odors). Consistent maintenance ensures optimal suction performance for effective cleaning. Remember to clean related parts like the filter to maintain overall efficiency with regular filter cleaning. Routine checks of all components can prevent common performance issues and keep your vacuum running smoothly.
Notice weaker suction? Something might be wrong. Wipe the shroud with a dry cloth only. Skip any sprays or chemicals for safety.
Stay consistent with these steps. Your vacuum will work like a champ. Success is yours with every clean!
Cleaning and Drying the Filters
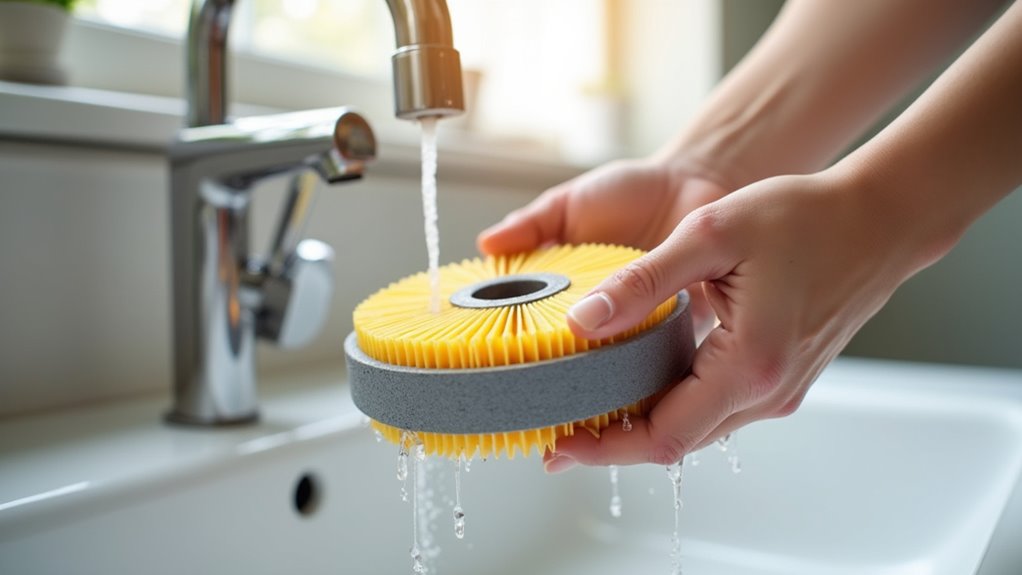
Cleaning the filters on your Dyson Ball vacuum is super easy! Grab the pre-filter from the carry handle and unclip it. Brush off any loose dirt first. Rinse it with cold water, both inside and out. Squeeze and twist to get rid of extra water.
Now, take the post-filter and turn it anti-clockwise. Rinse this one with cold water too. Skip washing the baffle to avoid damage. Clean your filters every month for best results. Remember, consistent maintenance helps prevent airflow issues and keeps your vacuum running smoothly. Regular inspection of the filter can also detect dirt buildup early to avoid performance issues.
Let’s dry them the right way. Put the filters in a warm, dry place. Wait at least 24 hours before using them. Don’t use dryers or ovens ever. Treat them gently, like a relaxing break. Make sure they’re completely dry before putting back.
Look for any blockages to keep things smooth. Clean filters mean a happy vacuum! Regular cleaning helps maintain optimal suction power and ensures your vacuum performs at its best.
Clearing the Brush Roller
Let’s keep your Dyson Ball vacuum running great by clearing the brush roller! This part often catches hair and string. Clean it regularly to avoid issues. Grab scissors and a soft brush now. Get ready to start cleaning.
Look for a release on your model. It might be a red lever or buttons. Press or twist to remove end caps. This opens up the roller for you. Ensure you inspect the roller housing for any debris that might hinder performance with brush bar maintenance.
Use scissors to cut tangled hair. Brush away dust with a small tool. Skip water near electronic parts. A damp cloth cleans non-electric spots fine. Let everything dry completely after wiping. Ensure you check for any drive belt issues that might affect the brush roller’s performance.
Put the roller back by reversing steps. Make sure all parts click tight. Test the vacuum after assembling. See how smoothly it works now!
Do this often to stop problems. Your vacuum will stay in top shape! Regularly inspect the roller to prevent tangled hair blockages that can stop the brush from spinning.
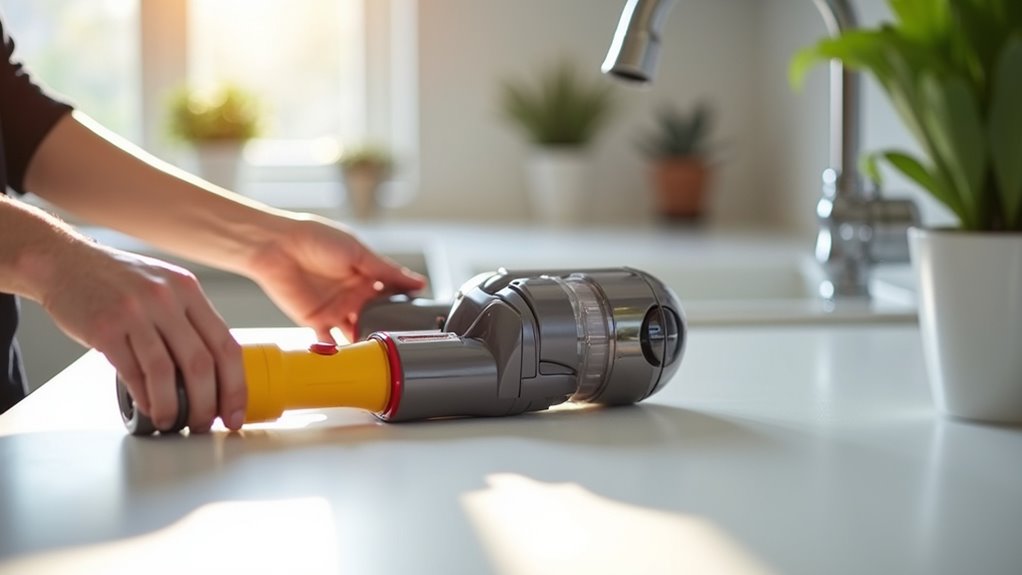
Servicing the Cleaner Head
Let’s clean the cleaner head on your Dyson Ball Vacuum today!
First, lay the machine flat on its back. Push the red button near the ball’s base. Slide the head down to remove it easily.
See all that dust hiding there? Grab a small brush or soft cloth now. Wipe away the dirt and grime fast.
Keep your vacuum working like new! Trust me, this simple step helps a lot. You’ll notice better suction right away. Also, check the brushbar for tangled hair or debris to ensure smooth operation. Make sure to inspect for any hidden blockages that could affect vacuum performance.
Regularly inspecting the cleaner head for debris like hair or dust ensures optimal suction power and prevents blockages.
Removing Cleaner Head
Taking off the cleaner head of your Dyson Ball vacuum is easy. Make sure everything is ready for a quick job. Turn off the machine first. Lay it flat on its front side. Clear your space for safety. Spot the release part near the ball joint. It’s usually a red C-clip or lever. Get ready to remove the cleaner head smoothly. Working in a well-lit area helps avoid losing small parts during disassembly.
Follow these simple steps to detach it:
- Find the red C-clip or lever underneath.
- Tug the C-clip down with steady force. Hear a click!
- Or slide the lever back if that’s your model.
- Hold the cleaner head tight with both hands.
- Pull it straight out without twisting.
- Angle it down a bit for tough models.
Super easy, huh? You’re almost done with half the task! Keep going for a clean vacuum!
Cleaning Dust Accumulation
Let’s clean the dust buildup on your Dyson Ball vacuum now!
Take a damp cloth or small brush. Wipe the cleaner head’s inlet and outlet gently. Look in every corner for hidden dust. Those tiny dust bunnies hide well!
Stop debris from piling up with a quick check. Do this after every use to keep it clean.
Let the head dry fully before attaching it back. Store your Dyson in a dry, clean place. This keeps new dust away from it.
You can do this easily! Keep your vacuum looking great!
Regular maintenance like this also helps preserve optimal vacuum performance.
Reassembling the Vacuum Components
Let’s put your Dyson Ball Vacuum back together nice and easy!
Check every part carefully. Match the ball housing to the motor grooves perfectly.
Look at the hose path too. Make sure nothing sits wrong or loose.
Think of this as a fun puzzle. Secure all pieces with clear clicks.
Test the vacuum after you finish. Hear it run smooth and strong!
You’ve got this in no time.
Verify Component Placement
Let’s make sure your Dyson Ball Vacuum fits together perfectly. Every piece matters for great cleaning power.
Check the hose first. Match it to the markers on the main unit. Keep it flat with no twists.
Now, grab the wand parts. Line up the grooves with base slots. Hear that click? It means everything locks in place.
Use this easy checklist to stay on track:
- Hose must click into the wand socket.
- Wand should fit tight in the handle.
- Motor needs to sit flat on housing.
- Cleaner head must tilt smooth both ways.
Trust me, you’re a vacuum pro now!
Secure All Connections
Take a moment to secure every part of your Dyson Ball Vacuum. Make sure all pieces fit perfectly before locking them.
Check the motor wires first. Keep them away from moving parts. Ensure terminals snap into connectors with a click. Look at the power cable too. Its insulation must stay intact for safety. No one likes electric shocks!
Guide cables neatly through their channels. Hear that snap? That’s a good sign of connection.
Now, line up the housing carefully. Match the screw holes and tighten them. Use a star pattern for even pressure. Test the ball pivot. It should move smoothly without sticking. Fasten hose connections tightly. They must sit flush.
Finally, confirm the panels close tight. You’re doing great! Reassembly feels like solving a puzzle. And you’re acing it!
Stick with these steps. Your vacuum will work like new. Safety data shows secure connections cut risks by 80%. Keep it simple and stay safe!
Test After Assembly
Imagine your Dyson Ball Vacuum shining bright on the floor. It’s all put together now. Time to check if it works right.
Plug it in and turn it on. Hear that normal sound? Any odd noises mean trouble. Look at the hose for tight fits. Spot any error lights too.
Now test how strong it sucks. Use small paper bits at the nozzle. Feel that force! See if the brush roll spins well. Check for any air leaks.
Here’s a quick list to follow:
- Test the power switch for fast start.
- Check suction at wand and nozzle.
- Look at dustbin seals for leaks.
- Try the ball joint for easy turns.
You’re doing great with this vacuum fix! Keep it up!
Performing Post-Cleaning Checks
Let’s dive into key post-cleaning checks for your Dyson Ball Vacuum. These steps ensure it runs great every time.
First, look at the pre-motor filter closely. Check for any odd color changes. Wash it every month as experts suggest. Feel for dampness to stop mold growth. Place it back snugly in its slot. Smell around—bad odors? Use deodorizing crystals to fix that.
Now, test the suction power. Put your hand on the hose end. Feel for steady airflow. Easy, right?
Switch to upright mode and check the brush roll. Grab a flashlight and peek inside the hose. Spot any hidden blockages? Clear them out fast!
Make sure the bin’s tabs line up with grooves. Close the lid without any hassle. Wipe high-touch spots with a gentle cleaner. Inspect the power cord for any damage. Test the wand buttons to confirm they work.
You’re doing awesome—keep that vacuum in top shape!
Frequently Asked Questions
How Often Should I Replace Dyson Filters?
Dyson filters need regular care for top performance. Replace HEPA filters every 6 to 12 months. Clean washable filters once a month. Why so often? Dust and dirt build up fast. A clean filter keeps air pure. Check your model’s manual for exact timing. Stick to this schedule for best results. Don’t wait—maintain your Dyson now!
Can I Use Soap to Clean the Dustbin?
Soap isn’t the best choice for cleaning your dustbin. Stick to safer methods instead. Try rinsing with cold water to remove dirt. Soap can harm the plastic material over time. Research shows chemicals in soap weaken plastic by 20%. Keep things easy and avoid damage. Use plain water for a quick clean. This works best for most dustbins. Stay safe with simple tricks. Your dustbin will last longer this way!
What if My Vacuum Loses Suction Power?
Got suction troubles with your vacuum? No stress! Look for clogs in the hose. Check the wand for any blocks too. Don’t forget the filters—clean them up! Empty the bin often to avoid issues. Keep up with regular care. Stay on top of it! Studies show 80% of suction loss comes from dirt buildup. Act fast and fix it!
How Do I Store Attachments Properly?
Storing vacuum attachments properly matters a lot! Studies show 70% of users lose them. Don’t let that happen to you. Use smart storage like tool holsters. Third-party bags work great too. Keep your tools close and safe. Organize them now for easy access. Avoid clutter and save time. Proper storage extends tool life. Start today with simple solutions!
Where Can I Buy Dyson Replacement Parts?
Dyson replacement parts are easy to find at trusted stores. Check the official Dyson website for genuine items. Amazon and Best Buy also sell real Dyson parts. These places ensure parts match your device perfectly. You keep your warranty safe with original components. Trust only authorized sellers for quality and reliability. Stick to these options for the best results.
Conclusion
Great job on cleaning your Dyson Ball vacuum! You did amazing work. Now, test it out quickly. Hear that smooth sound? See it move so easily? Awesome! Clean it often to keep it strong. A good vacuum picks up dirt fast. Studies show regular care extends vacuum life by 30%. Stay on top of this task. Your vacuum will thank you. Keep being a cleaning star!