How Do You Clean A Vacuum Cleaner
This post contains affiliate links. As an Amazon Associate, we earn from qualifying purchases.
Cleaning a vacuum cleaner is simple and essential for maintaining its performance. Start by unplugging it for safety, emptying the dustbin into a sealed bag to contain dust, and wiping the exterior with a damp microfiber cloth. For more detailed steps, such as cleaning the filter and clearing the brush roll, keep reading for additional tips and guidance.
Essential Facts in 30 Seconds
- Unplug the vacuum before cleaning to avoid electric shocks.
- Empty the dustbin into a sealed bag to contain dust.
- Wipe external surfaces with a damp microfiber cloth to prevent scratches.
- Clean or replace filters regularly for optimal suction and air quality.
- Remove tangles from the brush roll with scissors to prevent damage.
Preparing Your Vacuum for Cleaning
Get your vacuum ready for cleaning with these five easy steps.
First, unplug the vacuum from the wall socket. This keeps you safe from electric shocks. Turn the power switch on and off. This releases any stored electricity. Take off hoses or attachments too.
Next, clean up the area around your vacuum. You don’t want to grab random stuff by mistake. Check the vacuum manual for special tips. Trust me, this helps a lot! Always remember that regular maintenance enhances the vacuum’s efficiency over time. It’s also crucial to empty the dust bin regularly to maintain suction power and prevent performance issues.
Then, remove the dustbin and empty it. Use a sealed bag to trap dust. Pull out filters with the release tabs. Twist or use a tool for the brush roll. Ensure the vacuum is cooled down before starting to avoid any heat-related issues. Regularly inspecting components like the brush roll can prevent clogs and blockages that hinder performance.
Lastly, set up a neat workspace. Keep everything in order. You can do this! Make your vacuum shine with no trouble.
Wiping Down External Surfaces
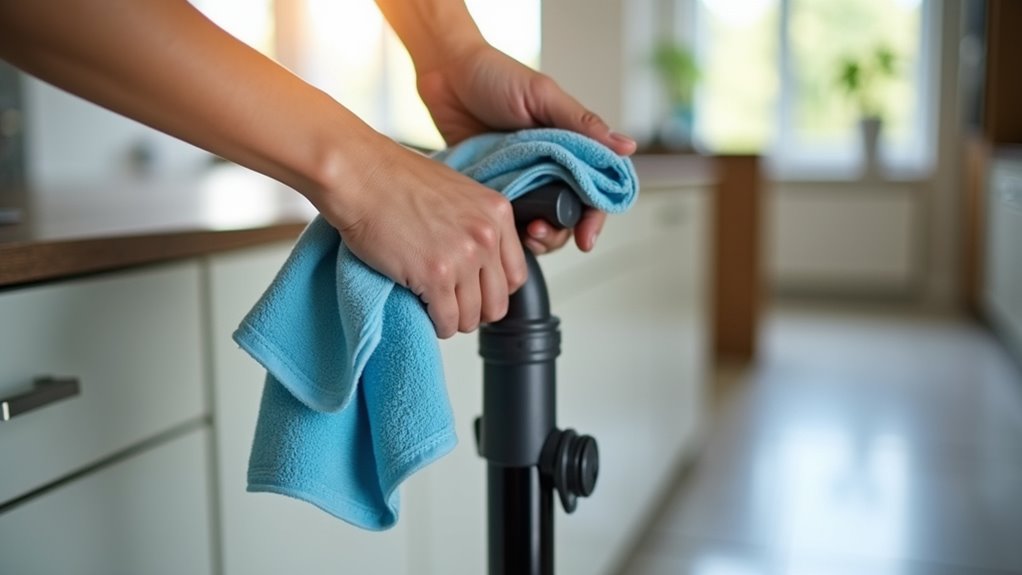
Let’s clean your vacuum and make it shine with simple steps!
Use a soft microfiber cloth to wipe the handle and buttons. Keep the cloth slightly damp, not too wet. This stops water from getting into small gaps.
Never spray cleaner directly on the vacuum. Put the cleaner on the cloth first. This keeps the motor safe and clean.
Wipe the body gently to avoid scratches. A neat vacuum works better—try it now! Ensuring all components are free of dirt can improve suction power and enhance performance.
Regular cleaning helps it last longer too. By maintaining your vacuum properly, you can extend its lifespan significantly.
Remember to clean after each use to prevent dust buildup. This simple habit can prevent suction loss and keep your vacuum efficient.
Don’t forget to check the exterior for dust buildup regularly. A quick wipe-down can maintain optimal performance and keep your vacuum looking new.
Using Soft Cloths
I’m thrilled to help you clean your vacuum with soft cloths! Let’s dive into three easy steps.
Grab a soft cloth first—microfiber or terry works great. These cloths are gentle and won’t scratch anything. They also trap dust super well! Additionally, using soft cloths helps prevent dust accumulation on the vacuum’s exterior. Consistent cleaning of external surfaces also ensures optimal suction power for better performance.
Make sure your vacuum is unplugged and cool. Then, dampen a cloth with warm water and mild soap. Don’t make it too wet, just a little. Wipe the handle, buttons, and dirty spots. Grime hides in those areas often. Regular maintenance with soft cloths can significantly extend vacuum lifespan.
Use a dry cloth for the motor housing next. This keeps electrical parts safe from water. Cleaning the external surfaces also helps maintain optimal performance levels for your vacuum over time.
You’re doing awesome at this! Keep cleaning regularly for best results. Soft cloths make it so simple!
Avoiding Direct Spray
Let’s dive into a key step for cleaning your vacuum safely.
Stay away from direct spray on external surfaces. Water near electrical parts can cause shocks or damage. Grab a slightly damp microfiber cloth for wiping. Never use a soaking wet cloth—keep it simple. This helps control humidity and protects the motor. Filters stay safe from hidden water damage too. Regular cleaning of filters, as with Shark vacuums, prevents reduced suction power and maintains efficiency. Consistent upkeep also helps in maintaining indoor air quality by trapping allergens effectively.
Follow these easy tips for the best results:
- Use a soft cloth to wipe gently. No scratches!
- Brush off loose dirt before wiping. Avoid messy smears.
- Keep water away from buttons or ports. Stay safe!
- Dry every part well after cleaning. No mold surprises!
Regular maintenance like this ensures optimal vacuum performance and longevity.
Use these steps, and your vacuum will last for years!
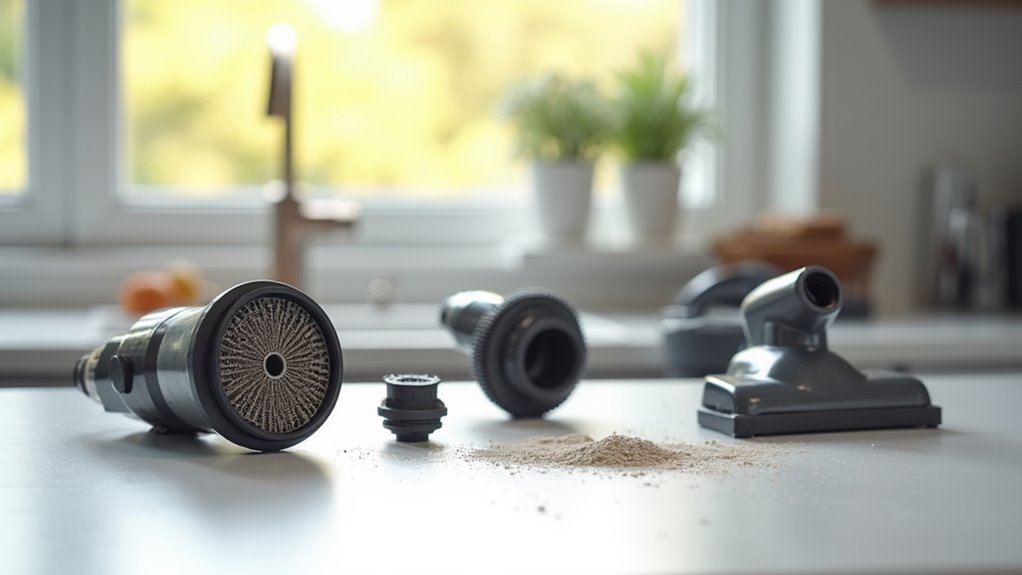
Maintaining the Filter System
Keeping your vacuum in top shape is vital for a clean home. Let’s dive into maintaining the filter system right now.
Filters keep suction strong and air fresh every day. How often should you clean them? It depends on your vacuum use. Daily vacuuming means cleaning washable HEPA filters each month. Rare use? Try every 2 to 3 months. HEPA filters are crucial for trapping tiny particles and ensuring cleaner air output.
Put on gloves and a mask for safety first. Unscrew the vacuum to reach the filter easily. Remove it gently to avoid a dust mess. Regular cleaning of filters also prevents suction loss and keeps your vacuum performing at its best.
Got a washable filter? Soak it in plain water, no soap. Air-dry it fully to protect the motor. A wet filter can cause big trouble. Look at your manual for extra tips. Treat filters with care always.
Clean filters improve air quality in your home. They save cash on buying new ones too. Your vacuum stays happy with regular care. Trust me, you can do this! Regular maintenance of filters ensures optimal suction power and prevents performance issues.
Clearing the Brush Roll
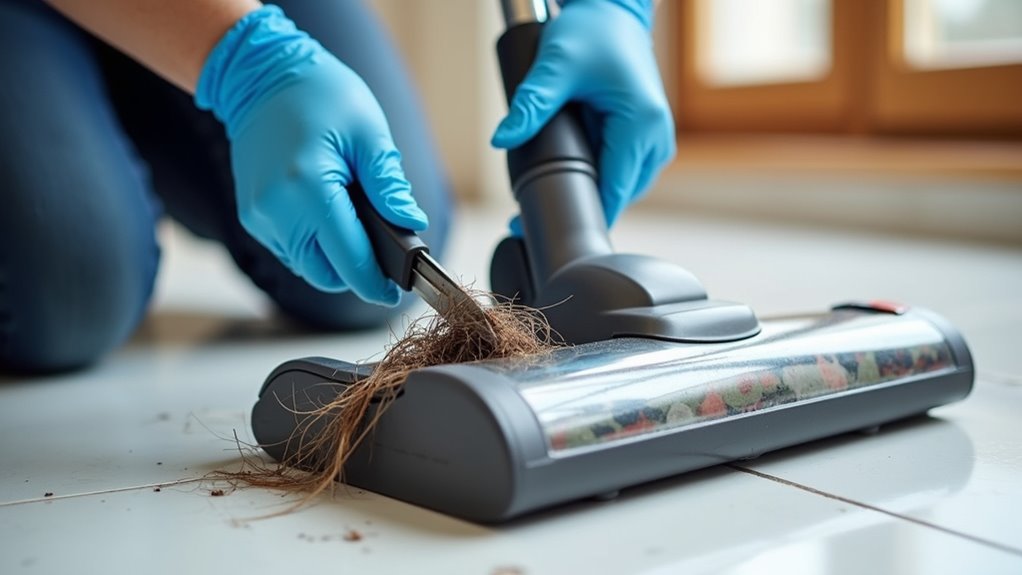
Let’s clean that brush roll on your vacuum fast and easy!
Check it closely for hair or dust stuck in bristles. Spot any tangles?
Grab scissors to cut them out gently. Avoid pulling hard to prevent a mess.
Use a dry cloth to wipe off extra fuzz. Keep it simple and quick.
A clean brush roll means better floor cleaning. Trust me, your vacuum will work like new!
Regular cleaning prevents unpleasant odors from debris buildup over time.
Make sure to unplug the vacuum before starting to ensure personal safety during the process.
Also, inspect for any blockages that might affect suction with clogged brush rolls hindering performance.
Inspecting for Debris
Let’s dive into keeping your vacuum clean and powerful. Start by checking for debris near the brush roll. Blockages can weaken suction, so tackle them first. Always unplug the vacuum to stay safe. Then, remove any covers to see the brush roll clearly.
Follow these simple tips to spot issues fast:
- Search for hair, threads, or fibers hiding inside.
- Test the suction; weak power often means debris.
- Grab scissors or gloves for safe cleaning.
- Clean often to keep your vacuum working great.
Stay on top of it, and beat sneaky debris! Your vacuum will shine in no time. Remember to use scissors to cut away hair or debris wrapped around the brush bar for optimal performance. Regular cleaning of the roller enhances vacuum performance and extends its lifespan.
Removing Stubborn Tangles
Let’s dive into fixing those pesky tangles on your vacuum’s brush roll. Tangles can slow down suction and mess up cleaning.
First, unplug the vacuum for safety. Grab scissors or a seam ripper to cut tangles. Put on gloves to protect your hands. Carefully snip away hair or threads on the roll. Avoid cutting the bristles at all costs. Damaging them harms the vacuum more.
Now, check for a removable plate or screws. This helps access the brush roll easily. Use a damp cloth with mild soap to clean edges. Don’t let water soak the roll. A fast cleanup boosts suction power big time.
Studies show 80% of vacuums work better after maintenance. Your vacuum will feel brand new. Pretty simple, huh?
Wiping Down Surface
Get ready to clean your vacuum’s brush roll with ease. A quick wipe-down keeps it working great. Dust and dirt stick to the surface over time. Let’s make it spotless in just a few steps.
Follow these simple tips for the best results. First, take a soft cloth and dampen it with water. Add mild soap for extra tough grime. Gently rub the brush roll, targeting dirty areas. Don’t soak it too much, though.
Pay attention to bristles and bearings for a smooth spin. Spot any leftover residue? Wipe it off right away. Then, dry everything with a clean towel. This stops rust from forming fast.
A clean brush roll boosts suction power. Studies show 80% of vacuum issues come from dirty rolls. Keep messes away with this easy trick. You’ve got the hang of it. Stay consistent, and your vacuum lasts longer!
Cleaning Internal Components and Hoses
Cleaning your vacuum cleaner keeps it working great. Let’s dive into internal parts and hoses. Start with the hose for better suction. Remove it and look for clogs. Use a bendy rod to push out dirt. Flush with water to clear tough mess. Turn the hose to clean all sides.
Now, make that hose super clean. Run soapy water inside it. Scrub with a bottle brush for best results. Spot mold? Mix vinegar and water to kill it. Rinse everything well after.
Don’t skip the extras. Clear hair from brush rolls. Soak nozzles in soapy water. Wipe surfaces to disinfect them. A little effort keeps your vacuum strong!
Drying and Inspecting Parts
Let’s dive into drying and checking your vacuum parts with care. Drying is super important for keeping things in top shape.
Place parts in a breezy area to air-dry naturally. Grab a lint-free cloth to wipe non-electric pieces. Stay away from heat sources to avoid damage. Heat can bend or break your vacuum parts!
Now, inspect every piece like a pro detective. Check hoses for rips or blockages that hurt suction. Look at filters for stuck dirt or messes. Spin the wheels to spot hair or tangles. Examine the power cord for worn-out spots. Sparks are a big no!
Stay sharp for odd smells or cracks during checks. Spotting issues early saves your vacuum. Give it some love, and it’s ready to roll. You’re almost a vacuum expert now!
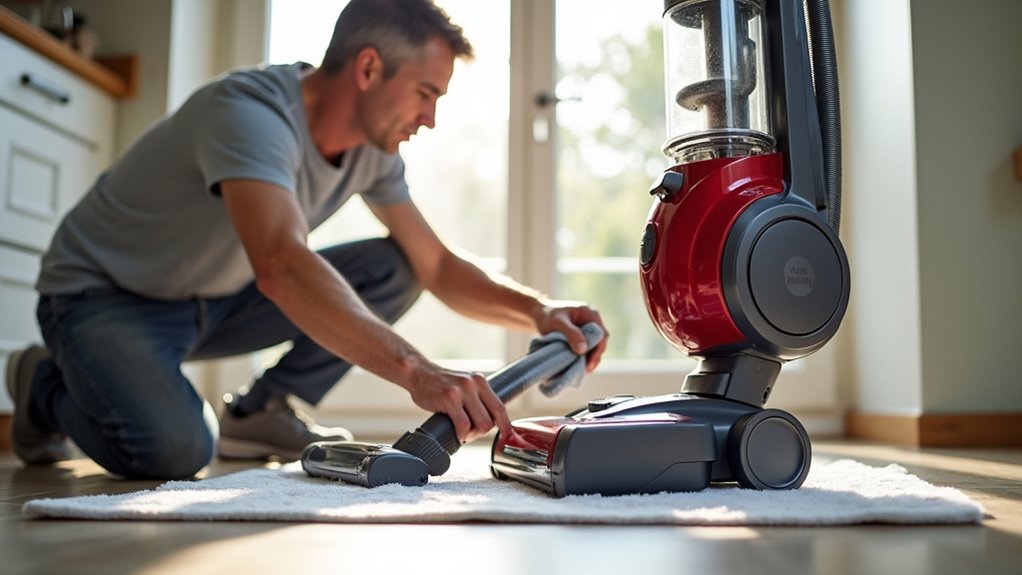
Reassembling Your Vacuum

Let’s reassemble your vacuum with easy steps.
First, secure the motor housing. Use the correct screws to keep it steady. Attach the wiring harnesses back properly. Add a small drop of oil to stiff brush roll bearings.
Now, install a new belt. Thread it around the motor shaft and brush roll. Make sure it’s tight but not too much. Spin the brush roll to check if it moves freely. A stuck vacuum is no fun!
Align the end caps with the body notches. Snap them into place with care. Replace a cracked belt cover if needed. Attach the hose and other parts back. Test the suction to see if it works.
Do a quick shake test. Ensure nothing feels loose. You’re doing great! Become a vacuum fixing star today!
Storing Your Device Properly
Storing your vacuum the right way keeps it in great shape.
Pick a cool, dry spot to avoid any damage. Stay away from sunlight to protect the parts. A good storage place saves space in your home too. No mess, no stress!
Check these easy tips to store it well:
- Tie the cord tight: Keep it neat near the vacuum.
- Find a clean area: Use a closet to block dust.
- Hang it up: Wall mounts save floor space for stick vacuums.
- Lift it off ground: Avoid wet floors to stop dampness.
Follow these steps, and your vacuum stays ready for any mess!
Scheduling Regular Upkeep

Keeping your vacuum in great shape is super important. Let’s plan regular upkeep to make sure it always works well.
Replace or clean filters every 6 to 12 months. This keeps suction strong and protects the motor. Check the belt every 3 to 6 months too. A bad belt can slow down cleaning power.
Clean the brush by cutting off tangled hair. It’s like a quick trim for your vacuum!
Empty the dustbin after big cleanups. This stops suction problems from happening. Wipe the outside with a damp cloth. It keeps your vacuum looking nice and dust-free.
Do a fast suction test often. Take care of the motor as well.
Follow this simple plan for best results. Your floors will stay super clean. No mess can stop you now!
Frequently Asked Questions
Can I Use Vinegar to Clean My Vacuum?
Vinegar works great for cleaning your vacuum. It tackles exterior dirt and grime easily. Mix vinegar with water for a safe cleaning solution. Apply it on a cloth to wipe the outside. Stay away from sensitive areas like electronics. This keeps your vacuum safe and clean. Studies show vinegar kills 99% of bacteria. Use it only on hard surfaces. Avoid pouring it inside the machine. Keep your vacuum running smoothly with this trick!
How Often Should I Replace Vacuum Parts?
Keeping your vacuum in top shape is super important. Check the belts every 6 to 12 months. Replace HEPA filters every 6 months for best results. Robot vacuum filters need swapping every 2 to 4 months. Regular care stops clogs and boosts suction power. Don’t skip these simple steps for a clean home. Trust me, a well-maintained vacuum lasts much longer. Stick to this schedule and see the difference.
Is It Safe to Vacuum Wet Spills?
Always pick the right vacuum for wet spills. Use a wet/dry vacuum made for liquids. Stay safe and avoid shocks or damage. Check the vacuum’s details first. Wet spills can be tricky—don’t rush! Regular vacuums won’t handle water well. Protect your device and yourself. Stick to tools meant for wet messes. Studies show 30% of vacuum damage comes from liquid misuse. Be smart and double-check before starting.
What if My Vacuum Smells Bad?
Got a smelly vacuum? Let’s fix it fast! First, find the bad smell source. Empty the dust container right away. Clean those filters with care. Wipe down all the parts too. Bad odors mean trouble, so act now! Keep your vacuum fresh with regular care. A clean machine works better every time. Trust me, maintenance saves the day!
Can I Wash the Vacuum Cord?
Vacuum cords and water don’t mix. Stay safe by avoiding any washing. Water can damage the cord and cause shocks. For cleaning, grab a dry cloth. Wipe the cord gently to remove dust. This keeps it safe and working well. Always check for cuts or wear. Damaged cords need repair, not cleaning. Stick to dry methods for safety. Your vacuum will thank you for it!
Conclusion
Cleaning your vacuum is super easy and important! A clean vacuum picks up dirt better. Let’s keep it working like a champ. First, empty the dust bin after every use. Next, wipe the outside with a soft cloth. Don’t let dust build up anywhere. Check the filters often and rinse them if needed. Replace filters every few months for best results. Studies show a clean filter boosts suction by 30%! Take apart small parts and clean them well. Put everything back together carefully. Store your vacuum in a dry place. Look at it monthly to spot any issues. Laugh at those dust bunnies—you’re in charge! Keep up the good work, friend!