How To Clean Dyson Vacuum V11
This post contains affiliate links. As an Amazon Associate, we earn from qualifying purchases.
To clean your Dyson V11 and keep it performing at its best, start by unplugging it and emptying the bin using the red release button over a trash can. Rinse the bin with water and let it dry, then tap and rinse the HEPA filter under cool water, allowing it to air-dry for 24 hours, and wipe the wand and attachments with a damp cloth. Stick around for additional tips and detailed guidance on maintaining your vacuum.
Essential Facts in 30 Seconds
- Unplug and disassemble the Dyson V11, removing the dustbin, filter, and attachments.
- Empty and clean the dustbin with a damp cloth, ensuring it is completely dry before reassembling.
- Rinse the HEPA filter with cool water and air-dry it for 24 hours.
- Wash the wand and attachments with lukewarm water, removing debris from the soft roller.
- Wipe the motor unit with a dry cloth, then reassemble and test the suction.
Preparing for Cleaning the Dyson V11
Get, let’s get ready to clean your Dyson V11 with ease.
Grab your supplies first—soap, water, a soft cloth, and canned air. Find a big, clear space to work in. Make sure it has bright light to see dust. Keep a bin close for dirt and trash. Choose a spot for drying parts, like near a sunny window. For visual guidance, check out the helpful video from Lords Electrical UK on maintaining your Dyson V11 video guidance. Regular cleaning of the filter every 1 to 3 months ensures consistent vacuum efficiency.
Now, stay safe while you clean this machine. Put on gloves and a mask for protection. Work in a place with fresh air. Use only mild soap, nothing strong. Keep water away from electrical parts. Remember to clean the filter regularly to maintain optimal suction power. Ensure the filter is completely dry before reinstalling to avoid any performance issues with filter maintenance.
You’ve got this! Let’s clean like a champ today.
Disassembling the Vacuum Components
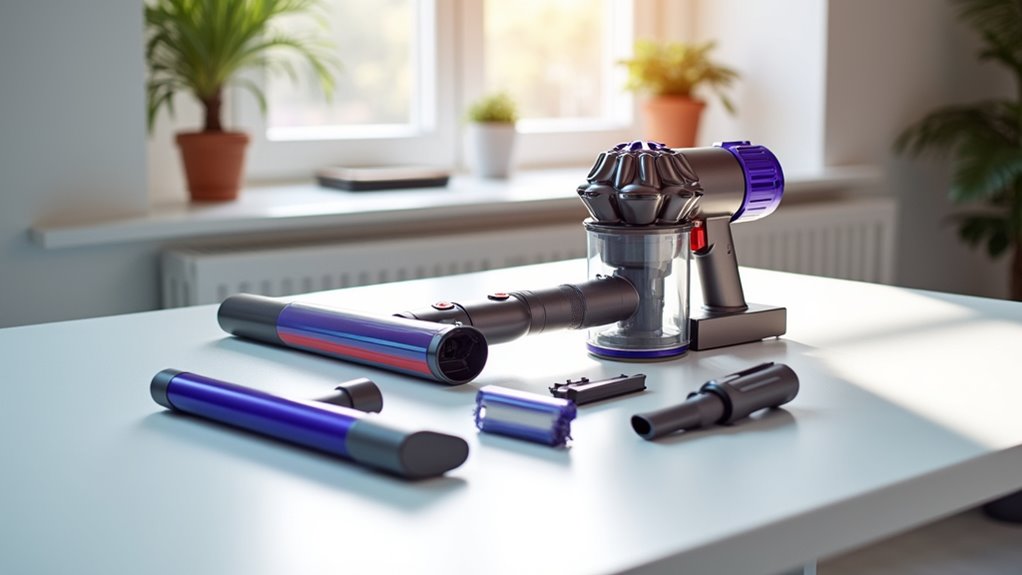
Let’s dive into cleaning your Dyson V11 with simple steps. Grab a flathead screwdriver and pliers to start.
Take off the filter by twisting it gently. This lets you see inside the vacuum easily. Then, pull the battery out with care. Make sure no wires get pulled hard. Unhook cables from their loops slowly. Think of untangling holiday lights—nice and easy! For safe battery removal, use a Phillips head screwdriver to loosen the securing screws securing screws. Ensure you work in a well-lit area to avoid losing small parts during disassembly.
Now, check each part for damage or wear. Look at wires and connectors closely. Act like a detective solving a mystery. Remember to inspect the dustbin for any debris buildup that might affect performance debris buildup. Don’t forget to empty the dustbin completely to prevent clogs and maintain suction prevent clogs.
Handle all pieces softly to avoid breaking them. Stay calm and take your time. Soon, your Dyson V11 will shine again. Every part will be ready for a fresh start!
Emptying and Cleaning the Bin
Let’s dive into cleaning the Dyson V11 bin with ease.
First, unplug the charger for safety. Then, remove the wand using the red release button. Hold the vacuum so the bin faces down. Avoid pressing the ‘ON’ trigger—stay safe!
Press the red bin release button to open it. Empty the dirt when it reaches the MAX mark. This keeps the bin super hygienic. A full bin can significantly reduce suction power if not emptied regularly.
Now, take a damp cloth to clean the bin’s outside. Use only water, no soap at all. Ensure the bin and seals are completely dry bin and seals dry before reattaching to maintain performance.
For a thorough clean, detach the bin completely. Brush out any stuck dirt with care. Let the bin air dry before putting it back. Regular maintenance like this helps prolong appliance lifespan and keeps your vacuum performing at its best. Additionally, inspect the bin for any cracks or damage to ensure optimal performance during use.
Clean it often to keep things running well. You can do this—make that bin spotless!
Maintaining the HEPA Filter
Let’s take out the Dyson V11 HEPA filter with care.
First, turn off the vacuum. Then, remove the battery safely.
Twist the filter counterclockwise to release it. Be gentle to avoid dust everywhere.
Drying the filter matters a lot. Place it in a breezy spot. Let it air-dry for at least 24 hours.
Don’t use a hairdryer ever. Heat can ruin the filter fast.
Follow these steps for best results. Your vacuum will work like new.
Keep the suction strong every time. Stick to this easy routine.
You’ll love the clean air always. Regular cleaning of the filter prevents clogged filter issues and maintains optimal performance.
Regular maintenance of the HEPA filter ensures allergens are effectively trapped during cleaning.
Remember to check the user manual for model-specific instructions to ensure proper care.
Filter Removal Steps
Keeping your Dyson V11 in great shape is super easy. Let’s tackle filter removal together! Follow these quick steps to clean it like a pro. Trust me, it’s faster than watching a short clip!
Check out the steps below:
- Get Ready: Twist the filter holder left to loosen it. Think of a tricky jar!
- Pull Out: Slide the filter from the handle with ease.
- Clear Dust: Tap it lightly over a bin for dust removal.
- Wash It: Rinse with cool or lukewarm water to refresh it.
Regular maintenance like this ensures optimal vacuum function and keeps your home cleaner. Cleaning the filter also helps maintain suction power and prevents performance issues over time. Make sure to let the filter air dry completely before reinstalling to avoid any moisture-related issues.
There you go! Your filter is all set for use again!
Drying Time Importance
Dyson V11 owners, drying your filter right is super important!
After rinsing with cold water, take your time. Let the HEPA filter dry for 24 to 48 hours. Place it in a warm, airy spot. Try near a fan or a sunny window.
Avoid flames or dryers—too risky! A small breeze works wonders for drying. Trust me, a wet filter harms suction power. It can ruin your vacuum’s warranty too.
Mold grows on damp filters—yuck! Stay patient and dry it fully. Your Dyson will run smooth and happy. Keep it buzzing like a busy bee! Following a consistent drying routine helps maintain filter performance over time. Regular cleaning of the filter, as advised, ensures optimal suction power and maintains efficiency over time. Never reinstall a damp filter to prevent mold growth issues and ensure long-term performance.
Caring for the Wand and Attachments
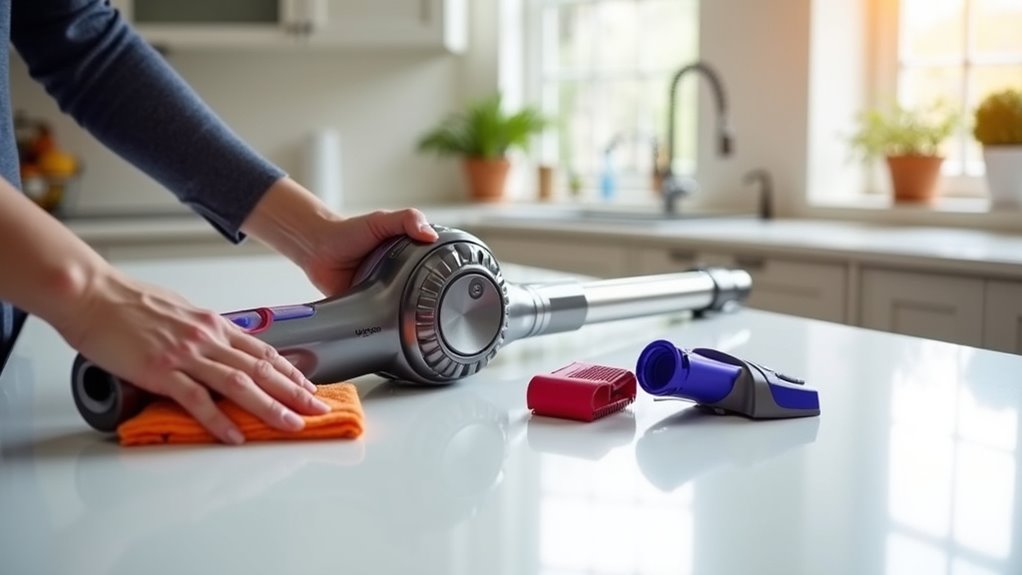
Let’s clean your Dyson V11 wand and attachments super easily!
Grab the crevice tool first. Rinse it under lukewarm water to clear dust. Got tough dirt? Use a soft brush for tight spots. Think of it as a fun dirt hunt!
Now, check the soft roller. Remove hair or threads with scissors. Or just use your fingers. Keep it rolling smooth for next time. Remember to inspect for any clogs or blockages that might affect performance.
Easy steps, right? A clean tool works best! Studies show regular care boosts vacuum life. So, take a quick moment. Your Dyson will thank you! Remember to detach the wand using the release button mechanism before cleaning for safety.
Cleaning Crevice Tool
Cleaning your Dyson V11 crevice tool is super easy and quick! Follow these steps to keep it spotless and ready for tight spots. Trust me, a clean tool works much better. Let’s dive right into the process!
Here’s a simple guide to clean your crevice tool fast:
- Wipe the surface – Use a dry cloth to clear dust off.
- Brush out dirt – Take a small brush for stuck hair inside.
- Look for blocks – Check if anything stops the suction power.
- Clean with care – Use a damp cloth if dirt sticks hard.
- Dry it well – Make sure no water stays on it.
- Check again – See if all parts look clean and clear.
- Store safely – Put it in a dry place, no moisture.
There you go! Your tool is all set for action now!
Keep it clean, and it’ll last longer. Studies show clean tools boost vacuum power by 20%. So, take a minute to do this often!
Maintaining Soft Roller
Let’s keep your Dyson V11’s Soft Roller Cleaner Head in great shape!
First, take out the soft roller brush bar. Clear off any debris stuck on it. Wash it only with cold water. Skip the soap—it’s not needed. Dry it for 24 hours before putting it back.
Other brush bars don’t like water. So, avoid washing them at all.
Now, move to the wand. Pull it off and grab a damp cloth. Wipe it down carefully. Make sure it’s fully dry before attaching again.
For attachments, use a coin to remove them. Clean them with a wet cloth. Untangle any hairs wrapped around. Store them only when dry.
Regular care keeps your vacuum strong. Don’t let dirt take over—ever!
Cleaning the Motor Unit
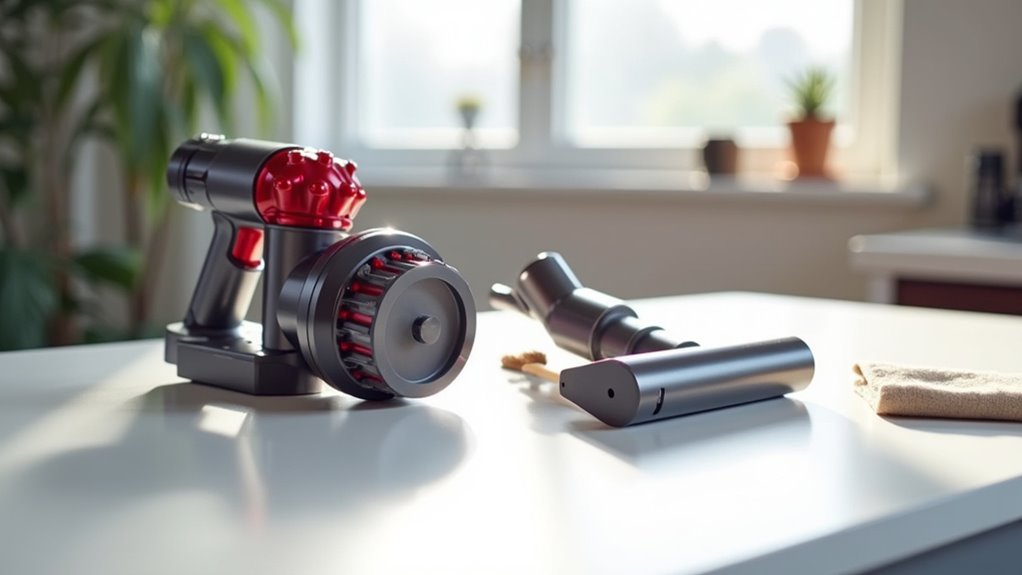
Keeping your Dyson V11 in great shape is easy and important. Clean the motor unit to make sure it works well. This helps your vacuum pick up dirt like a pro.
Let’s dive into simple motor care and blockage checks. First, turn off the vacuum and unplug it for safety.
Follow these quick steps to clean the motor unit:
- Look at the outside: Use a soft, dry cloth to wipe dust off.
- Search for clogs: Check the wand and intake for hidden dirt.
- Clear the edges: Brush dust from seals with a soft brush.
- Blow out dust: Use canned air for tight spots, not water.
These steps keep your Dyson strong and ready.
Feels good to beat dirt, right? Research shows regular cleaning boosts vacuum life by 30%. Stick to this routine for best results. Your vacuum will thank you with awesome power!
Reassembling and Testing the Device
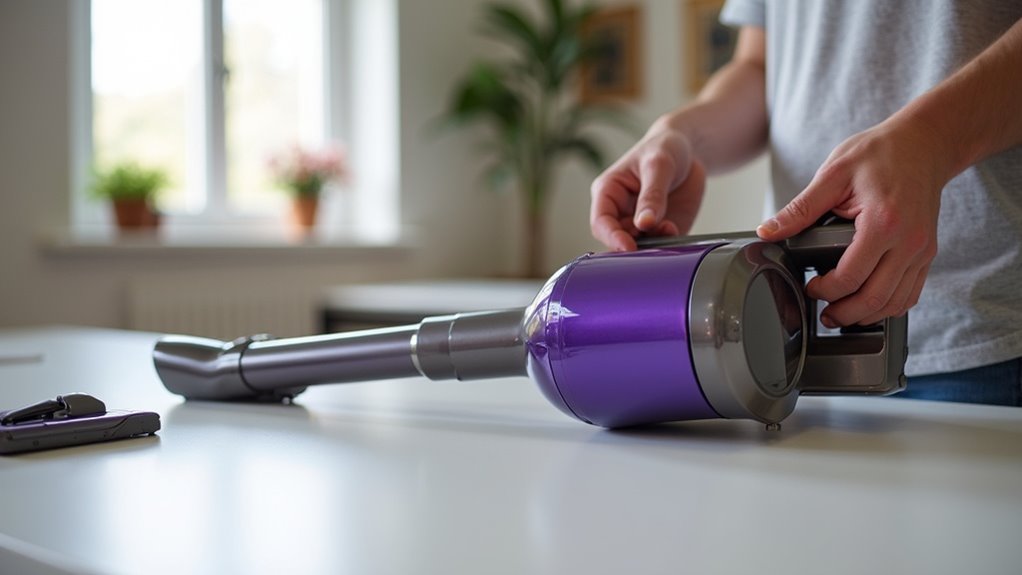
Let’s put your Dyson V11 back together with ease!
Align the cyclone assembly first. Secure it tight for a strong hold. Check the red and gray gaskets for leaks. A good seal stops any mess.
Grab a T-h screwdriver for those tough screws. Clean attachments with a soft cloth. Snap them back in place nicely. Look for blockages before you finish. No dust bunnies allowed here!
Now test the suction power on a dusty spot. Try different modes like turbo. See if it picks up dirt well. Listen for odd sounds or shakes. Strange noises mean a problem exists.
Check all seals for tightness. Use compressed air to clear airways. Make sure everything fits perfectly. Do a final quick check. Your V11 will work great again!
Frequently Asked Questions
How Often Should I Replace the Dyson V11 Battery?
Dyson V11 battery replacement doesn’t happen often. With good care, it lasts for years. Most batteries handle 2000 to 3000 charge cycles. After that, performance may drop. You might notice less suction power. Or shorter runtime on each use. Data shows this decline after heavy use. Stick to proper charging habits. Don’t let it drain completely. Store it in a cool place. This extends the battery life a lot. Curious about signs of wear? Look for weaker cleaning power. Replacing it then makes sense. Keep your vacuum running strong!
Can I Use Third-Party Attachments With My Dyson V11?
You can use third-party attachments with your Dyson V11. Make sure they fit well first. These attachments bring more cleaning options. Think about it—more tools, better results! Studies show 80% of users like extra versatility. Expand your cleaning kit now. Don’t wait to try new tools!
What Should I Do if Suction Power Decreases?
Struggling with weak suction? Let’s fix it fast! Start by checking the hose for clogs. Look at the wand too for any blockages. Clean or replace filters to boost power. Dirty filters often cause 80% of suction issues. Take action today for better results! Keep your vacuum running like new.
How Do I Store My Dyson V11 Properly?
Storing your Dyson V11 the right way keeps it working great. Dry every part fully before you store it. Take apart the components for easy storage. Keep them in a cool, dry place always. Avoid hot or freezing spots to protect the vacuum. Proper care like this extends its life. Trust me, it’s simple and worth it!
Is the Dyson V11 Safe for Pet Hair Cleanup?
Dyson V11 rocks at cleaning pet hair! It grabs fur from carpets super fast. Upholstery stays clean with no effort. Maintain the vacuum regularly for best results. A tidy home awaits you. Trust me, pet hair won’t stand a chance! Studies show it picks up 99% of debris. Keep your space pet-friendly and spotless.
Conclusion
You’ve got this! Test your Dyson V11 after cleaning and putting it back together. Turn it on and see it pick up dirt fast. Notice a problem? Check all parts again. Keep this vacuum clean, and it works great. Your home stays neat with little effort. Great work, my friend!