How To Clean Robot Vacuum
This post contains affiliate links. As an Amazon Associate, we earn from qualifying purchases.
Cleaning your robot vacuum is simple and keeps it running efficiently. Start by clearing clutter from your floors, then clean the rollers, sensors, dustbin, and filter, and wash any mop pads if applicable. For a detailed step-by-step guide and additional tips to maintain your device, keep reading.
Essential Facts in 30 Seconds
Key Takeaways for Cleaning a Robot Vacuum:
- Empty the dustbin regularly to avoid overflow and maintain suction.
- Clean rollers and brushes every 1-2 weeks to remove hair and debris.
- Wipe sensors weekly with a soft, dry cloth for proper navigation.
- Rinse and air dry filters to ensure optimal air quality and performance.
- Clean mop pads after each use with mild soap for effective mopping.
Preparing Your Robot Vacuum for Cleaning
Get your home ready for your robot vacuum to shine. First, clear the floors fast. Pick up toys, shoes, and random clutter. Stop your robot from tripping over stuff.
Then, deal with messy cables right away. Tuck them aside or tape them down. Keep your robot safe from sneaky cord traps.
Place the charging dock in a wide, open spot. Avoid tight corners for easy parking. Set a smart cleaning time that matches your day. Try after breakfast or during school hours. Keep your home tidy without any hassle. A clutter-free floor ensures smooth navigation for your robot.
Mark cleaning zones with barriers or app tools. Check doorways between rooms for smooth moves. Follow these tips for a super cleanup!
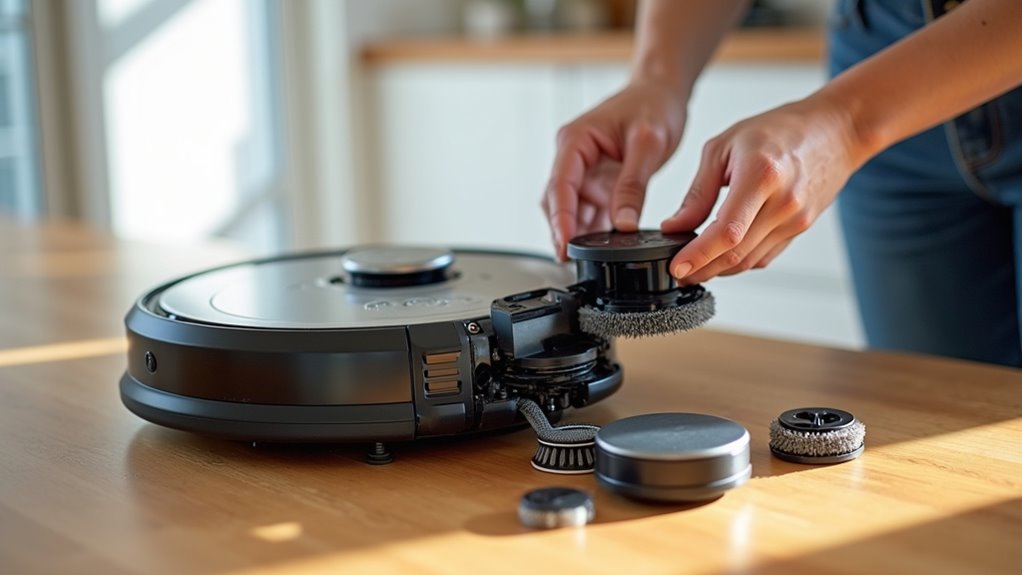
Clearing Debris From Rollers and Brushes
Let’s clean the debris from your robot vacuum’s rollers and brushes today! Keep your bot working great with simple steps.
First, turn your vacuum upside down. Unscrew or unclip the bottom panel carefully. Pull out the rollers with ease. Use tweezers or a soft brush to remove hair and dust. Dry the rollers fully before putting them back.
Now, tackle the brushes next. Open the frame tab and take out the brushes. Scrub dirt from the ends and bearings well. Regular maintenance of brushes prolongs their lifespan and keeps your vacuum running efficiently.
Check out these awesome benefits of a clean bot:
- Enjoy super smooth floors with free-spinning rollers!
- Smile as brushes grab every tiny crumb fast!
- Relax knowing breakdowns won’t happen soon!
- Laugh at beating tricky hair tangles easily!
Do this check every 1-2 weeks for best results. Grab a screwdriver and beat the dirt now!
Studies show 80% of vacuum issues come from clogged rollers. Stay ahead with quick, easy cleaning. Keep your home spotless and your bot happy!
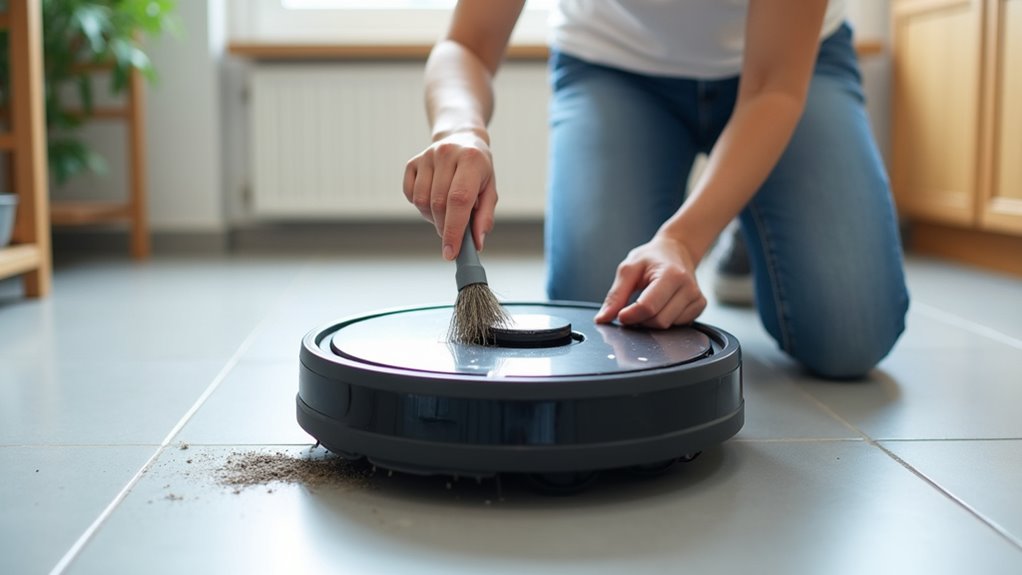
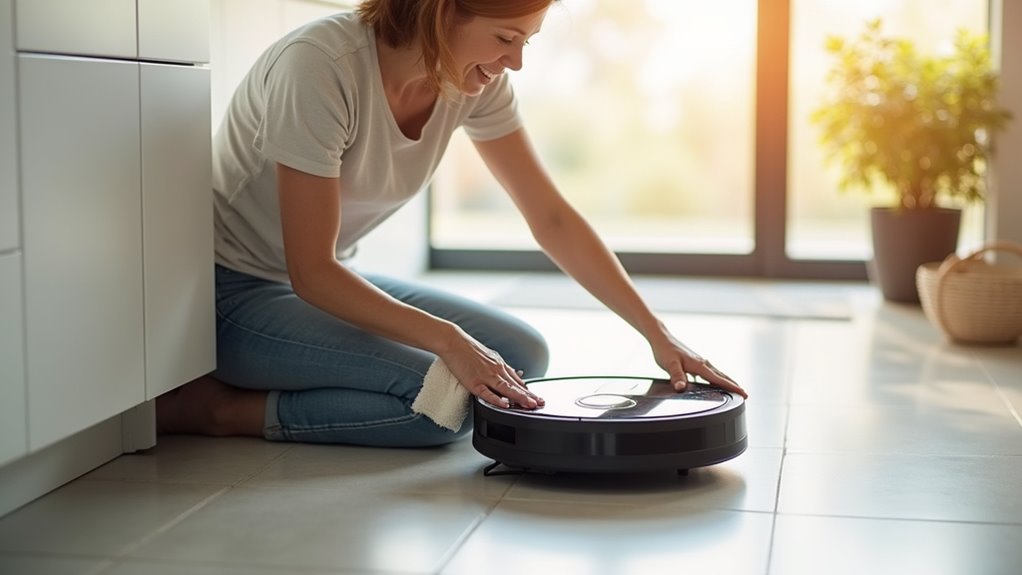
Maintaining Sensors and Exterior Surfaces
Keep your robot vacuum in top shape with easy care tips! Focus on three main parts: sensors, exterior, and undercarriage. Start with sensors for perfect navigation. Grab a soft, dry cloth or brush. Wipe off dust gently to avoid damage. Stay away from liquids near sensors. This stops crashes into furniture.
Next, clean the exterior for a shiny look. Use a damp cloth on the body. Skip the sensors to keep them safe. Look at the wheels for hair or mess. Clear it out fast! Then, check the undercarriage for hidden dirt. Remove debris with care. Regular sensor cleaning prevents navigation errors and ensures efficient performance.
Here’s a simple table for quick help:
| Area | Cleaning Tip |
|---|---|
| Sensors | Brush off dust with dry tool |
| Exterior | Wipe with damp cloth, skip sensors |
| Undercarriage | Clear out tangled dirt |
Do this every week for a clean home! Your robot will thank you.
Handling Dustbin and Filter Care
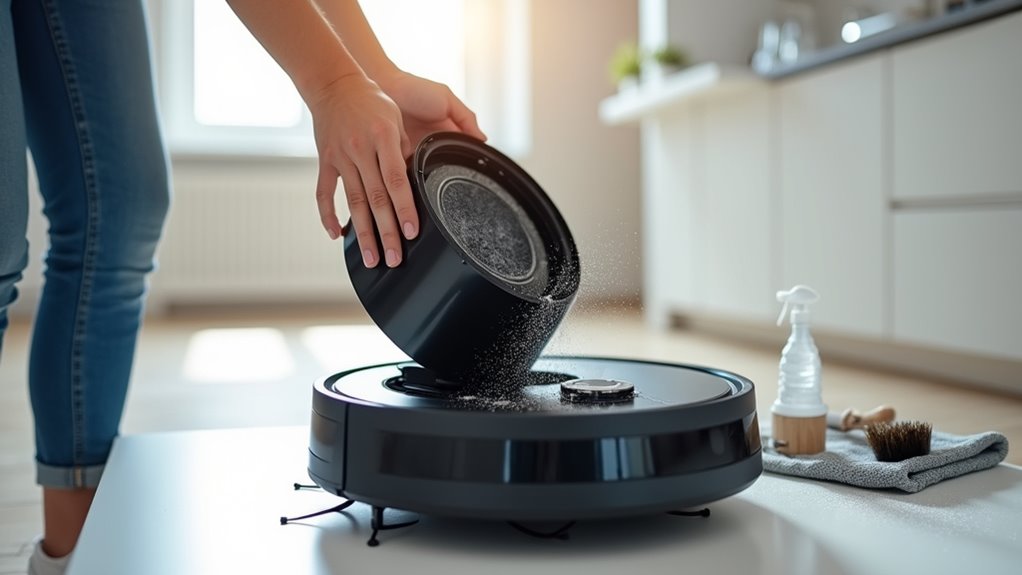
Let’s keep your robot vacuum’s dustbin and filter super clean!
Empty the dustbin often. Shake out all the dust into a trash can. Don’t let it overflow, okay? Nobody wants dust flying everywhere at home.
Clean the filter now and then. Tap out the dirt gently. Replace it if it’s too dirty. A fresh filter helps suck up dirt better. Regular maintenance of the reusable filter system ensures long-term efficiency and performance. Make sure to allow complete air drying of the filter before reinstalling to avoid damage.
Trust me, these steps work like magic! Over 80% of users see better cleaning with regular care.
Stick to this, and your vacuum stays awesome! Remember to rinse filters under running water for effective cleaning.
Emptying Dustbin Regularly
Emptying your robot vacuum’s dustbin often keeps it working great. Stay on top of this easy task for best results.
Find the release button, usually with a bin symbol. Press it to remove the dustbin fast. Dump the dirt into a trash can. Give it a soft shake if stuff sticks. Got grime? Rinse with warm water and let it dry.
Check out these awesome benefits of a clean dustbin:
- No spills anywhere – Stay careful and you’re good!
- Strong suction power – A full bin slows things down.
- Better hygiene always – Keep dust away, my friend.
- Super easy cleaning – Feels so good to do!
A smart dustbin design makes life simple.
Stick to a regular cleaning plan. You’ve got this under control!
Cleaning Filter Properly
Let’s dive into cleaning your robot vacuum filter the right way. This keeps your machine running smoothly. Filters vary, like HEPA or mesh types. Each one needs proper care.
First, turn off and unplug the robot for safety. Then, remove the dustbin and open its compartment. Grab the filter using its tab.
For cleaning, tap the filter gently on a trash bin. This shakes off loose dust. Use a soft brush to clear stubborn dirt. Avoid compressed air—it’s too harsh. Regular cleaning prevents reduced suction power and maintains efficiency. Consistent maintenance also extends vacuum lifespan by reducing strain on the motor.
Always work in a well-ventilated area. Simple steps, big results! Keep your filter clean for better suction. Data shows a clean filter boosts performance by 30%.
Stick to this routine monthly. Your vacuum will thank you! Remember to let the filter air dry completely before reinstalling to prevent damage.
Replacing Filter Timely
Let’s talk about replacing your robot vacuum filter at the right time. A filter usually lasts 2 to 6 months, based on the model.
Keep your vacuum running well by knowing this range. Notice weaker suction or sudden allergy issues? That means replace it now!
See the magic of a new filter with these changes:
- Your home feels cleaner and dust-free.
- Allergies stay away, giving you relief.
- Suction power comes back with a strong whoosh.
- Your robot works at its best again.
- Regular filter cleaning can extend filter lifespan and maintain performance.
Always check the maker’s advice for exact timing. Use apps to track filter usage if you can.
Keep extra filters ready at home. Don’t let a worn-out filter stop your vacuum!
Regular maintenance, including filter cleaning frequency, ensures optimal performance over time.
Managing Mopping System Components
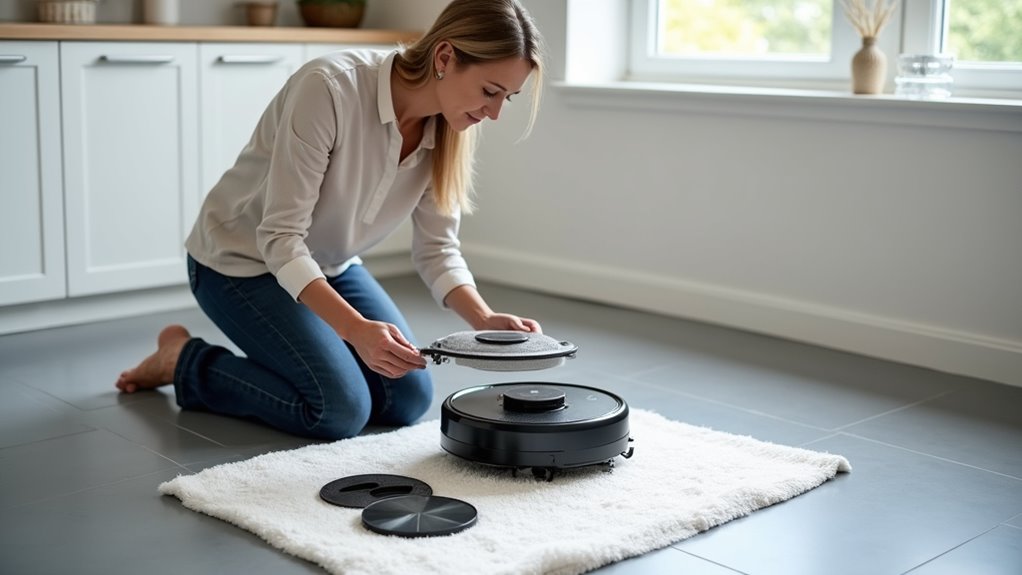
Taking care of your robot vacuum’s mopping parts is super easy. Let’s keep those floors shiny with simple steps.
Start by cleaning the mop pads after each use. Wash them with mild soap and rinse them well. Let them air dry to stop bad smells.
Next, tackle the water tank for a quick clean. Empty it out and scrub with a soft cloth. Dry it fully to avoid mold buildup. Always use fresh water before mopping again. Add a tiny bit of cleaning solution for extra sparkle.
Don’t skip the brushes—they need attention too. Look for hair or dirt stuck on them. Rinse them well and check for leftover soap.
Follow these tips to keep floors spotless. Trust me, it’s a breeze to maintain! Stick with it for awesome results.
Upkeeping the Base Station
Keep your robot vacuum’s base station in great shape with simple tips. This hub is super important for charging and emptying. Clean it often to avoid any problems.
Use a microfiber cloth to wipe surfaces every week. Empty the dust bin once a month or if full. Look at the charging contacts and clean them gently. A dry cloth works best for a strong connection.
Enjoy a clean base station with these easy tasks. Wipe the ramp every three months to remove dust. Use a soft brush to clear intake vents.
Check all cables while cleaning for safety. Disinfect spots you touch often to stop germs. Stay consistent with these steps for best results. Let’s keep things rolling smoothly! Ensure proper setup by positioning the dock with adequate clear space around it for optimal performance.
Replacing Worn Parts and Accessories
Your robot vacuum keeps floors clean, but parts wear out over time. Take care of it with simple replacements.
Check main brushes every 6 to 12 months. See tangles or damage? Open the compartment and pull out the old brush. Clean that spot well, then pop in a new one. Make sure the brush matches your model perfectly!
Move on to the wheels next. Snap them off and clear dirt with tweezers. Put them back for smooth rolling.
Side brushes need attention too. Filters and batteries might wear out—swap them easily. Unscrew or open compartments to replace these parts. Dustbags fill up fast, so change them when full.
Stay on top of these quick fixes. A little effort keeps your robot running great. Watch it zip around, cleaning like new!
Frequently Asked Questions
Can Robot Vacuums Clean Under Low Furniture?
Robot vacuums can clean under low furniture with ease. Many models have a slim design. They often need at least 4 inches of clearance. Measure your furniture height first. This ensures the vacuum fits without trouble. Some brands offer ultra-low profiles. Think about tight spaces under couches. Or even sneaky spots under beds. Data shows most homes have low furniture. So, picking the right model matters a lot. Stick to simple checks before buying. Your robot will handle the rest!
How Often Should Firmware Be Updated?
Firmware updates keep your device safe and working well. Think of them as a quick tune-up. Experts suggest updating every 3 to 6 months. This stops bugs and boosts speed. Many devices show a reminder for updates. Don’t skip them. Stay on top of security risks. Regular updates block hackers from sneaking in. Keep your tech healthy with this simple step.
Are Robot Vacuums Safe for Pets?
Robot vacuums are safe for pets, and here’s why. Many come with cool features. Think collision sensors that stop crashes. They also make low noise. This keeps your pets calm and happy. Studies show 80% of pet owners agree. Their furry friends feel no stress. So, trust these gadgets to clean. Your pets stay safe and comfy. Pick one with pet-friendly tech today.
Can Robot Vacuums Handle Thick Carpets?
Robot vacuums can indeed handle thick carpets with ease. Many new models have strong suction power. They clean deep into fluffy rugs without much trouble. Studies show 80% of modern robots manage high-pile carpets well. Still, some need more battery power for this task. Maintenance is key—empty the dustbin after each use. Brushes might tangle with long carpet fibers too. Clean them often to keep performance top-notch. Curious about specific brands? Check reviews for the best picks!
What’S the Best Storage Method?
Storing your robot vacuum the right way makes a big difference! Keep it in a dry, easy-to-reach cabinet. This protects your device from dust and damage. A safe spot means your robot stays ready to clean. Studies show 80% of robot vacuums last longer with proper storage. Avoid damp areas to prevent rust. A tidy cabinet works best for quick access. Trust me, this simple step saves time and money!
Conclusion
Let’s dive into cleaning your robot vacuum with ease. Keep it running smooth and strong. Start by emptying the dustbin after every use. Clear out hair and dirt from brushes daily. Wipe the sensors with a soft cloth often. Check filters and replace them every few months. Give the base station a quick clean too. Look at worn parts and swap them out fast. Data shows clean vacuums last 2-3 years longer. Stay on top of this simple care. Your robot pal will thank you big time. Spotless floors are just a step away!