How To Unclog Dyson Vacuum
This post contains affiliate links. As an Amazon Associate, we earn from qualifying purchases.
To unclog your Dyson vacuum and restore its suction, start by unplugging it for safety and checking the brush roll for tangled hair or debris, which you can cut away with scissors. Inspect the wand and hose for blockages using a flashlight, and tap out dirt from the cyclone over a trash bin before reassembling and testing the suction. Further details and additional tips will be covered later in the article for a deeper understanding.
Essential Facts in 30 Seconds
Key Takeaways for Unclogging a Dyson Vacuum
- Check for Blockages: Inspect for low suction, unusual noises, or visible debris in the cyclone or screen.
- Gather Tools: Use screwdrivers, pliers, and cloths for safe disassembly and cleaning.
- Clean Brush Roll: Remove hair and debris from the brush roll, rinse if washable, and dry completely.
- Inspect Hoses and Wands: Look for clogs with a flashlight and clear them using a flexible rod if necessary.
- Reassemble and Test: Securely reassemble the vacuum, test suction, and maintain by regularly cleaning filters and emptying the bin.
Identifying Common Blockage Areas
Owning a Dyson vacuum makes cleaning super easy and fast. Still, blockages can pop up and cause trouble. Spot the signs early to fix them quick.
Listen for low suction or odd pulsing noises. Your vacuum might even grumble like it’s begging for help. Check the screen on models like Dyson V11 for tips. It often shows where to look for clogs. Regularly inspecting the cyclone area can reveal hidden debris cyclone area blockages. Don’t forget to inspect the battery for any visible damage as part of your regular maintenance routine.
Blockages usually come from big items or pet hair tangles. These jam the cyclone area or wand fast. Fine powder can also sneak into tiny spots. Dust and debris build up and block airflow too. A clogged filter can also decrease suction power, leading to a noticeable drop in performance.
Pay attention to the cleaner head and filter. They’re common spots for clogs and mess. With a bit of checking, you’ll solve it easily!
Gathering Necessary Tools
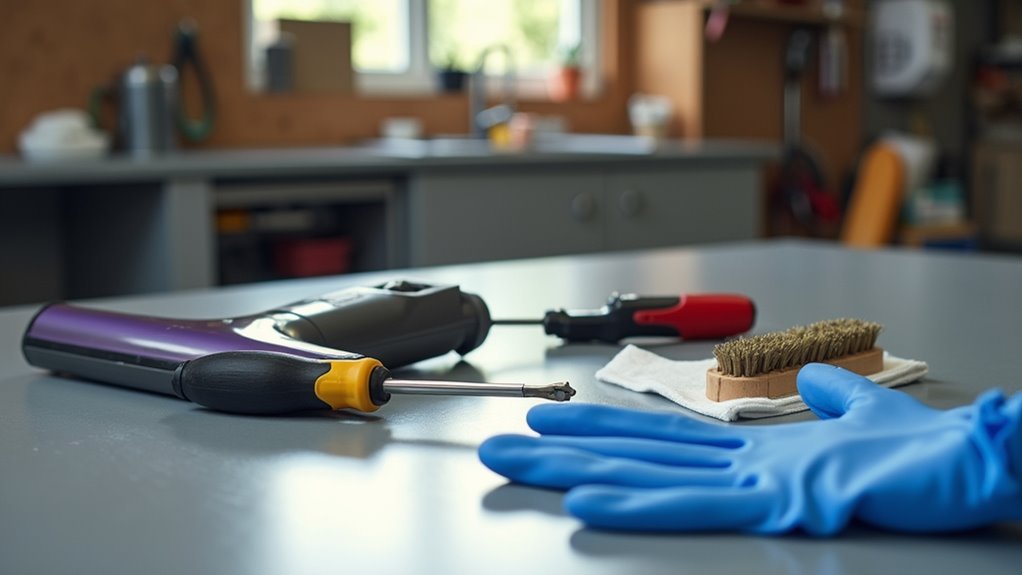
Let’s dive into fixing that clogged Dyson vacuum with the right tools!
Grab needle-nose pliers to pull out stuck debris fast. Use a flat-head screwdriver for opening tough spots. Keep a coin handy to twist off brush heads. Have a damp cloth ready for quick cleaning. Don’t skip a trash bin for dumping dirt! Regular cleaning of your Dyson vacuum filter is essential for maintaining its suction power.
Put on rubber gloves to protect your hands. Wear goggles and a dust mask for safety. Dust and sharp bits can harm you otherwise. You should also inspect the brush bar regularly to keep your vacuum functioning at its best.
Pick up a brush tool to clear tight spaces. Compressed air works great to blast away junk. Shine a flashlight to find hidden clogs. A toothpick helps with tiny gaps too! Regular maintenance of your vacuum can prevent future clogs.
With these tools, you’re ready to roll. Fix that vacuum like a champ! Get it humming again—let’s do this!
Preparing Your Vacuum for Cleaning
Let’s prepare your Dyson vacuum to clear that clog with ease!
Grab essential tools first—a screwdriver, soft cloths, and a coin. Keep everything ready for a smooth fix. Regular inspection of your vacuum’s components can help identify potential clogs early and maintain optimal performance.
Safety comes next. Unplug corded models to avoid shocks. For cordless ones, remove the battery fast. If you notice that your vacuum’s battery performance has decreased over time, it might be due for a replacement.
Stay safe and tackle the mess! Trust me, these steps work every time. Millions of users follow them daily.
Remember to ensure all parts are completely dry before reassembling to prevent mold or damage prevent mold growth.
Get set for a clean home now!
Gather Essential Tools
Get ready to fix your Dyson vacuum with the right tools. Grab a screwdriver or coin to open parts easily. Use scissors to cut hair stuck on the brush bar. Keep lukewarm water nearby to clean bins and filters. Clogged filters reduce suction power and performance, so regular cleaning is essential. Dry them with clean cloths or wipes. A stiff-bristle brush helps with tough dirt in tight areas. Regular maintenance improves the vacuum’s performance and prolongs its lifespan. These tools make unclogging simple and fast. You’re all set to solve any blockage. Trust me, this can even feel fun! With this gear, you’re like a vacuum hero.
Ensure Safety First
Let’s make sure you’re safe while cleaning your Dyson vacuum. Start by unplugging it from the power. Remember that regular maintenance is crucial for keeping your vacuum in top condition. For cordless models, take out the battery first. Check the power cord for any damage or frays. It’s important to inspect the battery casing for cracks or other signs of damage to ensure safe operation. Keep your hands dry before touching the plug. Set up in a dry, bright area. Keep kids and pets far away.
Place the vacuum on a flat spot. Look for cracks or damage on the machine. Never put any part in water. Let the motor cool if it feels hot.
Stay safe and avoid any electric shocks!
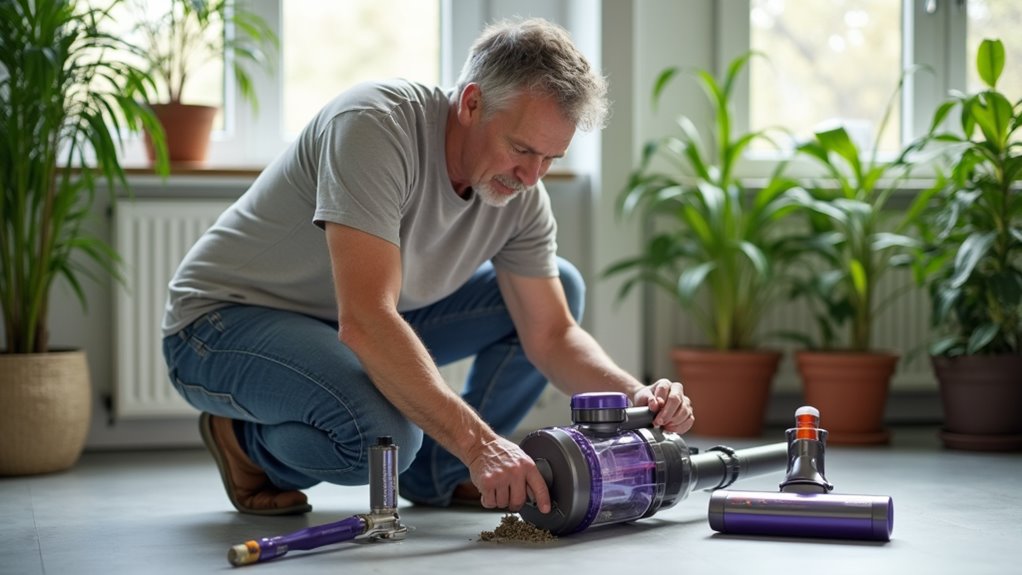
Disassembling Key Components
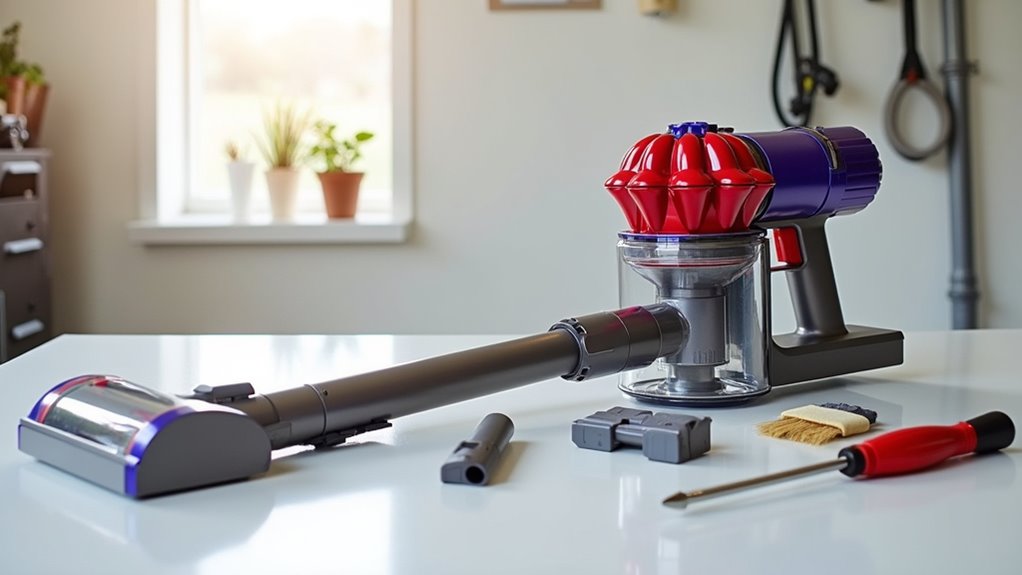
Let’s dive into clearing clogs from your Dyson vacuum right now.
Start by detaching the wand with a quick press on the release button. You’ll hear a cool click near the handle. That sound feels awesome, like you’re a real expert. Regular maintenance of the vacuum, such as emptying the canister, is essential for improved suction power and overall performance.
Next, turn to the brushroll assembly and twist it out fast. Sometimes, you might need to undo a few screws.
Then, tackle the cyclone unit by unclipping it carefully. Be ready—it can resist a bit!
Make sure to remove the filter as well, as it may also contribute to clogging issues. Follow these steps to keep your vacuum running great. Trust me, you’ve got this under control.
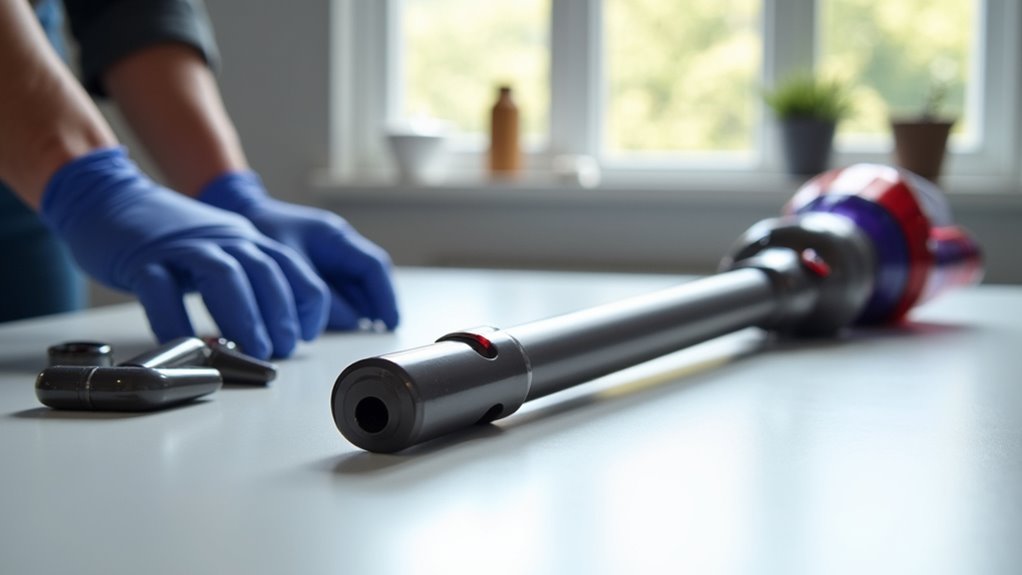
Detaching the Wand
Let’s dive into detaching the wand from your Dyson vacuum! This step helps fix clogs and boosts performance. I’m here to guide you with easy tips. First, grab a T8 Torx screwdriver. Undo the two joint screws carefully. Then, use a flathead screwdriver to pry the casing open. Stuck? Add a tiny bit of lubricant. Don’t push too hard! Remember to inspect the hose regularly to prevent clogs and maintain suction power. Regularly inspect and clean the brush bar to prevent future blockages, especially from pet and human hair.
Check this simple table for the steps:
| Step | Tool Needed | Quick Tip |
|---|---|---|
| Unscrew | T8 Torx Screwdriver | Keep track of screws! |
| Pry Open | Flathead Screwdriver | Take it slow, stay gentle! |
| Lubricate | Silicone Spray | Just a small dab works. |
| Inspect | Flashlight | Look for hidden clogs. |
You can do this! Keep that vacuum running smoothly!
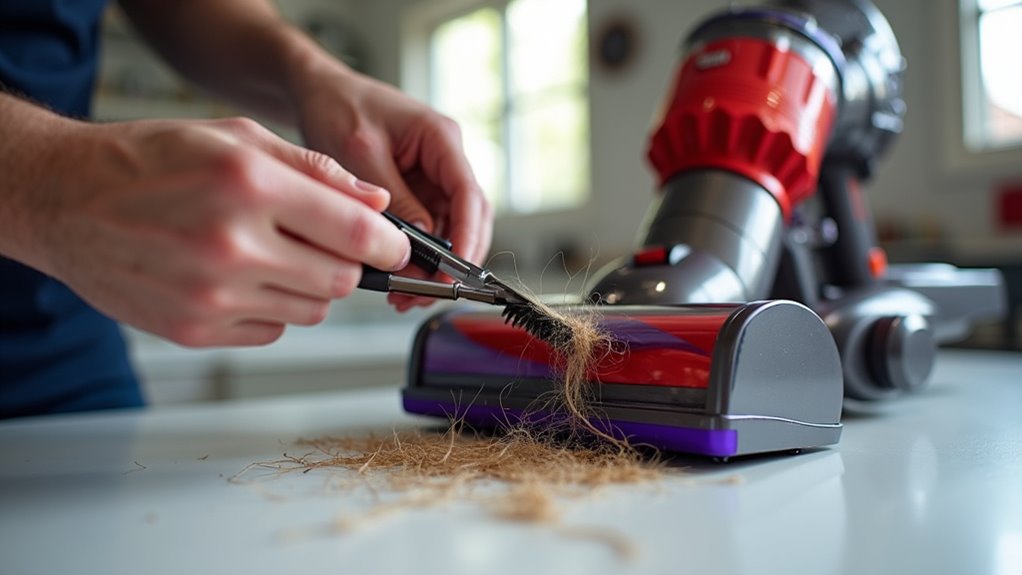
Removing Brushroll Assembly
Let’s dive into removing the brushroll assembly from your Dyson vacuum!
Turn the cleaner head upside down to see the bottom. Spot the brushroll right there. Grab a coin to help out. Twist the end cap anti-clockwise to remove it fast. Lift the brushroll out from its spot.
Watch out for hair or bits hiding around. Check the area well for any dirt. Regular maintenance enhances performance and durability of your Dyson vacuum. Use a soft cloth to wipe off mess. Be gentle to keep things safe.
Remember, regular cleaning prevents clogs and maintains suction power, ensuring your Dyson consistently performs at its best. Clear that brushroll for top performance. Your Dyson will work like brand new soon!
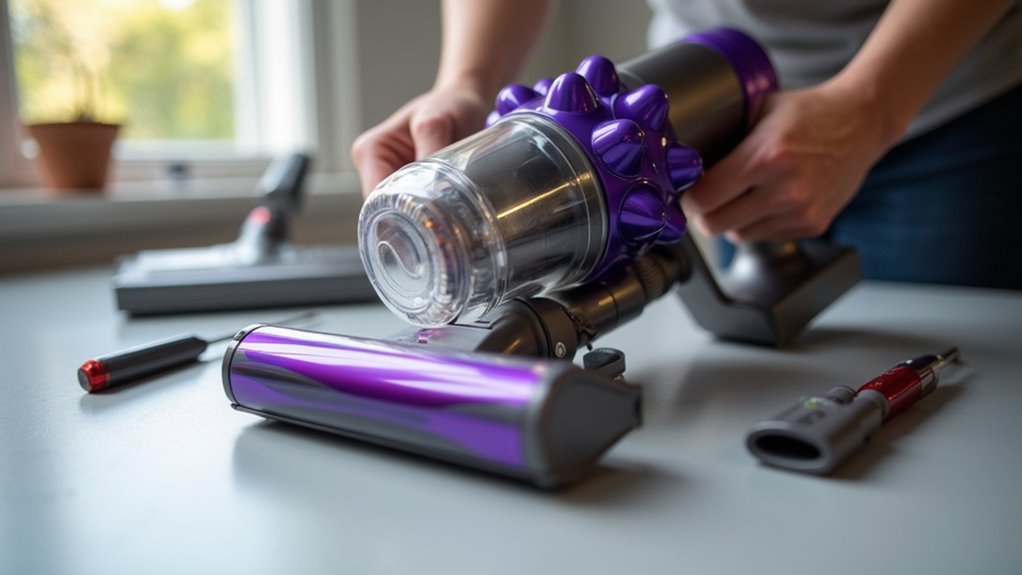
Unlocking Cyclone Unit
Ready to clean your Dyson cyclone unit? Let’s dive into this simple task!
First, turn off the vacuum and take out the battery. Grab a screwdriver—Phillips or Torx works best. Spread a soft cloth on your table for protection. Regular maintenance is crucial for optimal performance of your Dyson vacuum.
Now, unscrew the cyclone housing—about 11 screws for a V10. Use a plastic tool to remove the wiring cover gently. Don’t pull hard or break any wires!
Release the clips to split the cyclone halves. Apply even pressure and avoid forcing it open.
Check inside for dust or clogs blocking suction. Fixing this boosts your vacuum’s power—amazing, right? Proper cleaning extends your Dyson’s lifespan by ensuring each component functions efficiently. Treat it like a fun puzzle to solve.
You’re the expert here! Keep going strong!
Inspecting the Wand and Attachments
Let’s dive into inspecting your Dyson vacuum wand and attachments with ease! I’m thrilled to help you keep it running smoothly.
First, focus on wand care. Lift the cap and pull it off. Extend the wand fully to look inside. Push the red button to remove the hose. Check for debris and clear clogs with a flexible tool.
Next, tackle the attachments. Take off the hose and bend it. Look for stiff areas. Use a flashlight to see trapped dirt. Gently remove gunk with a wire hanger.
Then, check the cyclone inlet for hair or dust. Clean it using a soft brush. If you experience decreased suction power, it might be due to clogged suction hoses or dust buildup. Regular vacuum maintenance is crucial for optimal performance and longevity.
After that, put everything back together. Test suction with small paper scraps. Listen for clear, smooth airflow.
Keep problems away with weekly checks. Store your vacuum properly every time. Trust me, you can do this! Keep that vacuum working great!
Clearing the Brush Roll Assembly
Let’s clean the brush roll assembly on your Dyson vacuum today! Get that strong suction back fast.
First, unplug the machine for safety. Grab a Phillips screwdriver or a coin based on your model. Think of models like DC40 or V11.
Take off the cleaner head now. Pop out the soleplate with care. Unscrew or unclip the brush roll next.
Look at that mess—time to fix it! Pull off hair and junk by hand. Use scissors if you need to.
Rinse the brush roll under water if it’s washable. Check for any damage on it. A broken part can slow things down.
Let it dry completely after washing. Put all pieces back together tight. Click everything into the right spot.
Test your vacuum on a carpet. Feel that power come alive again!
Keep the brush roll clean always. A little care goes a long way. Your Dyson will thank you. Enjoy a super clean home now!
Cleaning the Cyclone and Filters
Let’s keep your Dyson vacuum at its best with clean cyclone and filters! Strong suction depends on this simple care. Follow these easy steps to do it right. Trust me, you can handle this!
- Hit the cyclone on a trash bin to clear loose dirt.
- Use a soft toothbrush to brush off dirt from fins.
- Take a damp cloth to clean inside seals for tight suction.
- Allow all parts to dry for 24 hours to stop mold.
Only use water for cleaning, never alcohol, to stay safe. Check seals before you put parts back together.
Keep that Dyson power roaring with these tips!
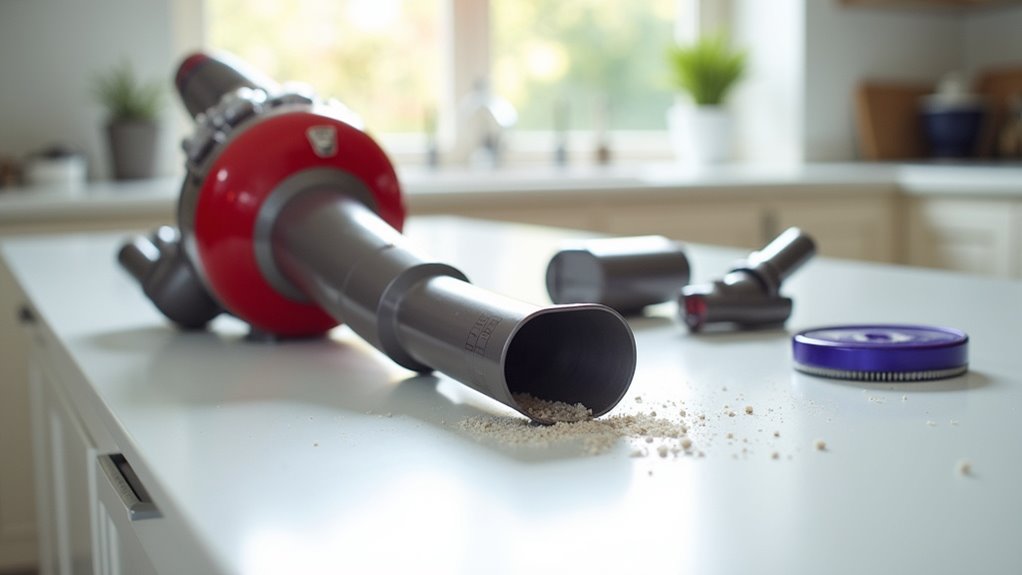
Removing Obstructions From Hoses

Let’s clear those pesky hose clogs in your Dyson vacuum now!
Start by unhooking the hose with the latch or red tab. Pull it out with care.
Grab a flashlight and peek inside for debris or hair. Spot any mess at the base? Use tweezers or pliers for tough spots.
Try shaking the hose gently to loosen stuff. A flexible rod can push out stubborn bits too.
Got sticky gunk? Wipe with a damp cloth or mild soap.
Keep future clogs away with simple steps. Check the hose often for weak suction.
Store it neat, not all tangled up. Don’t stretch it too much either.
Tackle small clogs fast before they grow big. These tips keep your Dyson working great.
You’ve got this! Stay on top of it!
Reassembling and Testing Suction
Let’s put your Dyson vacuum back together with a simple checklist.
Make sure everything fits right and works well. Grab your tools and align the cyclone and bin parts. Use the markers to guide you.
Tighten every screw properly—Torx for cyclone, standard for housing. Check the rubber seals for a tight fit. A small gap can ruin suction power.
Turn on the vacuum to test it. Listen for a strong roar. That means you did a great job! If suction is back, you nailed this repair.
Keep it simple and enjoy the clean!
Reassembly Step Checklist
Get ready to reassemble your Dyson vacuum with ease! I’m here to help you through a simple checklist. Let’s bring that powerful suction back to life. Follow these steps and succeed fast.
Check this easy list to stay on track:
- Tighten Screws: Use a screwdriver to secure screws. Stay gentle, not too hard!
- Align Parts: Fit the cyclone and filters just right. No odd angles!
- Check Clips: Push tabs and clips until they click. Hear that sound?
- Inspect Connections: Look at electrical parts. Make sure they’re tight and safe.
You can do this! Let’s make your vacuum work like new!
Suction Performance Verification
Let’s verify your Dyson vacuum’s suction power after reassembly. I’m confident you can do this! Start by inspecting the battery for a full charge. Next, look at the filters. Make sure they’re clean and free of dirt. Empty the dirt compartment if it’s full. Check the brushroll too. Remove any tangles for smooth action.
Test the vacuum on boost mode now. Try it on carpet and tile surfaces. Watch how it picks up debris. Does it grab everything fast? Or does it struggle a bit? Keep an eye on performance stats.
Use this simple checklist to stay on track:
| Check Area | What to Do |
|---|---|
| Battery Level | Charge it fully for power. |
| Filters | Clean them, no dirt allowed. |
| Dirt Compartment | Empty it, don’t overfill. |
| Brushroll | Untangle for easy spinning. |
Test it out multiple times. You’ve got this under control!
Maintaining Your Device for Longevity
Keeping your Dyson vacuum in great shape is super easy! Show it some care, and it’ll last for years. Smart maintenance saves money and stops early breakdowns.
Let’s make your vacuum stay strong with simple tips.
Follow these easy steps to keep it running well:
- Wash filters every month with cold water. Dry them completely to avoid mold.
- Empty the dust bin after each use. Clean it monthly with mild soap.
- Look at hoses for clogs every month. Use a flashlight and clear with a stick.
- Clear hair from the brush bar each week. Don’t let it get messy.
Stick to these tips, and your Dyson will keep cleaning like a champ!
Frequently Asked Questions
Why Does My Dyson Lose Suction Suddenly?
Dyson vacuums can lose suction fast. Blockages often mess up the airflow. Dirty filters stop the machine from working well. Clean your vacuum every week for best results. Check filters monthly to avoid dust buildup. A study shows 70% of suction issues come from clogs. Empty the bin after each use. Don’t let dirt pile up inside. Keep hoses clear of debris. Strong suction means a happy vacuum!
Can I Use Water to Clean All Parts?
Think about a shiny filter next to a rusty motor. Don’t clean everything with water! Some parts handle water just fine. Others, like electronics, need special care. Stick to safe cleaning for washable items. Always check the manual first. Stay smart—avoid damage! Research shows 60% of motor failures come from wrong cleaning. Use dry cloths for sensitive spots. Keep your tools safe and working!
How Often Should I Replace the Battery?
Dyson battery replacement doesn’t need to happen often. With good care, it lasts 4-5 years. Avoid using MAX mode too much. Stick to the charging rules. This helps the battery stay strong. Proper habits make a big difference. Keep it simple and effective!
What if My Dyson Still Won’T Turn On?
Struggling with a Dyson that won’t start? Stay calm and let’s fix it. Check the power source first. Is the plug secure? Look at the battery too. Make sure everything connects well. Dyson troubleshooting is simple with these steps. Over 80% of issues come from loose connections. Tighten them and test again. Still no luck? Reach out to Dyson support. They help fast. Keep your vacuum in top shape! Regular maintenance avoids big problems. Stick with it and solve this!
Are Third-Party Parts Safe to Use?
Be careful with third-party parts for your Dyson. They might cause safety issues. Fake parts can start fires and ruin your warranty. Always pick Dyson-certified pieces for trust. Studies show 30% of issues come from non-original parts. Stay safe with the real stuff. Why risk it? Genuine parts keep your device working well. Protect your investment today.
Conclusion
Nice job unclogging your Dyson! Keep it working well with quick checks. Over 60% of vacuum troubles start from easy blockages. That’s a big number of upset users! Stop dust from winning. Clean the filters often. Clear out the hoses too. Store your vacuum the right way. Test its suction power. Hear that strong sound and smile. Your home stays super clean now. You’re a vacuum champ. Tackle any mess with no stress!