
Fix Dyson Stick Vacuum That Won’t Work: 5°C Lockout Guide
This post contains affiliate links. As an Amazon Associate, we earn from qualifying purchases.
A Dyson stick vacuum won’t work for three core reasons: a temperature lockout (below 5°C for most models), a complete power circuit break (dead battery, faulty charger, or loose connection), or a detected blockage that causes the motor to pulse and shut down. The fix is diagnostic, you match the symptom to the system.
That temperature lockout isn’t a suggestion. It’s a hard electronic cutoff written into the machine’s firmware. If you left the vacuum in a cold garage overnight, it will refuse to turn on until it warms up past its specific threshold. The other failures follow a similar logic, the machine is telling you what’s wrong through its behavior, not just being broken.
What follows is a walkthrough of that logic. You’ll get the model-specific numbers that matter, the three places blockages actually hide, and the one repair that usually isn’t worth your time.
Key Takeaways
- The most common cause of total power failure is the temperature lockout. Most Dyson V11 models (SV24, SV25, SV55, Digital Slim) won’t operate below 5°C (41°F); the older V11 SV16 model cuts out below 10°C (50°F).
- If the motor pulses and then cuts out, you have a detected blockage. The machine is protecting itself. The blockage is almost always in one of three narrow points: the bin inlet, the wand elbow joint, or deep inside the cleaner head.
- A damp filter will damage the motor. The filter must dry for at least 24 hours after washing. Using it wet can short-circuit the electronics, creating a new, expensive problem.
- Battery and charger faults have specific LED light codes. A single flashing red light or alternating red/blue flash means a component has failed and needs replacement.
- Clearances are not covered by the warranty. Forcing the machine to run with a blockage can burn out the motor. The official manuals state that clearing blockages is explicitly excluded from the guarantee.
The First Thing to Check Isn’t the Battery
You pick up the vacuum, press the trigger, and get nothing, no sound, no lights, no hint of life. Your first thought is a dead battery. That’s often wrong.
The machine’s first priority is to protect its lithium-ion battery and digital motor from damage. If the internal thermometer reads an ambient temperature below its programmed threshold, the main board simply won’t complete the circuit. It’s a hard off.
Where this goes sideways: Bringing a cold vacuum inside and trying it immediately. The internal components are still cold. Wait 30-60 minutes for the whole machine to reach room temperature before testing it again.
The thresholds are model-specific and printed in the manuals. For the Dyson V11 SV24, SV25, SV55, and Digital Slim models, the cutoff is 5°C (41°F). For the older Dyson V11 SV16, it’s 10°C (50°F). This is a non-negotiable safety feature. If your garage, porch, or car trunk dips below these temperatures overnight, the vacuum will be inert in the morning.
Check the battery LEDs only after you’ve ruled out temperature. Plug the charger in. The lights on the side of the battery will tell you the story.
| LED Behavior | What It Means | Next Step |
|---|---|---|
| No lights at all | No power is reaching the battery. | Check the wall outlet, charger cable, and connection at the vacuum’s charging port. |
| Lights flash blue, then turn off | Normal charging. Wait 4.5 hours for a full charge. | Let it charge fully before testing. |
| Single flashing red light | Battery fault. | The battery needs replacement. |
| Alternating red/blue flash | Charger fault or incompatible power source. | Try a different outlet and charger. |
If the battery charges fully but the vacuum still won’t power on, the issue is either a loose internal connection or a failed main switch. Press the red battery release button, remove the battery, and reseat it firmly until it clicks. This fixes more connection issues than you’d think.
Motor Pulses Then Dies? You Have a Blockage.
This symptom is distinct from total power loss. You pull the trigger, the motor spins for a second with a straining sound, then it pulses and shuts off. Sometimes it will repeat this cycle a few times.
The machine has detected a severe airflow restriction. A sensor tells the main board to pulse the motor to try and clear it, then cuts power to prevent overheating. This is a protective mode, not a mechanical failure.
The motor will pulse and the machine will not operate until the blockage is cleared. Attempting to use the machine while the motor is pulsing will cause it to automatically cut out.
You must find and remove the obstruction. The vacuum’s design creates three natural choke points where blockages lodge.
- The Bin Inlet (Cyclone Shroud): Hair, string, and plastic film get sucked up and wrap around the central cone inside the bin. Remove the bin and look up into the cyclone from the bottom.
- The Wand Elbow Joint: This is the most common hidden spot. A large debris item gets pulled from the floor, travels up the cleaner head, and jams at the 90-degree bend where the wand connects. You must detach the wand from the main body and look through it.
- Inside the Cleaner Head: Thick carpet threads, hair, and toy parts wrap around the Digital Motorbar™ XL brush bar axle or clog the suction channel directly behind it.
Do not use metal tools to poke inside. A wooden chopstick, a straightened coat hanger, or the long handle of a plastic spoon is safer. You want to dislodge the clog, not scratch the plastic air channels or dislodge internal seals.
The Step-By-Step Clearance That Fixes 80% of Cases
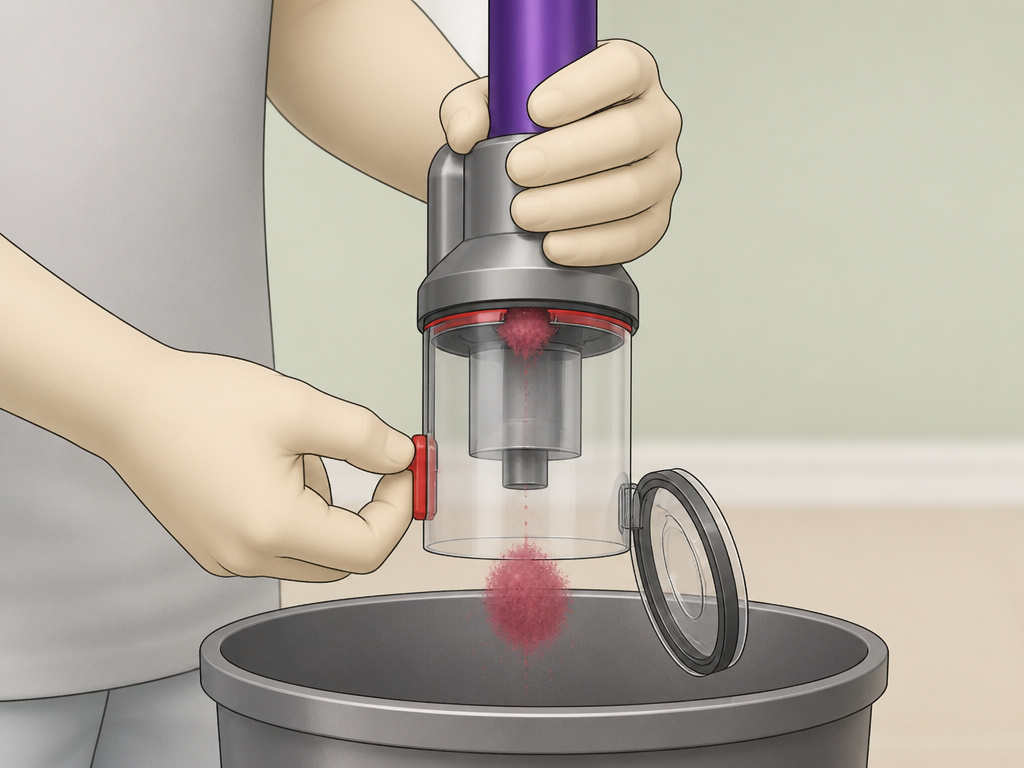
Follow this sequence. It’s ordered from easiest to most involved, which is also the order of most likely to least likely.
- Empty the Bin Completely. Hold the vacuum over a trash can, pull the bin release catch, and let the base swing open. Tap the cyclone gently. Look for a small clump of dust caught in the seal at the top, this is enough to trip the sensor.
- Detach and Inspect the Wand. Remove the wand from both the main body and the cleaner head. Shine a flashlight through it. Look directly at the gray plastic elbow joint. A compressed felt pad or a kid’s sock will be visibly stuck here. Use a long, flexible tool to push it through.
- Clear the Cleaner Head. Turn the Motorbar or Fluffy Optic™ cleaner head over. Manually rotate the brush bar. If it doesn’t spin freely, hair is wound around the ends. Use scissors to cut it away. Check the rectangular suction opening behind the brush bar for debris.
- Check All Attachments. A blockage can be hiding in the crevice tool or extension hose. Blow through each one to confirm air passes freely.
If you clear a blockage and the motor still pulses, you may have missed a second one. Go through the sequence again. The machine’s sensor is very sensitive.
The Filter Is Wet, Clogged, or Missing
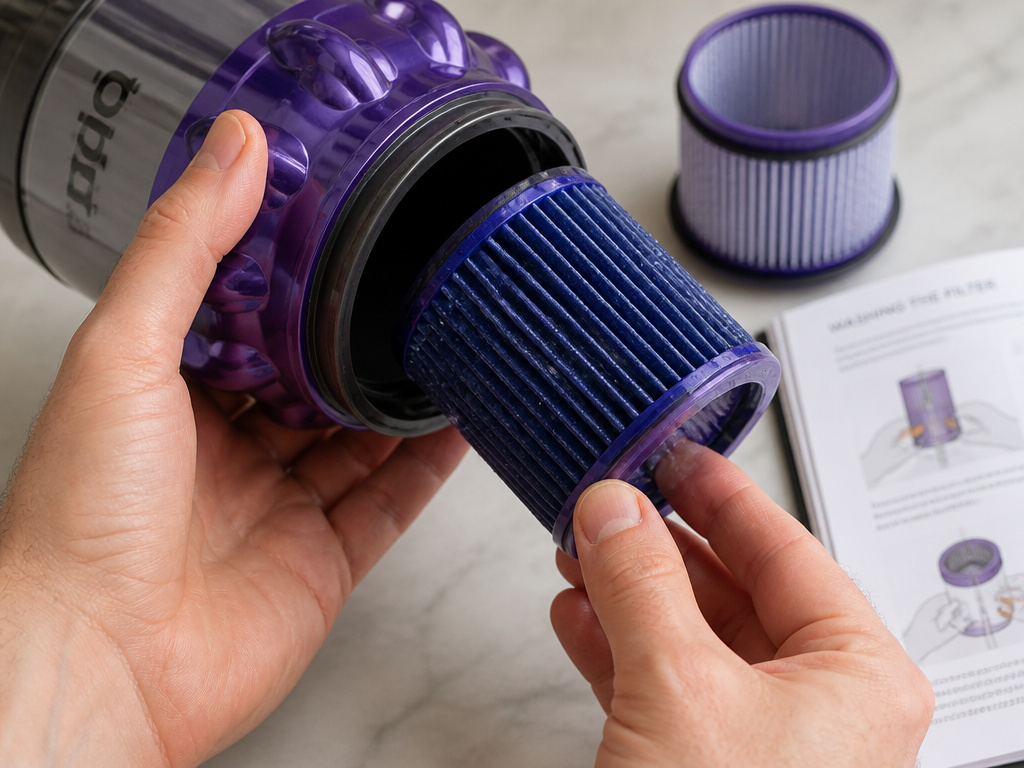
The filter is the lungs of your vacuum. If it can’t breathe, the machine can’t run. There are three failure modes here, and one can cause permanent damage.
First, a clogged filter causes weak suction and can lead to overheating. The manual instructs you to wash the pre-filter (and post-filter on some models) once a month. If you vacuum fine dust like plaster or pet dander, do it every two weeks. A clogged filter makes the motor work harder, which can trigger the high-temperature cutoff.
Second, and more critical, is a damp filter. After washing, the filter must dry for at least 24 hours in a warm place with good airflow. Putting a damp filter back in the machine can draw water into the motor chamber. This leads to a short circuit. The repair cost often exceeds the value of an older model.
Common mistake: Putting a filter back in after 12 hours because it “feels dry.” The dense paper pleats hold moisture you can’t feel. Give it the full day.
Third, the filter might be missing or not seated correctly. If you’ve recently washed the filter, ensure it’s twisted back onto the main body clockwise until it clicks. Running the vacuum without a filter will suck debris directly into the motor, destroying it.
Battery and Charger: Diagnosing the Power Circuit
When there’s no response at all, no lights, no sound, the problem is in the power delivery circuit. This is a process of elimination.
| Component | Symptom | Diagnosis | Action |
|---|---|---|---|
| Wall Outlet | Charger LED shows no light. | No power to charger. | Test outlet with another device. |
| Charger & Cable | Battery LEDs do not illuminate when plugged in. | Faulty charger or broken cable. | Inspect cable for kinks/damage. Try a known-good charger. |
| Battery | Single flashing red LED on battery. | Battery management system has failed. | Battery needs replacement. |
| Charging Port | Charger connects but won’t “click” or sit flush. | Damaged or dirty pins inside port. | Inspect for bent pins or debris. Clean with compressed air. |
A fully discharged battery can sometimes enter a protection state. Leave it on the charger for a full 4.5 hours, even if no lights come on immediately. If it’s truly dead, it will not recover.
The UK manual for the V11 adds a specific warning: avoid recharging immediately after a full discharge. Let the battery cool for a few minutes first. This helps preserve long-term cell life.
When To Call It: Repairs vs. Replacement
Some problems are not user-serviceable. Recognizing them saves you hours of frustration.
The main trigger switch fails. If the battery is charged, the temperature is fine, and you hear a faint click from the electronics when you press the trigger but the motor doesn’t spin, the micro-switch under the trigger is likely broken. This requires disassembling the handle.
The digital motor burns out. A burnt electrical smell from the main body, even when the vacuum is off, is a bad sign. So is a visible melt mark on the housing. This is a core component failure.
The main logic board is fried. This is rare, but it happens after a power surge or liquid damage. The vacuum will behave erratically, turning on by itself, displaying gibberish on the LCD, or having unresponsive buttons.
For any of these, the cost of official Dyson parts and labor often approaches the price of a newer model. If your vacuum is out of its 2-year warranty, weigh the repair quote against the performance of a current machine like the Dyson V12 Detect Slim or the Dyson Gen5detect.
The short version: If the fix requires opening the sealed motor housing or soldering a new circuit board, it’s time to consider a replacement.
Frequently Asked Questions
Why does my Dyson stick vacuum work for a few seconds then stop?
This is almost always a blockage. The machine starts, detects restricted airflow, and pulses the motor before shutting down to prevent damage. Follow the step-by-step clearance guide, focusing on the wand joint and cleaner head.
What does it mean when the red light flashes on my Dyson?
Single flashing red light on the battery indicates a battery fault. An alternating red and blue flash signals a charger fault. In both cases, the component needs replacement. Ensure you’re using the official Dyson charger for your model.
Can a dirty filter stop a Dyson from working?
Yes. A severely clogged filter can cause the motor to overheat and shut down. A damp filter can cause a short circuit, preventing the vacuum from powering on at all. Always use a completely dry, clean filter.
Is my Dyson broken if it won’t turn on after being in the cold?
No, it’s likely in temperature lockout mode. Most Dyson V11 models will not operate below 5°C (41°F). Bring the vacuum to a room above that temperature and let it sit for 30-60 minutes to warm up internally before trying again.
How do I reset my Dyson stick vacuum?
There is no universal “reset” button. The equivalent is to remove the battery for 60 seconds, then reattach it. This can clear a temporary electronic glitch. For persistent issues, you must diagnose the specific cause, blockage, filter, battery, or temperature.
Before You Go
Start with the temperature. That’s the fix for a completely dead vacuum that spent the night in a cold space. If the motor pulses and dies, you’re hunting for a hidden clog in the wand joint. A clean, bone-dry filter is non-negotiable.
The machine is designed to tell you what’s wrong. Your job is to learn its language, the specific light codes, the sound of a blockage pulse, the feel of a correctly seated filter. Most failures are not catastrophic. They’re the vacuum enforcing a simple rule you missed. Find that rule, and you’ll get it running again.