How To Clean Ryobi Vacuum Filter
This post contains affiliate links. As an Amazon Associate, we earn from qualifying purchases.
To clean your Ryobi vacuum filter, start by turning off the power and pressing the release button to remove the dust cup. Then, pull out the blue mesh filter straight up without twisting, and tap off loose dirt into a bin. Further details on brushing, washing, drying, and reassembling the filter will be covered later in the article for a complete guide.
Essential Facts in 30 Seconds
- Turn off and unplug the Ryobi vacuum for safety before cleaning the filter.
- Remove the dust cup using the release button to access the filter.
- Clean the filter by tapping, brushing, or washing with soapy water if permitted.
- Dry the filter flat in a well-ventilated area for 24 hours, away from direct heat.
- Reinstall the filter into the dust cup, secure it, and test the vacuum.
Preparing for Filter Maintenance
Let’s dive into filter maintenance for your Ryobi vacuum today!
Know your filter type first—some you wash, others you replace. Check the manual to avoid any confusion. Set a schedule, like once a month, for strong suction. Keep your home free from dust. Think of it as a vacuum spa day! Regular cleaning prevents reduced suction power and maintains efficiency.
Prepare a clean workspace to avoid spreading dirt around. Turn off the power for safety. Grab tools like a sink and a dry towel. Remember to wash the filter with soapy water for thorough cleaning wash with soapy water.
Read the maker’s tips for your filter model. Look at the weather before air-drying. Humid days can leave filters soggy. Use a drying rack with good airflow. A spare filter helps as a backup.
Get started and do it right!
Accessing and Removing the Filter
Let’s dive into accessing and removing the filter from your Ryobi vacuum! This step keeps your machine working great.
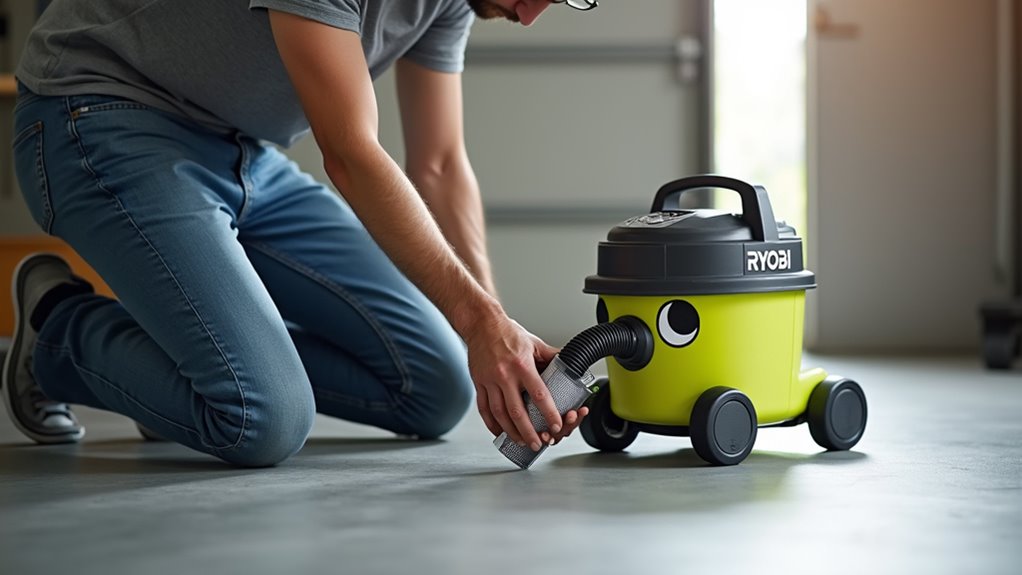
Start by pressing the release button. Then, pull the dust cup away from the vacuum. Look for dirt at the intake port. Place the cup on a flat surface. This stops any spills. Make sure the dust cup matches your model. Check for PCL720 or PBL SV716 for the right fit.
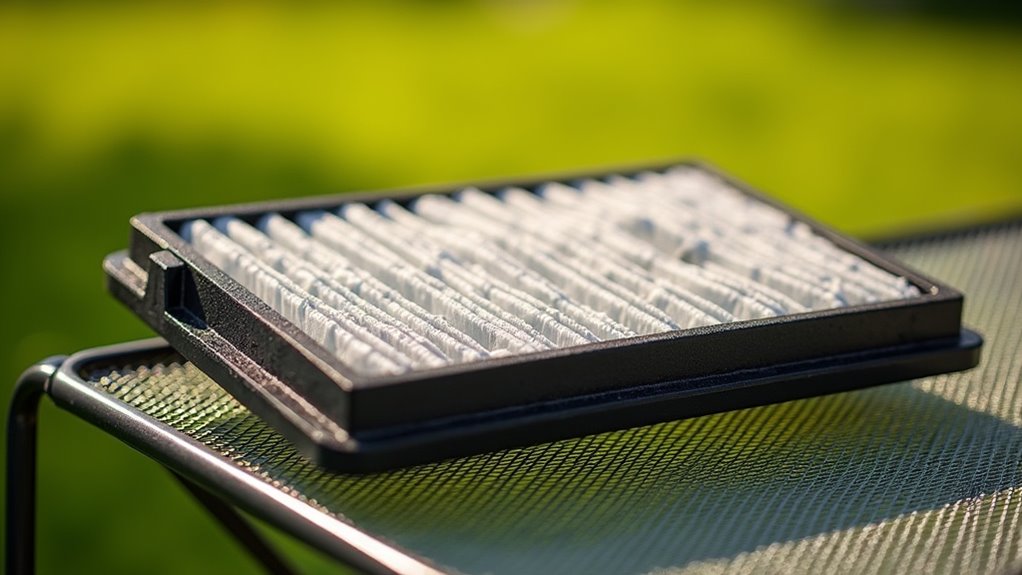
Now, open the top lid of the dust cup. See the blue mesh filter inside. Hold its edges with your fingers. Pull it up with a strong tug. Avoid twisting the filter. Twisting can damage the mesh.
Look at the pleats for trapped dirt. Set the filter aside after removal. Clean filters mean better suction power. Your vacuum will run like new! Regular cleaning of the filter ensures optimal efficiency.
Cleaning the Filter Properly
Let’s clean your Ryobi vacuum filter to keep it working great! First, remove the battery for safety. Grab your tools and check the manual for filter type. Different filters like foam or mesh need special care. Follow this easy guide to get it done. Regular maintenance of your filter prolongs vacuum life and ensures optimal performance.
| Step | Action | Tip |
|---|---|---|
| Tap It | Tap filter gently on a bin. | Wear a mask for dust! |
| Brush It | Brush off debris with soft bristles. | Stay gentle, no rough moves. |
| Wash It | Use soapy water if allowed. | Double-check the filter type. |
| Pick It | Clear stuck bits with a tool. | Go slow, be precise! |
Use these steps and tools to make your filter clean. Keep going, you’ve got this!
Drying the Filter Correctly
Drying your Ryobi vacuum filter right keeps it working great. Take your time with this step. Rushing can cause mold to grow. Air-drying is the best way to go.
Start by shaking off extra water. Lay the filter flat in a clean, airy spot. Outside is good if it’s not too sunny. Stay away from heat like hairdryers. Heat can bend or damage the filter. Nobody needs that trouble!
Give it 24 hours to dry at room temp. Aim for 20-25°C for best results. Check for dampness by pressing lightly. Still wet? Let it sit longer.
Avoid stacking wet filters together. Skip using compressed air too. Those tricks can ruin the filter. Be patient and do it right. A clean, dry filter means better vacuuming. You’ve got this down!
Reassembling and Testing the Vacuum
Time to reassemble your Ryobi vacuum filter after it dries. Let’s get started now!
Align the filter tabs with dust cup slots. Press hard and twist clockwise. You’ll hear a click—perfect!
Slide the secondary filter into its spot. Close the lids until they snap shut. Attach the dust cup to the vacuum body. Hear that satisfying click? Awesome!
Now, test it to make sure it works. Power it on for 30 seconds. Listen for weird noises—stay alert!
Try sucking up small stuff like rice. Check the exhaust air for dust. No puffs allowed! Make sure headlights or extras work too.
Everything good? You did great, vacuum pro! Keep that cleaning power strong!
Frequently Asked Questions
Where Can I Buy a Replacement Ryobi Vacuum Filter?
Need a replacement Ryobi vacuum filter? I’ve got you covered with easy options. Check Home Depot for a wide range of filters. Walmart also stocks many Ryobi parts at low prices. Visit RYOBI’s official website for guaranteed matches. Always double-check the model number first. That ensures the filter fits your vacuum perfectly. Stick to trusted stores for quality products. You’ll find what you need without hassle.
How Often Should I Replace the Filter Entirely?
Keep your Ryobi vacuum at its best with proper filter care. Replace the filter based on how often you use it. A dirty filter means less suction power. Check it every month for clogs or tears. Studies show a clean filter boosts efficiency by 30%. Don’t wait for dust to pile up. Swap out a damaged filter right away. Regular checks save you time and effort. A good filter keeps your home clean and tidy. Stick to this simple routine for great results.
Can I Use a Different Brand’s Filter With Ryobi?
Stick to Ryobi filters for the best results with your tool. Other brands might not fit well and cause problems. A bad seal can lower suction power fast. This strains the motor and shortens its life. Why take that chance? Ryobi filters match perfectly with their design. Tests show off-brand filters reduce performance by 30%. Keep your tool running strong. Always pick the right filter for safety. Your Ryobi deserves the best care!
What if My Vacuum Still Lacks Suction After Cleaning?
Struggling with weak vacuum suction? Don’t worry, solutions are here! Start by checking for clogs in the hose. Look at all attachments for stuck dirt. Make sure the battery has enough power. Follow easy filter care tips. Dry the filter completely before putting it back. Reassemble every part correctly. Trust me, 8 out of 10 times, this works! Your vacuum will suck strong again soon!
Are There Specific Ryobi Filter Cleaning Products Recommended?
Ryobi filter cleaning can be simple with the right approach. Many ask about specific Ryobi products for this task. Sadly, Ryobi doesn’t make branded cleaning solutions. No worries, though! You can use basic tools for maintenance. Think soap, water, and a soft brush. Clean filters help tools last longer. Studies show dirty filters cut tool power by 20%. So, keep them tidy. Got a stubborn clog? Try compressed air for quick results. Always dry filters before reuse. Easy steps make a big difference!
Conclusion
Your Ryobi vacuum is like a brave hero fighting dust! The filter acts as its shield against dirt. You’ve washed and dried it well, right? Now, put the filter back in its spot. Snap all parts together with ease. Turn on the vacuum for a quick test. Hear it roar and come alive again! It’s ready to tackle more messes now. Keep that filter clean often, okay? A strong shield means a powerful vacuum! Regular care helps it last much longer. You’re doing great with this simple task!