
How to Properly Clean a Filter in a Shark Vacuum Cleaner
This post contains affiliate links. As an Amazon Associate, we earn from qualifying purchases.
To clean the filter in a Shark vacuum, you must identify the filter type, remove it, rinse it under cold water without soap, and let it air-dry completely for at least 24 hours before reinstalling. For most upright models like the NV770, clean the foam and felt pre-motor filters every three months. The post-motor HEPA filter needs a yearly wash. Putting a damp filter back in is the single fastest way to damage the motor.
That 24-hour dry time isn’t a suggestion. It’s the line between a routine maintenance task and a repair bill. Every manual for every Shark model I’ve pulled, from the 900W NV770 to the cordless MultiFLEX, states it in bold. Moisture drawn into the electric parts doesn’t just reduce suction; it corrodes contacts and can trigger the thermal cutoff. The vacuum turns off to protect itself, and you’re left waiting 45 minutes for it to cool, wondering why your clean filter caused a shutdown.
What follows is the breakdown most videos skip: the specific part numbers for your model, the two signs that mean “replace, don’t clean,” and the exact consequences of getting each step wrong. By the end, you’ll know the factory schedule, but more importantly, you’ll know when to ignore it.
Key Takeaways
- Air-dry filters for a full 24 hours, every time. Installing a damp filter risks immediate motor damage and is the most common preventable cause of a loss of suction.
- Use cold water only, never soap or cleaners. Detergents leave residues that clog filter pores and can be drawn into the motor as aerosols.
- Match the cleaning schedule to your dirt, not your calendar. If you have pets, high-pollen areas, or vacuum construction dust, clean the pre-motor filters monthly, not quarterly.
- Know the two replacement triggers: permanent discoloration after washing and any physical tear or hole. A damaged filter passes dust straight to the motor.
- Stick to Shark-branded replacement filters for your model. Using generic parts can void the warranty on newer units like the SV1100 series.
What Kind of Shark Filter Do You Have?
Your vacuum has at least one filter, but most have two working in sequence. Getting this wrong means you’re cleaning the wrong part or missing a clogged one entirely.
The first is always the pre-motor filter. Its job is sacrificial, to catch the bulk of fine dust and debris before it reaches the fan and motor. This protects the expensive mechanical parts from abrasive grit. In most Shark uprights like the Shark NV770 and NV581, this is actually a two-part kit: a green foam pad and a thicker felt pad stacked together. The NV770 uses part number XFF600; the NV581 uses XFFT580.
The second is the post-motor or HEPA filter. This one polishes the air after it passes through the motor, capturing ultrafine particles like pollen, mold spores, and pet dander before the air exhausts back into your room. Not all models have a true HEPA filter; some cordless sticks use a simpler post-motor filter. If yours is HEPA, it’s typically a pleated, paper-like material in a plastic frame. For the NV770, it’s part XHF600; for the NV581, it’s XHEP580.
Where this goes sideways: Assuming all Sharks are the same. A Shark handheld or Shark stick vacuum like the MultiFLEX consolidates these into a single, smaller filter cartridge. Always check your manual, downloading it from the Shark site takes 60 seconds and gives you the right part numbers.
The Universal 5-Step Cleaning Process
This method works for every washable filter in a Shark vacuum, from the foam pre-filter to the HEPA stage. The specifics of where the filter is located vary by model, but the how is constant.
- Unplug the vacuum. This is non-negotiable. You’re handling components that channel air directly to electrical parts. For a Shark vacuum that won’t turn on later, the first thing a technician will ask is if any work was done with it plugged in.
- Remove the dust cup and locate the filter housing. On uprights, the pre-motor filters are usually in the top of the dust cup assembly. For the HEPA filter, look for a separate door or grill on the back or side of the vacuum body. On a Shark Lift-Away, the pod that detaches often houses the HEPA.
- Gently tap the filter over a trash can. Dislodge loose, dry dust first. This prevents you from just making mud when you rinse it.
- Rinse under cool, running tap water. Use your fingers to gently squeeze and agitate the foam and felt filters until the water runs clear. For a pleated HEPA filter, run water through the pleats in the direction opposite to airflow (usually from the clean side to the dirty side). Never use hot water, soap, or detergents.
- Air-dry completely for at least 24 hours. Place filters in a well-ventilated area, out of direct sunlight. Prop them up so air circulates around all sides. The foam and felt ones can take a full day to dry inside.
The part nobody mentions: That 24-hour dry is for ideal, low-humidity conditions. In a damp basement or during rainy season, give it 36 hours. Squeeze the foam filter hard, if you feel any coolness or see a water bead, it’s not ready. Putting it in wet is how you create a loss of suction scenario that no amount of troubleshooting will fix.
What happens if you skip a step? Rinsing without tapping first turns dust into a paste that hardens in the filter pores. Shortening the dry time pulls water into the motor chamber. The first symptom is often the vacuum sounding strained. The next is an automatic shutdown from the thermal protector, an overheated vacuum that won’t restart for an hour.
How to Clean a Shark HEPA Filter
Cleaning the HEPA filter feels different because the material is more delicate. The process is similar, but the stakes for doing it wrong are higher.
After locating and removing the HEPA filter from its compartment, take it to your trash can. Tap it firmly against the inside of the bin to dislodge as much dry dust as possible. A soft-bristle brush (a clean, dry paintbrush works) can help dust out the tight pleats.
Hold the filter under a gentle stream of cool water. Run the water through the pleats from the clean side (usually the side facing the inside of the vacuum) toward the dirty side. This helps push debris out. Never submerge it or run water directly into the pleats from the side, as this can force dirt deeper in.
Shake off excess water and begin the drying process. Because the pleats trap water, this filter often takes the longest to dry. Place it on a towel in a breezy spot. Do not use compressed air to dry it, as the high pressure can damage the pleated media.
| Step | Action | Risk If Done Wrong |
|---|---|---|
| 1. Removal | Open HEPA grill, lift filter out by its frame. | Pulling on the pleats can tear the media. |
| 2. Dry Clean | Tap over trash, brush pleats gently. | Skipping this turns dust to mud, permanently clogging pores. |
| 3. Rinse | Run cool water through pleats (clean side to dirty). | High-pressure water or submerging deforms the structure. |
| 4. Dry | Air-dry for 24+ hours on a towel. | Even slightly damp, it restricts airflow and can mold. |
Worth knowing before you start: Most Shark manuals list HEPA cleaning as a yearly task. But if you vacuum fine ash, drywall dust, or have multiple pets, check it every six months. The NV581 manual explicitly says “DO NOT PICK UP FIREPLACE ASH OR DRYWALL DUST.” That debris is so fine it bypasses the pre-filter and loads the HEPA immediately.
When to Clean (And When to Replace)
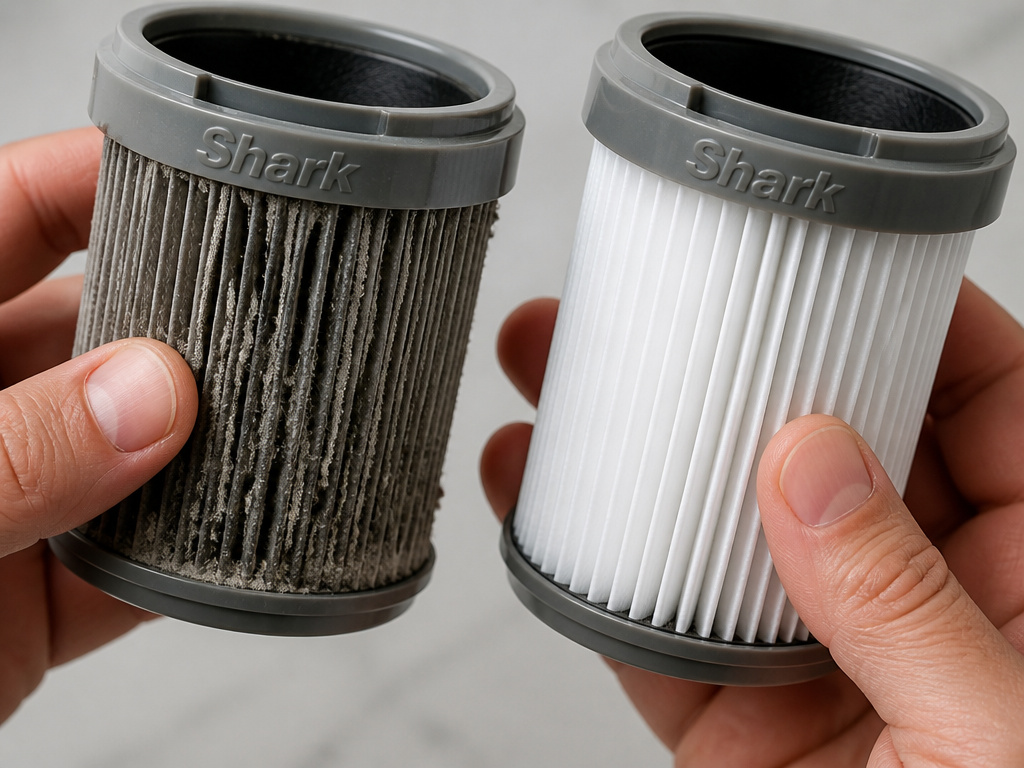 The factory schedule is a baseline for normal use. Your home isn’t a lab.
The Shark NV770 manual says clean the pre-motor filters every 3 months and the HEPA yearly. The Shark MultiFLEX® Cordless Vacuum manual says pre-motor at least once a month and post-motor once a year. The difference isn’t arbitrary. A cordless vacuum has a smaller filter and a motor that works harder per battery cycle, so it loads up faster.
You need to clean your filters before the scheduled date if you notice either of these two things: 1. A visible drop in suction power. The vacuum feels weaker on the same setting. 2. Visible dust buildup on the filter or around the filter housing.
Heavy use demands a heavier schedule. If you have shedding pets, live on a dirt road, or are cleaning up after a renovation, treat your vacuum like it’s in the “heavy use” category. Clean the pre-motor filters monthly. Check the HEPA filter every six months.
Cleaning has its limits. You replace a filter when: * It remains discolored or gray after a thorough wash and dry. * You find any tear, hole, or damage to the foam, felt, or HEPA media. * The filter material has become stiff or misshapen and no longer fits snugly in its housing. * Performance doesn’t improve after a proper cleaning.
For replacements, buy the Shark-branded filter for your exact model. The fit and filtration rating are engineered for your vacuum’s airflow. Using a generic filter can alter suction and, as noted in the SV1100 manual, may void your warranty.
Troubleshooting Post-Cleaning Problems
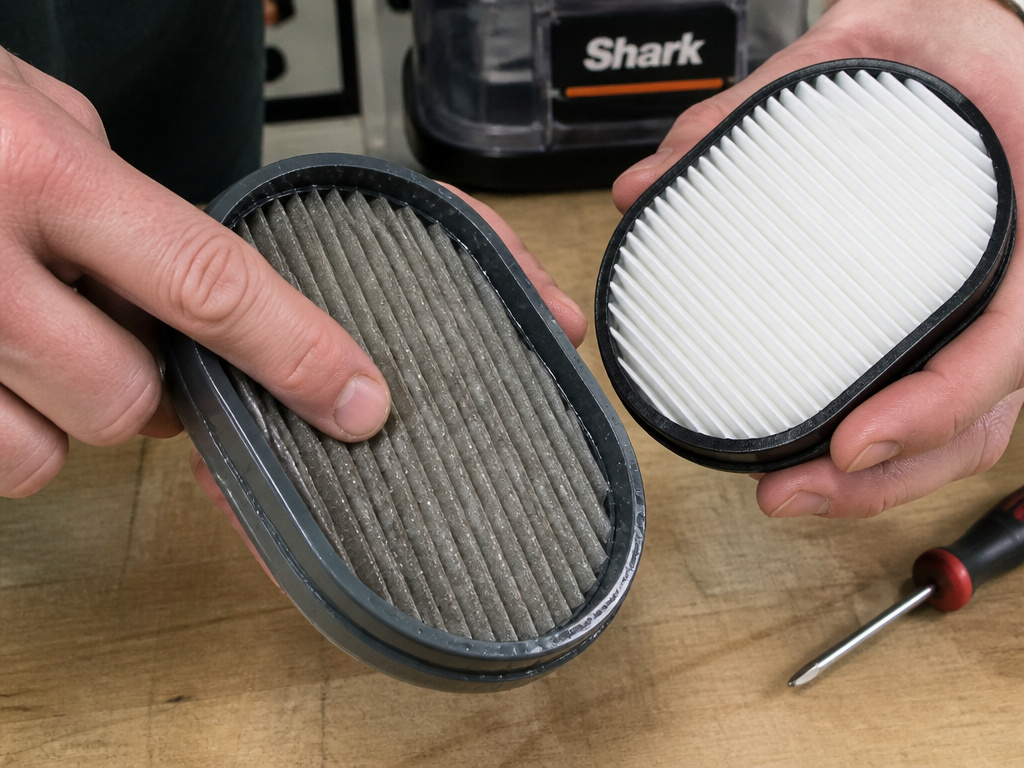 You followed the steps, but now the vacuum acts up. Here’s what likely went wrong.
Problem: The vacuum has no power or won’t turn on.
Cause: A damp filter was installed, and moisture reached the electrical contacts or triggered a safety cutoff. Alternatively, the filter housing wasn’t fully snapped shut, breaking the electrical connection.
Fix: Unplug the vacuum. Remove all filters and verify they are bone-dry. Reassemble, ensuring every latch and housing clicks firmly into place. Wait 30 minutes, then plug it in and try again. If it still has power issues, you may need to let the entire unit dry out for 24 hours.
Problem: Suction is weak or nonexistent.
Cause: The filter is still damp, massively restricting airflow. Or, a blockage was created downstream during reassembly.
Fix: Confirm filters are dry. Then, check for an obstruction. Detach the hose, the wand, and the floor nozzle. Look for clogs. A common spot is the connection point where the dust cup meets the vacuum body. Also, check the floor nozzle for hair wrapped around the brush roll, a brush not spinning can mimic a suction loss.
Problem: The vacuum overheats and shuts off quickly.
Cause: This is the classic symptom of a clogged or damp filter. The motor has to work too hard to pull air through, overheats, and the thermal safety switch kills the power.
Fix: Unplug the vacuum and let it cool for at least 45 minutes, this reset period is in every manual. Then, empty the dust cup, remove and inspect all filters (even the ones you just cleaned), and check for blockages in every airway. This is the standard drill for an overheated vacuum.
A clean filter should restore performance, not hinder it. If problems persist after verifying dry filters and clear airways, the issue is likely elsewhere, a failing motor, a broken seal, or a battery problem in cordless models like a Shark vacuum not charging.
Frequently Asked Questions
Can I use soap to clean my Shark vacuum filter?
No. Use cool water only. Soap, detergent, or cleaning solutions leave a residue that clogs the microscopic pores in the filter material. This residue can also be aerosolized by the motor, leading to unpleasant smells and potential damage. The official guidance from all Shark manuals is clear: rinse with water.
How long does it take for Shark filters to dry?
Plan for a minimum of 24 hours of air-drying in a well-ventilated space. The dense foam and felt pre-filters hold a surprising amount of water. In humid environments, it can take 36 hours or more. To test, squeeze the foam filter firmly in your fist. If you feel any dampness or see a water mark, it’s not ready.
What happens if I don’t clean my Shark vacuum filter?
Suction drops progressively as the filter clogs. The motor strains to pull air through the blockage, running hotter and reducing its lifespan. Eventually, the thermal protector will trip, shutting the vacuum off mid-use. Consistently dirty filters also mean dust, allergens, and fine particles are being recirculated back into your home’s air.
Are Shark vacuum filters washable?
Yes, the primary filters in most Shark vacuums are designed to be washed and reused. This includes the foam and felt pre-motor filters and the post-motor HEPA filter (if your model has one). The key is the washing method (water only) and the mandatory complete dry time before reuse. Always confirm in your model’s manual.
Can I run my Shark vacuum without a filter?
Never. Running the vacuum without its filters exposes the motor and fan to abrasive dust and debris, guaranteeing a quick and costly failure. It also bypasses the entire filtration system, blowing all the dust you just picked up back into the room. The filters are a required component for both operation and performance.
How do I know if my Shark HEPA filter is clean?
After rinsing and fully drying, the filter’s pleats should look visibly free of dust and debris. Hold it up to a light source; you should see light passing evenly through the pleats. If any areas look darkened or clogged, or if the water never ran completely clear during washing, it may be at the end of its life and need replacement.
The Bottom Line
Cleaning a Shark vacuum filter is simple, but it’s not fast. The job is 5 minutes of washing and 24 hours of waiting. Cheat the dry time, and you risk the motor. Stick to water, follow your model’s part layout, and let the filter’s condition, not just the calendar, tell you when to clean.
For most homes, cleaning the pre-motor filters every two months and the HEPA once a year keeps suction strong. If you own a Shark upright like the NV581, keep part number XFFT580 on hand. For a Shark cordless stick vacuum, check that filter monthly. The goal isn’t just a clean filter, it’s a vacuum that works when you need it, without a surprise loss of suction or an overheating shutdown halfway through the living room.