
Steps to Empty the Roomba 405 Vacuum Bag & Avoid Error 350
This post contains affiliate links. As an Amazon Associate, we earn from qualifying purchases.
To empty a Roomba 405 vacuum bag, you must access the debris bin via the magnetic top cover, not a side button. Lift the cover, press the bin’s release tabs, remove the bin, and then pull the self-sealing evac bag straight out of the Clean Base. Replace it after 60 bin empties or when the LED indicator flashes.
The magnetic cover is the first thing people miss. The Roomba 405 is part of the Plus 400 Series, which uses a different access method than later models with side-release buttons. Fumbling for a button that isn’t there wastes time and can lead to thinking the bin is stuck.
What follows is the full sequence: how to open the 405 correctly, handle the self-sealing bag, and what to do when the robot throws an Error 350 because the bag is full. We’ll also cover the filter cleaning that happens right after you empty the bin.
Key Takeaways
- The Roomba 405 uses a magnetic top cover to access the bin; there is no side release button.
- The self-sealing evac bag must be pulled straight out of the Clean Base, twisting or yanking can tear it.
- Replace the bag after 60 bin empties or when the robot’s LED indicator or app alerts you.
- If you get Error 350, the bag is either full, missing, or inserted incorrectly.
- Never reuse a bag or use non-iRobot bags; they can cause clogs and sensor errors.
The 4-Step Process to Empty a Roomba 405 Bag
The process is straightforward if you know where to push. The confusion starts because the 405’s design is from an earlier generation.
Step 1: Open the Magnetic Top Cover. Place the robot on its Clean Base. Find the seam at the very top of the robot, behind the bumper. Slide your fingers under the rear edge and lift upward. The entire top panel is held by magnets and will come free. There is no button to press here.
Step 2: Remove the Debris Bin. With the cover off, you’ll see the blue plastic debris bin. On each side of the bin are small, recessed release buttons. Press both inward simultaneously and lift the bin straight up and out of the robot. If it feels stuck, you’re likely pressing only one button.
Step 3: Empty the Bin Over a Trash Can. Hold the bin over your trash can and press the lid release latch. The bottom door will swing open, dumping the contents. Tap the bin gently to dislodge fine dust. For a deeper clean, you can rinse the bin with warm water, but let it dry completely for 24 hours before putting it back. It is not dishwasher safe.
Where this goes sideways: Placing the robot on the dock by hand. If you don’t let it drive onto the dock itself, the auto-empty cycle won’t trigger. You’ll have to press the “Home” button on the robot while it’s seated or use the iRobot Home App to start a manual evacuation.
Step 4: Pull the Evac Bag from the Clean Base. This is the bag-emptying step. Look at the front of the Clean Base station. The bag sits inside a chamber. Grasp the plastic handle of the bag and pull it straight out. It will self-seal as you remove it. Discard the full bag and insert a new, genuine iRobot replacement, pushing until you hear a click.
| Action | Correct Method | Risk if Done Wrong |
|---|---|---|
| Opening the robot | Lift magnetic top cover from the rear. | Forcing a non-existent side button can break the housing clips. |
| Removing the bin | Press both side release buttons simultaneously. | Pulling with one button pressed jams the bin in its slot. |
| Emptying the bin | Press latch, dump, tap, rinse with warm water if needed. | Using hot water or a dishwasher warps the plastic. |
| Removing the bag | Pull straight out by the handle. | Yanking at an angle can tear the bag, spilling debris inside the base. |
Roomba 405 Bag Types and the Self-Sealing Feature
Not all bags are the same. Using the wrong type is a fast track to a clogged Clean Base.
The Roomba 405 uses a cardboard evac bag. This is the larger, flat-pack style designed for the Plus 400 Series and later. The older, original plastic bags are for much earlier “Classic” series models and will not seal or seat correctly in your Clean Base. The box will say which series it’s for, look for “400/500/700 Series” or similar.
The self-sealing mechanism is a simple flap inside the bag’s neck. As you pull the bag out, this flap closes over the opening, trapping dust and allergens inside. This is why you should never try to reuse a bag, the seal is one-time-only. A reused bag will leak fine dust back into the Clean Base’s fan and sensor, which is a primary cause of Error 350.
Common mistake: Shaking a “full” bag to make more room. IRobot’s own guidance says you can gently shake a bag you believe isn’t full to settle the debris. But if the bag is genuinely at capacity, this just packs the dust tighter against the sensor. If the LED is flashing or the app says it’s full, replace it.
When the Bag is Full: Signs and Replacement
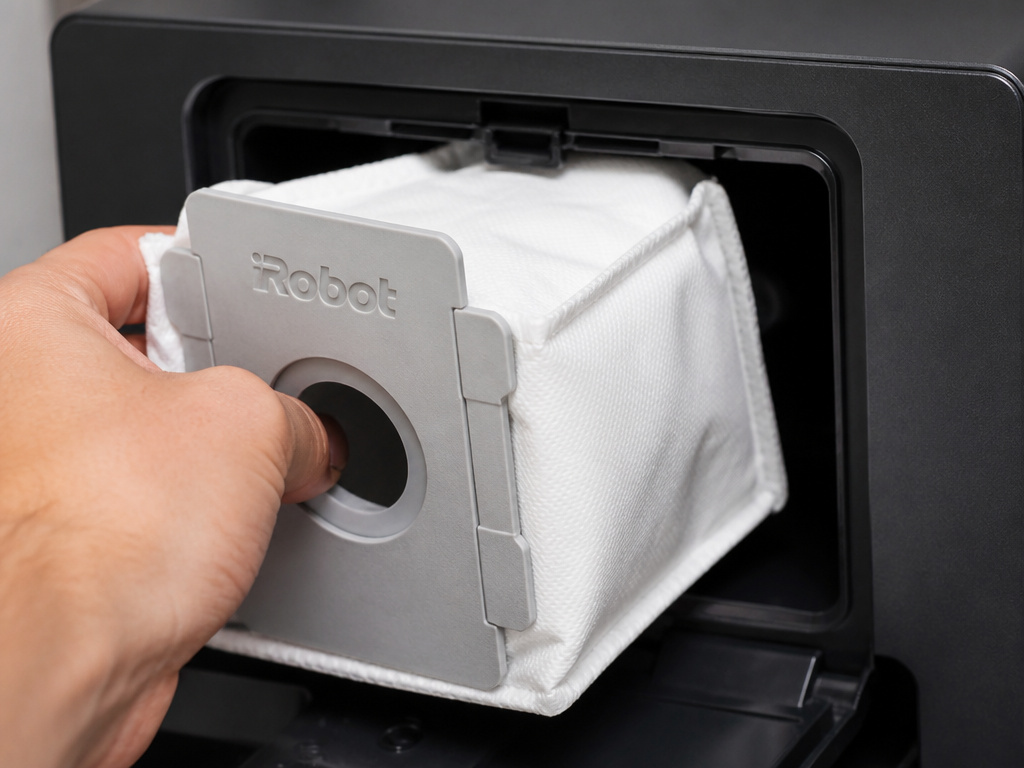 The robot tells you the bag is full in two ways. Ignoring both leads to the same error code.
First, the LED indicator on the Clean Base will flash. The pattern is usually a slow, repeating pulse. Second, the iRobot Home App will send a notification and show a persistent message on the home screen. The official replacement interval is after 60 bin-empties. The robot counts these cycles internally.
When you get the alert, follow the removal process in Step 4 above. Insert the new bag by pushing the cardboard carrier firmly into the chamber until it clicks and sits flush. A bag that isn’t fully seated will trigger Error 350 because the sensors can’t detect a proper connection.
What is Error 350 and How Do You Fix It?
Error 350 means the robot attempted an auto-empty cycle but failed. The Clean Base couldn’t move air because the bag was full, missing, or blocked.
- Bag is Full: This is the most common cause. Replace the bag.
- Bag is Missing or Not Seated: Remove and re-insert the bag, ensuring a firm click.
- Non-Genuine or Reused Bag: These often don’t seal or fit right. Swap it for an authentic iRobot bag.
- Debris Blocking the Chute: With the bag removed, check the interior of the Clean Base chamber for a clump of hair or debris blocking the inlet. Use a flashlight and a long, thin tool to clear it.
The fix is almost always in that list. After addressing the issue, clear the error by pressing the “Clean” button on the robot or restarting it from the app.
Essential Post-Emptying Maintenance: The Filter
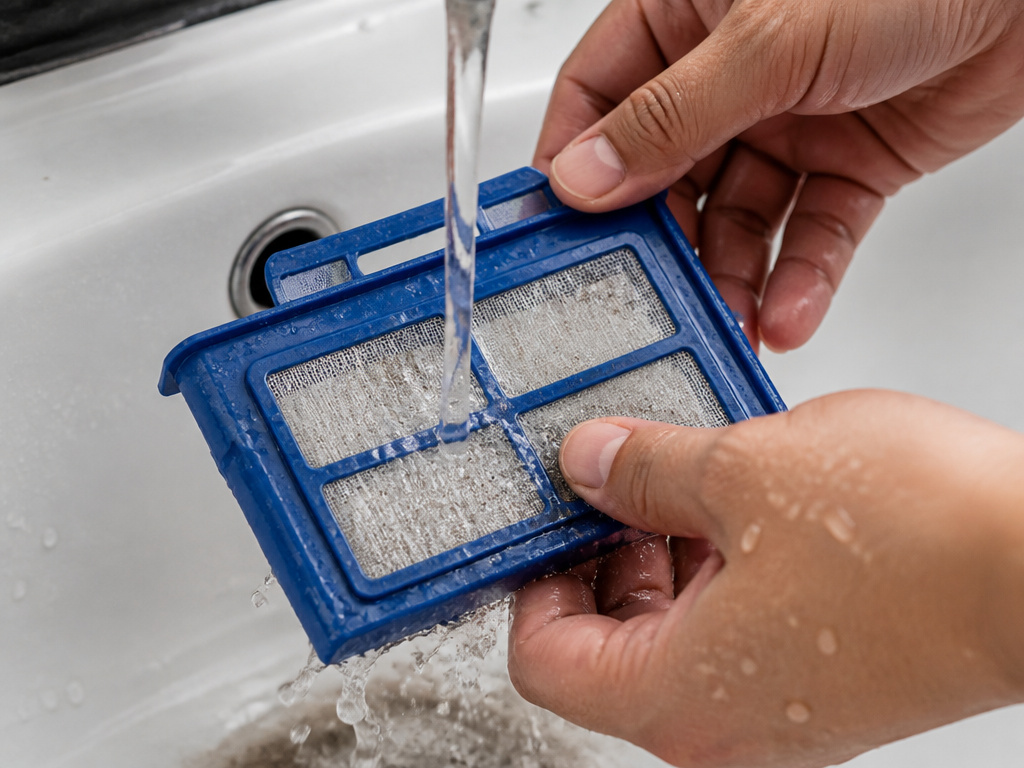 You’ve emptied the bag and the bin. If you stop here, you’re only halfway done. The filter is the next performance choke point.
The Roomba 405 uses a single, non-separable filter housed in a blue plastic frame. After emptying the bin, remove this filter frame by pulling it straight up. Tap it gently against the inside of your trash can to dislodge loose dust. For a thorough clean, hold it under lukewarm tap water and rinse until the water runs clear. Do not use soap or detergents. Squeeze out excess water, don’t twist, and let it air-dry for a full 24 hours. A damp filter will ruin your vacuum’s suction and can mold.
Easy to miss: The filter has a plastic piece surrounding it and does not separate further once removed from the bin. Don’t try to pry it apart; you’ll break the frame. Rinse the whole unit.
| Maintenance Task | Frequency | Consequence of Skipping |
|---|---|---|
| Empty Debris Bin | After every cleaning run | Robot loses suction, leaves trails of dirt. |
| Clean Filter | At least once per month | Suction drops by over 50%, motor strains, battery drains faster. |
| Replace Evac Bag | Every 60 bin empties | Error 350, auto-empty fails, dust recirculates. |
| Wipe Sensors & Charging Contacts | Once a month | Robot gets “lost,” fails to dock, battery doesn’t charge. |
This regular upkeep is what separates a Roomba that lasts five years from one that’s junk in two. It’s not complicated, but it’s non-negotiable.
Frequently Asked Questions
Can I use off-brand bags in my Roomba 405?
You can, but you shouldn’t. IRobot explicitly states to use only authentic bags. Non-genuine bags often have weaker seals, different material density, and can lack the proper RFID tag that communicates with the base. The risk is a torn bag leaking dust into the base’s motor or a false Error 350. The savings are minimal compared to a potential repair.
How do I know if my bag is the cardboard or plastic type?
Look at the bag itself. The cardboard evac bag for the 405 is flat, comes in a thin box, and has a rigid cardboard collar you insert into the base. The older plastic type is pre-expanded, has a softer plastic rim, and comes in a bulkier package. The product description should specify “for 400/500/700 series” for the correct one.
My Roomba 405 isn’t emptying into the base. What’s wrong?
Three likely culprits. First, the bag is full, replace it. Second, the robot isn’t docking perfectly. Make sure the Clean Base is on a level surface with clear space in front of it. Third, the bin’s exit port or the base’s intake may be blocked by a large debris clump. Inspect and clear both.
Is it necessary to clean the bin every time?
For peak performance, yes. IRobot recommends emptying the bin after each run. A full bin reduces airflow, making the robot work harder and clean less effectively. It takes ten seconds. Make it part of your routine.
Where can I buy replacement bags and filters for the Roomba 405?
Genuine iRobot bags and filters are sold on the iRobot website, Amazon, and at major retailers like Best Buy and Target. Look for part numbers or “Compatible with Roomba 400 Series.” When you need a new Roomba filter, getting the official part ensures it fits the housing perfectly.
The Bottom Line
Emptying your Roomba 405 is a simple four-step process hidden by one design quirk: the magnetic top cover. Master that lift, respect the self-sealing bag, and replace it at the 60-empties mark. The robot’s Error 350 is almost always a bag problem, not a mechanical failure. Keep the filter clean and the bin empty, and the 405 will handle the rest for years. The maintenance is the machine.