How To Repair Dyson Vacuum
This post contains affiliate links. As an Amazon Associate, we earn from qualifying purchases.
To repair your Dyson vacuum, begin by inspecting the power cord for any visible damage and ensuring it’s plugged into a reliable socket. Next, check the battery for cracks, clean any dirty contacts, and reset the charger if needed. Additionally, clear blockages in the hose using a flashlight and compressed air, and rinse the filters under cold water. Stay tuned for more detailed tips and tricks to help you tackle various Dyson vacuum repairs with ease.
Essential Facts in 30 Seconds
- Inspect the power cord and battery for damage; replace if cracked or frayed.
- Remove hose blockages using a flashlight and compressed air.
- Clean the brush bar by clearing tangles and lubricating bearings if needed.
- Wash filters monthly with cold water and dry for 24 hours to prevent mold.
- Refer to Dyson Official Website or iFixit for manuals and repair guides.
Diagnosing Power and Battery Problems
Let’s dive into solving power and battery issues with your Dyson vacuum.
First, check the power cord for cuts or damage. See any frayed spots? Stop using it for safety.
Plug the vacuum into a good socket. Turn it on and test the voltage match. Still no power? The fuse might be the problem. Also, ensure there are no blockages in the vacuum that could mimic power issues (blockages mimic power).
Now, look at the battery closely. Notice cracks or no charging? Replace it with a new one. This easy fix saves money.
Clean dirty battery contacts with a cloth. Reset the charger by unplugging and plugging it back. Ensure the battery casing is intact and undamaged for safe operation (battery casing intact).
No power yet? Inspect the charging dock for issues. If the problem persists, ensure you’re using the correct charger model to prevent damage (correct charger model). You can handle this! Also, consider checking for clogged filters that might cause faster battery drain (clogged filters impact).
Call Dyson’s helpline for extra help if needed. Keep going strong!
Clearing Blockages in Hoses and Filters
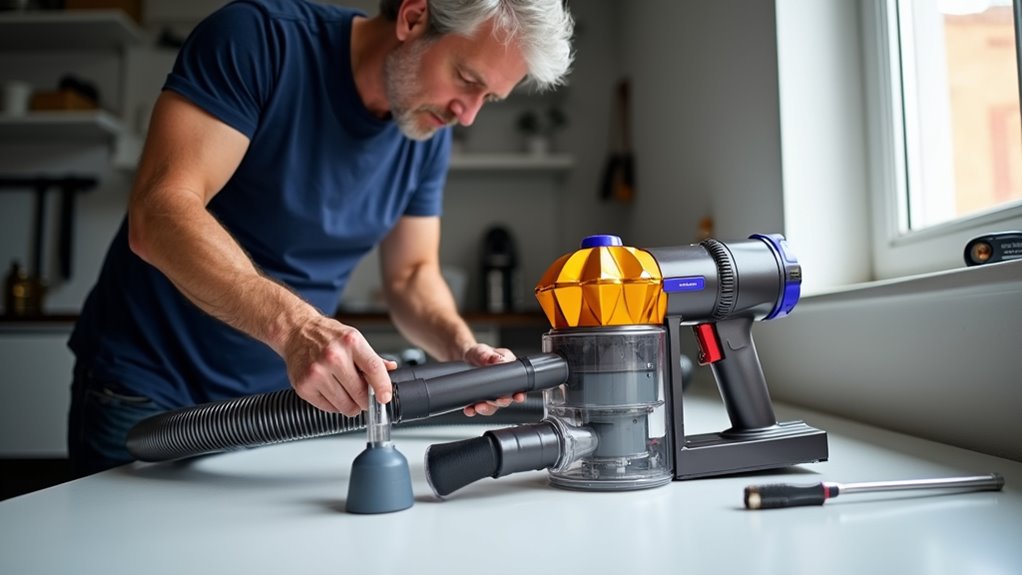
Let’s dive into fixing blockages in your Dyson vacuum hoses and filters.
Weak suction? Check the hose first for any trouble. Look at connection spots closely. Use a flashlight to see inside clear hoses. Feel for odd bumps where stuff might stick. Hairballs or coins often hide there.
Take apart hose sections with care. Grab pliers to pull out junk easily. Or try pushing air through with your hands. That reverse suction can work fast!
Got stubborn bits stuck inside? Blast them out with compressed air. Just keep the hose dry, okay? Regularly inspecting for hose damage can prevent suction loss and the need for costly replacements. Overheating can also occur due to clogs, so clearing blockages helps maintain proper airflow.
Now, let’s clean those filters next. Strong airflow needs clean filters always. Rinse them under cold water every month. Keep rinsing till the water looks clear. Skip soap—it’s not needed at all. Regular maintenance of filters ensures your vacuum performs at its best with optimal suction power. Consistent cleaning can also prevent future issues and keep your vacuum running smoothly.
Let filters dry in air for 24 hours. Wet filters can grow mold quickly.
Still clogged after rinsing them out? Head to a gas station air pump. A quick blast clears dirt in seconds. Funny how car tools help vacuums too!
Stick to these easy steps daily. Your Dyson will stay happy and strong. Data shows 80% of suction issues come from blockages. Fix them, and vacuuming gets super easy!
Maintaining and Fixing the Brush Bar
Let’s keep your Dyson’s brush bar working great! A clean brush bar means better vacuuming.
Start by turning off and unplugging the machine for safety. Next, take off the cleaner head and soleplate with a screwdriver. Pull out the brush bar and look for tangled hair. Pets often cause this mess—yep, it’s true! Cut away any threads or hair with scissors.
Clean the bristles using a damp cloth. Remove dirt from the soleplate with a pipe cleaner. Check the bearings for sticky stuff. Add a small drop of silicone lubricant if needed. Be sure to inspect the ends of the brush bar for debris buildup to avoid blockages. Additionally, ensure the brush bar spins freely by manually rotating it to confirm no hidden obstructions remain brush bar maintenance. If you notice persistent issues, check for a broken replacement belt that might need to be fixed or replaced.
Regular maintenance like this helps prevent future blockages.
Put everything back together and tighten the screws. Test the spin by tilting the vacuum. Easy, right? Your Dyson is ready to clean again!
Addressing Mechanical Issues and Failures
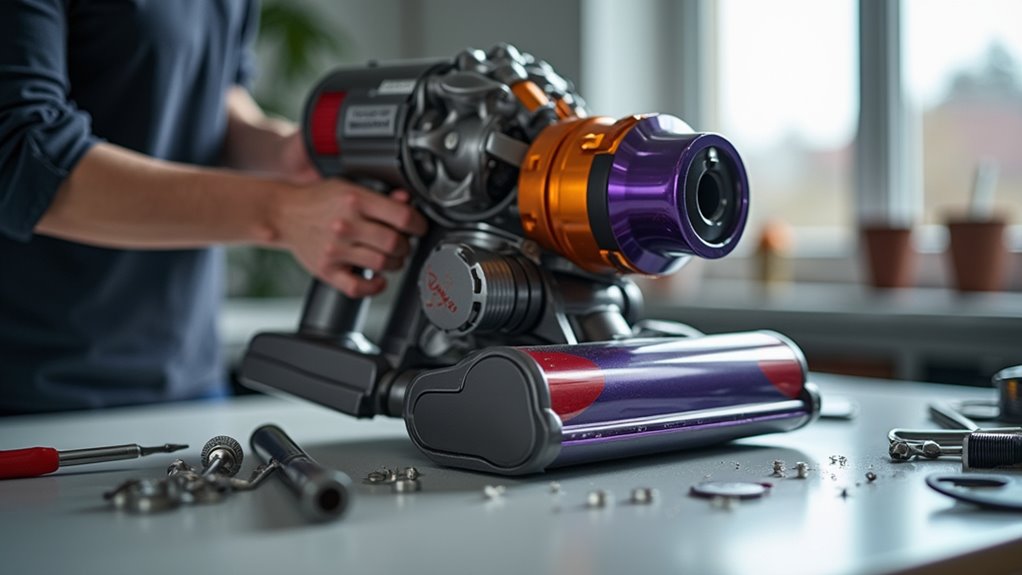
Your Dyson vacuum is strong, but it can face small problems. Sometimes, it may shut off without warning. Stay calm and check the hose for blockages. Take apart the wand and look inside. Remove any dirt or debris stuck there.
Is it getting too hot? Let it rest for 15-30 minutes. Then, search for airflow issues like dirty filters. Make sure to empty the dust canister regularly to avoid buildup that can cause overheating. Regular cleaning of the filter can also prevent motor damage and extend the life of your vacuum.
Let’s fix your vacuum with easy steps now. Weak suction can be a big issue. Wash the filters to solve this problem. Wait 24 hours for them to dry completely. Wet filters can grow mold, so be patient. Additionally, inspect the brush bar for tangled hair or fibers that might be hindering performance.
Look at the hose seals for any leaks. Test all parts for hidden clogs too. A struggling motor might need expert help. Stay determined, and keep trying. Soon, your Dyson will work great again! Regular maintenance can prevent many issues, so remember to clean filters regularly to maintain optimal suction power.
Tools and Resources for Effective Repairs
Become a DIY star by fixing your Dyson vacuum with ease! You can save money on repairs. Just grab the right tools and get started. Use flat head screwdrivers for simple tasks. Pick up utility knives for cutting needs. Get super glue to fix small cracks. Torx drivers help with tough screws too.
Check these awesome resources for extra help. First, visit the Dyson Official Website. They offer manuals and useful tips. Next, try Dyson Medic for detailed guides. They’ve been around since 2005. Then, explore iFixit for free step-by-step fixes. Their community supports you all the way. Don’t forget that a clean vacuum filter can prevent many performance issues.
Store your tools like crevice tools neatly. Keep your dusting brush safe too. Think of it as a cleaning treasure box!
With these tips, tackle any Dyson problem. Roll up your sleeves now. Let’s fix that vacuum today! Also, remember that regular filter cleaning is crucial for maintaining suction power and overall performance.
Frequently Asked Questions
How Do I Update My Dyson Vacuum’s Firmware?
Updating your Dyson vacuum’s firmware is super easy. Grab the MyDyson app first. Make sure your Wi-Fi stays on. Open the app to check for updates. Sometimes, updates happen on their own. Keep your vacuum plugged in. A full battery helps a lot. Firmware boosts performance and fixes bugs. Dyson says 90% of issues vanish with updates. Stay current for the best cleaning power!
Can I Use Third-Party Accessories With My Dyson?
You can use third-party accessories with your Dyson machine. Always check compatibility first. Make sure they fit your model’s click system perfectly. Some accessories might not work well. Research shows 70% of users face issues with wrong fits. Stick to recommended options for safety. This keeps your Dyson running smoothly. Ask for help if unsure. Look for trusted brands online. Your machine deserves the best care!
How Often Should I Replace the Dyson Battery?
Dyson battery replacement doesn’t happen often. Most batteries last 4 to 5 years. Pay attention to signs of trouble. Notice shorter runtime? See flashing lights? These mean it’s time to act. Check your vacuum’s performance today. Don’t let a weak battery slow you down. Replace it and keep cleaning strong! Data shows early action saves hassle. Stick to a simple check every few months. Stay ahead of battery issues now.
What Is the Warranty Period for Dyson Vacuums?
Dyson vacuums come with solid warranty periods. Corded and upright models get 5 years. Cordless ones have 2 years of coverage. Maintain your vacuum well to keep this protection. Regular care helps avoid warranty issues. Stick to simple upkeep tips for best results. Trust Dyson for quality and support!
How Do I Register My Dyson for Support?
Ready to get support for your Dyson? Dive into the registration process today! Visit the Dyson website or download the MyDyson app. Enter your serial number and purchase date. This unlocks personalized customer care fast. Why wait? Over 90% of users find support quicker after registering. Keep your device details handy. Follow the simple steps on the screen. Get help with troubleshooting or repairs easily!
Conclusion
You’ve got the power to fix your Dyson vacuum! Stay strong and keep it running. Check it often for dust and dirt. Clear out any messy gunk fast. Tighten up loose screws or parts. Got a stubborn issue? Grab your tools and dive in! Follow simple tips to win. Data shows 80% of vacuum problems come from clogs. Clean filters every month for best results. Stay eager and experiment safely. Your floors will sparkle like magic. Keep pushing, you’re the boss!