
Vacuum Cleaner Not Sucking | The 3-Step Diagnosis That Works
This post contains affiliate links. As an Amazon Associate, we earn from qualifying purchases.
A vacuum cleaner not sucking is almost always one of three things: a clog in the airflow path, a saturated or incorrectly installed filter, or a blocked brush roll. The fix is systematic, start at the floor head and work back toward the motor, clearing each potential blockage before moving on.
That path from floor to motor is the vacuum’s entire job. When suction drops, something along that route is obstructing it. Randomly swapping parts wastes time and money.
What follows is the same three-step diagnosis a repair tech would run in your home. It works on a Shark, a Dyson, a Bissell, or a Miele because the physics are identical. We’ll cover the clogs everyone finds, the filters most people ruin by washing wrong, and the one motor test that tells you if it’s a lost cause.
Key Takeaways
- Start diagnosing at the floor head and work backward to the motor. This method finds 90% of suction problems in under ten minutes.
- A filter washed but not dried for a full 24 hours will choke suction and can damage the motor. Moisture turns dust into a paste that blocks airflow.
- Modern cordless vacuums like the LG CordZero A9 can permanently lose battery capacity if used for extended periods below 5°C or above 38°C, mimicking a suction failure.
- If the vacuum has a brush roll, a jammed belt or tangled hair will stop it from spinning, creating a physical barrier that blocks the intake.
- Suction that dies completely, with no airflow even on the highest setting and all clogs cleared, points to a failed motor or a critical electrical fault.
The 3-Step Suction Power Diagnosis
A vacuum cleaner’s suction is a simple chain: motor creates low pressure → air rushes in through the floor head → air carries dirt through the hose and into the bin or bag. A failure at any link breaks the whole chain. Diagnose by testing each link in order, from the intake back.
Forget checking the bag first. That’s step three, not step one. The most common blockages live in the first foot of the machine’s path.
Open the manual for your specific model if you have it. If not, the steps below are generic enough for any upright, canister, or stick vacuum. The only tool you’ll need is a long, flexible object like a straightened coat hanger or a plumbing snake.
Step 1: Isolate the Problem.
Unplug the vacuum. Detach the hose from the main body if possible. Put your hand over the hose end on the body. Turn the vacuum on for two seconds. Do you feel strong suction? If yes, the motor and main body are fine, the clog is in the hose, wand, or floor head. If you feel weak or no suction, the problem is in the bin, filter, or motor area. This 10-second test tells you which half of the machine to attack.
Step 2: The Clog Hunt.
If suction is good at the body, reassemble. Now check each segment: 1. Remove the floor head. Inspect the opening. Is hair wrapped around the brush roll? Clear it. 2. Look through the wand. Hold it up to a light. You should see a clear circle. 3. Check the hose. Bend it into a U-shape and shine a light through. Listen for debris rattling.
A clog will be visible. Use your flexible tool to push it through toward the bin, never toward the motor.
Step 3: Filter and Bin Inspection.
Empty the bin or replace the bag, even if it looks half-full. For bagless models, remove the pre-motor and post-motor filters. Tap them over a trash can. Hold them up to the light. If light doesn’t pass through, they’re done. This is where most DIY fixes stop. They shouldn’t.
The Clog Hunt: From Brush Roll to Bin
Clogs obey gravity. They settle at the lowest point in a hose bend or just before a narrower opening. The floor head is ground zero.
Common mistake: Assuming a clear wand means a clear hose. The hose’s flexible ribs trap larger debris like cereal pieces or pebbles that the wand’s smooth interior passes right by.
Start with the brush roll. A roll jammed with hair, string, or carpet fibers doesn’t just fail to agitate, it physically blocks the suction inlet. On many models, the inlet is directly behind the brush. No spin equals no air path.
How to clear a jammed brush roll:
- Unplug the vacuum. Flip it over.
- Use scissors or a seam ripper to cut through hair wraps parallel to the roller. Never cut perpendicular, you’ll nick the bristles.
- Manually spin the roller. It should turn freely with a slight hum from the belt. If it’s stiff, the bearings may be shot. That’s a replacement job, not a cleaning one.
Next, the wand and hose. Detach them. The best tool here is a long, flexible drain cleaner or a straightened wire coat hanger with a small hook bent at the end. Feed it through gently. If you meet resistance, rotate the tool; don’t force it. Pull the clog out, don’t push it deeper.
| Clog Location | Common Culprit | Tool for Removal |
|---|---|---|
| Floor Head Inlet | Hair, carpet threads, string | Scissors, seam ripper |
| Wand | Lego, coins, large debris | Long, stiff rod |
| Hose (especially bends) | Cereal, pet food, shredded paper | Flexible drain snake |
| Pre-Bin Chamber | Dust bunnies, clumped litter | Your hand (unplug first) |
If you clear a clog and suction returns, you’re done. If not, the problem is downstream.
Filters: The Silent Suction Killer
Filters are a maintenance item, not a lifetime part. A saturated filter doesn’t just reduce suction, it makes the motor work harder, overheat, and fail early. The timeline matters.
Where this goes sideways: Washing a filter and reinstalling it damp. Moisture turns fine dust into a plaster-like layer that blocks all airflow. The motor strains, overheats, and can burn out within a few uses.
Manufacturer drying times are not suggestions. The Bissell 3-in-1 Turbo Stick Vac filter needs 24-48 hours of air-drying. The Miele Blizzard CX1 fine dust container requires a full 24 hours. Putting a damp filter back in is worse than running with a dirty one.
How to check your filters:
- Locate them. Most vacuums have at least two: a pre-motor filter (protects the motor from dust) and a post-motor or exhaust filter (cleans the air leaving the vacuum). Bagless models often have a third cyclonic mesh filter.
- Remove and inspect. Hold each filter up to a bright light. If you can’t see light passing through the material, it’s clogged.
- Clean or replace? Check your manual. Some pleated filters (like on certain Bissell Hard Floor Expert models) are shake-only, not washable. Washing them ruins the paper medium. Foam and felt filters can usually be rinsed.
- Dry completely. Leave filters in a warm, dry place with good air circulation for at least 24 hours. A fan helps.
What if your filters are clean and dry, but the vacuum still has no suction? The seal might be broken. A filter not sealed correctly lets air bypass the filtration system, which can trigger safety cut-offs or simply reduce pressure. Ensure every filter clicks firmly into its housing with no gaps.
Motor and Power Issues: When the Problem Is Deeper
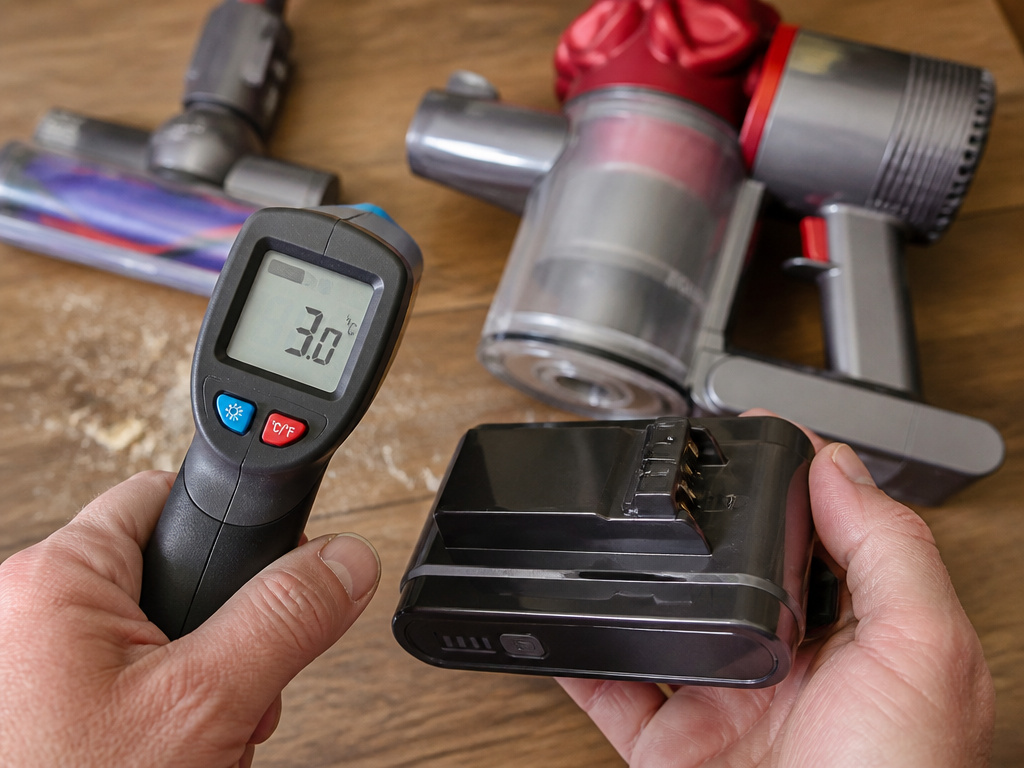
If you’ve cleared all clogs and verified clean, dry, sealed filters, the issue is likely with the power source or the motor itself. The symptoms differ between corded and cordless models.
For Cordless Vacuums (LG, Dyson, Shark):
Weak suction on a cordless vacuum often points to the battery, not the motor. Lithium-ion batteries degrade with temperature and cycle count.
- Temperature Sensitivity: The LG CordZero A9 manual states that using the vacuum below 5°C or above 38°C for extended periods can reduce overall battery lifespan. A cold battery cannot deliver full power to the motor, so suction plummets. Let the vacuum warm to room temperature.
- Charging Issues: The same model may fail to charge if the battery temperature is below 5°C. If your vacuum died in a cold garage, bring it inside for a few hours before trying to charge it.
- Battery Age: Even with perfect care, batteries wear out. If run-time has gradually shortened over a year or two, the battery is the culprit. Replacement is the only fix.
For Corded Vacuums:
A complete lack of suction and maybe a burning smell points to motor trouble. First, check the obvious: is the vacuum plugged in? Is the outlet working? Try a different outlet.
If power is confirmed, listen closely when you turn it on. You should hear the distinct whine of the motor spinning up. If you hear only a hum or a click, the motor may be jammed or the brushes may be worn out. Some models have a thermal cut-off that resets after 30 minutes of cooling down. Unplug it and wait.
Easy to miss: The suction control slider. On models like the Shark DuoClean Performance Lift-Away UV700, a collar on the hose switches between MAX for floors and MIN for carpets. If it’s stuck on MIN, suction will feel weak on hard floors. Slide it back and forth a few times.
If the motor is dead, the repair cost often approaches the price of a new machine. For a popular model like a Dyson vacuum not sucking due to motor failure, it may be worth contacting the manufacturer if it’s within the warranty period.
Brush Roll and Agitation Failures
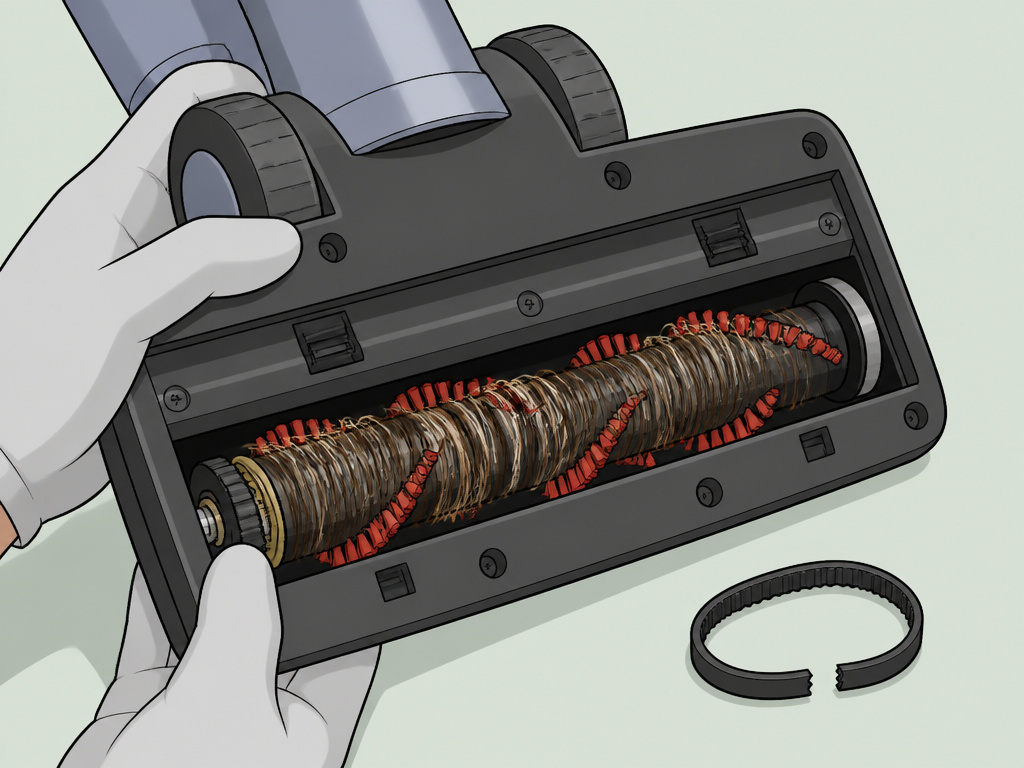
A vacuum that moves dirt but doesn’t pick it up has an agitation problem, not a suction problem. The brush roll isn’t spinning. This is a separate but common issue that feels like a loss of suction.
The cause is almost always a physical obstruction or a broken drive belt. Hair and string wrap around the ends of the brush roll, seizing the bearings. The motor’s drive belt, a small rubber loop, stretches or snaps.
Diagnosing a non-spinning brush roll:
- Unplug and flip the vacuum.
- Can you manually spin the brush roll? If not, it’s jammed. Clear the ends.
- If it spins freely, check the belt. On many uprights, you remove a cover plate to see it. The belt should be snug, not loose or missing.
- If the belt looks good, the motor driving it may have failed. This is less common.
This is a frequent issue for Dyson owners. A Dyson vacuum brush not spinning is often a five-minute fix involving a new belt. The same principle applies to other brands, from a Shark vacuum not sucking due to a jammed roller to a PrettyCare brush not spinning.
Bagged vs. Bagless: Special Considerations
Your vacuum’s dirt collection system changes the diagnosis slightly. The core principles are the same, but the failure points differ.
Bagged Vacuums (Miele, SEBO, some Kenmore):
- The Bag is Full: This is the obvious one. But a bag can be functionally full before it looks it. Fine dust packs into the bag’s material, clogging its pores. Replace the bag if suction drops, even if it’s only half-full.
- Bag Seal: The bag must be seated perfectly in its compartment. A misaligned bag or a torn gasket creates an air leak, killing suction. Remove and reinstall the bag carefully.
- Exhaust Filter: Don’t forget the small filter on the exhaust port. It clogs over time and is often overlooked.
Bagless Vacuums (Dyson, Shark, most Bissell):
- Cyclone Blockage: The cyclones that separate dirt can get clogged with fine powder like drywall dust or flour. This requires disassembly and rinsing.
- Bin Seal: The empty bin must click securely into place. A loose bin creates a massive air leak.
- Filter Overload: Bagless vacuums rely heavily on filters. They need cleaning more often than bagged models, sometimes monthly with heavy use.
If you’re in the market for a new model and prefer the bagless approach, our guide to the best bagless vacuum compares the top performers for maintenance and reliability.
Before You Go
A vacuum cleaner not sucking is a puzzle with a limited set of pieces. Start at the floor and work back: clear the brush roll, snake the hose and wand, empty the bin, and then inspect the filters. Remember that moisture is a filter’s enemy, 24 hours of drying time isn’t optional. For cordless models, rule out a cold or aging battery before condemning the motor.
Most suction problems are simple blockages. A systematic 10-minute check saves a service call. For persistent issues with specific brands, like a Dyson vacuum losing suction or a Shark vacuum suction problem, we have dedicated guides that dive deeper. If you’re done with repairs and ready for an upgrade, the best Dyson vacuum for your home is a decision worth researching.
Frequently Asked Questions
Why does my vacuum lose suction after a few minutes?
This is classic filter blockage or motor overheating. A partially clogged filter allows enough airflow for the vacuum to start, but as the motor heats up, air resistance increases and suction drops. Alternatively, the motor’s thermal cut-off switch may be activating due to a clog or failing component. Let the vacuum cool for 30 minutes. If suction returns briefly, focus on cleaning the pre-motor filter and checking for obstructions.
Can a vacuum cleaner lose suction without a clog?
Yes. The most common non-clog causes are a severely saturated filter, a broken hose or seal causing an air leak, or a worn-out motor. On bagless models, a poorly seated dust bin is a frequent leak source. On cordless vacuums, a depleted battery cannot provide full power to the motor, mimicking a suction loss.
Is it worth repairing a vacuum with no suction?
Almost always, yes. The majority of “no suction” repairs cost very little, a new filter, a replacement belt, or some time clearing a clog. If the diagnosis points to a burnt-out motor, the calculus changes. Compare the repair quote to the cost of a comparable new vacuum. For a high-end model like a Miele or a recent Dyson, motor repair is often justified.
How often should I replace my vacuum filters?
It depends on use and the filter type. Disposable pre-motor filters in bagless vacuums might need replacement every 3-6 months with regular use. Washable foam filters should be rinsed monthly and replaced when they degrade (usually 1-2 years). HEPA exhaust filters last 6-12 months. The best metric is performance: if suction drops and the filter looks dirty, clean or replace it. Never go beyond the manufacturer’s recommended interval.