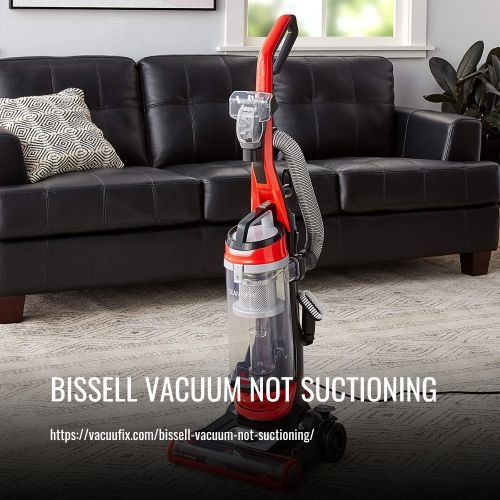
Bissell Vacuum Not Suctioning Picking Up? Here’s What to Do
This post contains affiliate links. As an Amazon Associate, we earn from qualifying purchases.
Are you frustrated with your Bissell vacuum not picking up dirt as it should? There could be several reasons for this issue, but don’t worry because we’ve got you covered in this article.
We’ll cover some common causes and easy solutions to get your Bissell vacuum back to its powerful suction. Read on to learn more about Bissell vacuum not suctioning and what to do about it.
Why Does Suction Matter in a Vacuum Cleaner?
Suction power is one of the most important features of a vacuum cleaner. It is the force that creates airflow, dislodges, and picks up dirt particles from carpets, floors, and upholstery. Without sufficient suction power, a vacuum cleaner would merely move dirt around instead of cleaning it up.
The suction power of a vacuum cleaner depends on the speed at which the fan spins. The faster the fan rotates, the stronger the suction power. However, other factors like the air pathway, filters, and attachments play a crucial role in determining suction performance.
When dirt is sucked up, it goes through the air pathway and filters, separating the dirt particles from the airflow. The dirt is then collected in the dirt tank or bag. Therefore, having clean filters and dirt tanks is essential for maintaining proper suction power.
Vacuum cleaners with clogged filters, overloaded dirt containers, or worn-out fans may cause a loss of suction power. The brush roll, foot suction, and suction inlet can also be affected by the hair, debris, and other dirt particles, leading to reduced suction power.
To keep your vacuum cleaner functioning correctly, it is recommended to clean the filters and dirt tanks from time to time. Use a bright flashlight to look through the air pathway and check if anything is blocking the airflow. If the problem persists, it is best to contact consumer care for assistance.
Overview of Reasons Why Your Bissell Vacuum May Not Be Suctioning Properly
A Bissell vacuum cleaner is a valuable cleaning tool that can help keep your home or office clean and free from dust and dirt. However, sometimes your vacuum cleaner may stop suctioning properly, which can make cleaning more challenging. Here are some of the most common reasons why your Bissell vacuum may not be suctioning properly.
1. Loss of suction:
This is one of the most common reasons why a vacuum cleaner may not be suctioning properly. It can be caused by factors such as clogged filters, damaged hoses, and worn-out fans.
2. Air filter:
A dirty air filter can also cause your Bissell vacuum to lose suction power. The air filter helps to trap fine dust and debris, preventing them from entering the motor. A clogged air filter can reduce the amount of air flowing through the vacuum, leading to a drop in suction.
3. Dirty filter:
Just like the air filter, a dirty filter can cause a loss of suction. As dirt and debris accumulate in the filter, the airflow through the vacuum is impeded, leading to poor suction.
4. Brush roll:
The brush roll helps to agitate the carpet fibers, making it easier for the vacuum to pick up dirt and debris. However, over time, the brush roll can become clogged with hair and other debris, reducing its effectiveness and causing a loss of suction.
5. Motor shaft:
The motor shaft connects the motor to the brush roll, and a worn-out motor shaft can cause the brush roll to stop turning, reducing the vacuum’s suction power.
Common Causes of Loss of Suction
A vacuum that is not suctioning properly can lead to frustration during cleaning tasks. There are several reasons why this can happen with your Bissell vacuum, and in this article, we will discuss the common causes of the loss of suction. Understanding the causes can help you troubleshoot the vacuum and prevent future problems. Read on to learn more.
Clogged Filters or Dirt Tank
A clogged filter or dirt tank in your Bissell vacuum can cause a significant decrease in suction power, giving you poor performance. If you notice that your vacuum cleaner is not suctioning correctly, it may be due to a clogged filter. Here are some possible causes and solutions:
Dirty Air Filter:
A dirty air filter can cause the vacuum to lose suction over time. To fix this issue, unplug the vacuum and remove the dirt tank. Look for any signs of buildup or clogs inside the tank or around the air filter. If the air filter appears dirty, wash it with warm water and mild detergent, and then rinse it thoroughly. Make sure to let it dry completely before replacing it.
Clogged Circular Filters:
The circular filters in your Bissell vacuum can become clogged with dirt and debris, affecting the suction power. Remove the filters and check for any buildup. If they are dirty, you can wash them with warm water, but make sure to let them dry completely before replacing them.
Clogged Dirt Tank:
The dirt tank can also become clogged with debris, affecting the suction power of the vacuum. Check the dirt tank for any signs of obstruction or accumulation of dirt. If you see any, clean the tank with warm water and mild detergent, and rinse it thoroughly.
Overloaded Dirt Container:
If the dirt container is overloaded, it can cause a decrease in suction power. Empty the container and try using the vacuum again. Remember not to overload the container, as it can cause clogging issues.
Dirty Pre-Motor and Post-Motor Filters:
Check the pre-motor and post-motor filters for any dirt buildup or clogs. If they are dirty, you can wash them with warm water, but make sure to let them dry completely before replacing them.
Overloaded Dirt Container
An overloaded dirt container can cause a loss of suction in your Bissell vacuum, interfering with its suction capacity. When the container is overloaded, the motor has to work harder, causing the machine to overheat. To fix this issue, you need to empty the vacuum’s dirt container.
To do this, first press the “Tank Release” button, remove the container and empty the debris over a garbage bin. Before replacing the container back in the vacuum, ensure that it is secure and that it sits correctly.
Brush Roll Issues
Brush roll issues can be a common problem in Bissell vacuums and can affect the vacuum’s suction power. If you are facing issues with your Bissell vacuum’s brush roll, follow these simple steps to address the problem:
1. First, remove the plastic lid on the bottom of your Bissell vacuum using a screwdriver and detach the brush roll.
2. Inspect the brush for hair and lint, and clean it if necessary.
3. Place the brush vertically on the ground and rotate it with one hand while pushing it to the floor with the other.
4. If the spinning motion is not smooth, replace the brush.
5. Check the foot hose on the back of the machine towards the bottom and remove any clogs with a broomstick.
6. Unblock the brush roll by removing it from your Bissell vacuum, using scissors to cut through tangled hair, removing debris clogging the bristle and the vacuum head, washing the bristles with warm water, and letting the roller dry.
Damaged Hose or Nozzle Attachment
If you’re experiencing reduced suction power on your Bissell vacuum, one possible culprit could be a damaged hose or nozzle attachment. Here are some steps to take to address this issue.
First, turn off and unplug the vacuum. Check the hose for any cracks, holes, or clogs. If you don’t find any visible damage or blockage, move on to the nozzle attachment.
Inspect the nozzle attachment closely for any visible damage such as cracks, tears, or other signs of wear and tear. If you see any damage, it’s time to replace the part. You can easily find replacement parts on Amazon or Bissell’s website.
If there is no visible damage, detach the nozzle from the hose and check the inlet for any clogs or blockages. Use a flashlight to inspect thoroughly and clear out any debris or dirt that might be blocking the inlet. Once the inlet is clear, reattach the nozzle and turn the vacuum power on.
Poor Power Supply or Motor Pulley Malfunction
If your Bissell vacuum cleaner is not suctioning properly, one of the possible causes could be poor power supply or a malfunctioning motor pulley. Here’s how to address these issues:
Firstly, check that the vacuum cleaner is receiving adequate power supply by ensuring that the power cord is firmly plugged into a working outlet. Sometimes, a loose connection or a faulty outlet can result in poor power supply and cause a loss of suction.
Next, inspect the motor pulley to see if it is functioning properly. A worn-out or damaged motor pulley can also cause a loss of suction. Look out for any unusual noises or smells that might indicate a malfunctioning motor. In addition, check if the motor is overheating, which can also result in a loss of suction.
If you suspect that the motor pulley is not functioning correctly, you may need to replace the part. Contact Bissell’s consumer care or check their website for replacement parts or any additional support you may need.
Worn Out Motor Shaft
If you’ve tried cleaning your filters and checking for clogs, but you’re still experiencing a loss of suction with your Bissell Vacuum, you may have a worn-out motor shaft that needs to be addressed.
To replace the motor shaft, you’ll need to disassemble the vacuum and remove the motor. This may require some technical expertise, so if you’re not comfortable doing it yourself, it’s best to contact Bissell’s consumer care for assistance.
Once the motor is removed, carefully remove the old motor shaft and replace it with a new one. This replacement part can be obtained from Bissell’s website or through their customer service.
After replacing the motor shaft, reassemble the vacuum and test it to ensure that you have proper suction. This should fix the loss of suction caused by a worn-out motor shaft and extend the life of your Bissell Vacuum.
Dirty Pre-Motor and Post-Motor Filters
Dirty Pre-Motor and Post-Motor Filters: Why Cleaning and Replacing Them is Important for Proper Suction in Your Bissell Vacuum
When was the last time you cleaned or replaced the pre-motor or post-motor filter in your Bissell vacuum? These filters play a crucial role in maintaining proper suction and preventing overheating, which can lead to motor damage and a shorter lifespan for your vacuum.
The pre-motor filter prevents dust and debris from entering the motor and causing damage, while the post-motor filter removes any excess dust from the air before it’s expelled back into the room. Over time, these filters can become clogged and less effective, resulting in a loss of suction and reduced cleaning power.
To ensure proper suction and extend the life of your vacuum, it’s important to clean the pre-motor and post-motor filters regularly. Bissell recommends cleaning washable filters every 3 months, or once a month for heavy use.
To clean the filters, first, turn off and unplug the vacuum. Remove the dirt container and locate the filters – the pre-motor filter is often located near the motor, while the post-motor filter is typically in the dirt container. Remove each filter and rinse them with warm water and a mild detergent until the water runs clear. Allow the filters to air dry for at least 48 hours before reinserting them into the vacuum.
How to Troubleshoot Your Bissell Vacuum for Loss of Suction
A loss of suction in your Bissell vacuum can be frustrating, especially when it hinders your cleaning efforts. However, before you consider buying a new vacuum, it’s important to troubleshoot and identify the root cause of the loss of suction. This guide provides simple steps for troubleshooting and solving this common issue.
Step 1: Check the Clog Status and Empty the Dirt Tank if Needed
The first step to troubleshooting loss of suction in your Bissell vacuum is to check the clog status and empty the dirt tank if needed. To do this, start by pressing the “Tank Release” button on your vacuum and removing the dirt tank from the machine.
Once you have removed the dirt tank, check to see if it is overloaded with debris. If the dirt tank is full, empty it before proceeding further. It is important to empty the dirt tank periodically to prevent it from getting overloaded and affecting your vacuum’s suction power.
Ensure the dirt tank is properly aligned and sits correctly on the machine before reattaching it. Improper placement of the dirt tank may cause loss of suction in your vacuum.
After checking the dirt tank, remove the hose and inspect it for any cracks, holes, or clogs. If you notice any damage to the hose, replace it immediately. To clear potential clogs from the hose, use a broomstick handle to push the debris out of the hose.
Next, inspect the suction inlet for any debris or clogs. To do this, remove the dirt tank and check the inlet for any potential obstructions. Clean the inlet thoroughly if there is any debris present.
Lastly, check all the filters of your vacuum for any debris or stones that might be stuck inside. If you notice any debris, clean the filters using mild detergent and warm water. It is recommended to clean the filters time to time to ensure proper suction of your Bissell vacuum.
Step 2: Inspect the Brush Roll and Cover
After checking the suction inlet of your Bissell vacuum for any potential obstructions, it is time to inspect the brush roll and cover to ensure proper suction. Follow these simple steps to inspect the brush roll and cover of your Bissell vacuum cleaner:
1. First, unplug the vacuum and lay it on its back to reveal the brush roll.
2. Use a Phillips screwdriver to remove the brush cover and carefully slide off the belt to gain access to the brush.
3. Check for any hair or debris in the brush housing area and remove it. Any excess hair or debris can cause the brush to become tangled, resulting in a loss of suction power.
4. Inspect the brush roll for any signs of damage by gently spinning it with your hand. Look for any visible signs of wear and tear, such as broken bristles or cracks. If any damage is found, replace the brush roll immediately.
5. Finally, check the cover for any signs of damage or obstruction that may be affecting the suction power. Clean the cover thoroughly if there is any debris present.
By following these steps, you can ensure that your Bissell vacuum’s brush roll and cover are properly functioning and not causing any loss of suction.
Step 3: Examine the Hose, Wand, and Nozzle Attachments
Step 3: Examine the Hose, Wand, and Nozzle Attachments
In addition to the brush roll and cover, it’s also important to inspect the hose, wand, and nozzle attachments when troubleshooting loss of suction in your Bissell vacuum cleaner.
Start by examining the wand for any cracks or damage that may be affecting its ability to maintain proper suction. If any cracks or damage are found, replace the wand immediately to avoid further complications.
Next, inspect the nozzle attachments for any blockages or clogs that could be causing the loss of suction. Make sure to check all crevices and corners of the attachments for any dirt or debris buildup.
Ensure that all connections between the wand, hose, and nozzle attachments are secure and that there are no leaks that may be affecting proper suction.
Check the wand and hose for any kinks or bends that could be obstructing airflow and adjust as necessary to ensure maximum suction power.
By examining these key components of your vacuum cleaner, you can quickly troubleshoot and resolve loss of suction issues. Don’t overlook these important steps in your maintenance routine to keep your Bissell vacuum cleaner running smoothly.
Conclusion:
Maintaining proper suction in your Bissell vacuum cleaner is crucial for effective cleaning. Various factors such as clogged filters, obstructions in the hose or nozzle, and damaged components like the wand or brush roll, can contribute to the loss of suction.
To troubleshoot a vacuum not suctioning properly, ensure to check for these common causes using the step-by-step solutions provided in the previous sections. If all attempts to fix the issues fail, it is advisable to contact Bissell consumer care for professional assistance or consider purchasing a new machine.
Remember, by following these solutions, you can prevent your Bissell vacuum cleaner from losing suction power and optimize its performance for a cleaner home environment.