
Hoover Vacuum Battery Not Working? Diagnostic & Fix Guide
This post contains affiliate links. As an Amazon Associate, we earn from qualifying purchases.
A Hoover vacuum battery not working points to one of three failures: a faulty charger connection, a battery drained by long storage, or a dead cell pack. The fix is a step-by-step check of the power source, charger, and battery terminals, ending with a factory replacement if the cell is under six months old or displays error E2.
That six-month window matters. Hoover’s own manuals state the battery is only guaranteed for half a year from purchase. After that, you pay for the new pack. The diagnostic process exists to separate a simple plug problem from a several-hundred-dollar battery replacement.
What follows: a start-to-finish diagnostic tree, the exact error codes that mean “stop using it,” and the one storage mistake that permanently kills a lithium-ion pack in under a year.
Key Takeaways
- The battery in most Hoover cordless models carries only a 6-month guarantee; after that, replacement cost falls on the owner.
- An error code E2 on models like the HF9 signals a battery fault requiring immediate removal and service.
- Long-term storage (over six months) without a partial charge can permanently disable a battery, as per Hoover’s troubleshooting guides.
- Always use only the supplied Hoover charger; third-party chargers may not communicate correctly with the battery management system.
- A warm charger is normal during charging, but a cold charger indicates no current is flowing.
Step-by-Step Diagnostic: From Plug to Battery
Start with the simplest possibility and move inward. Most “dead battery” cases are just a missed connection.
First, verify the outlet and the charger. Plug a lamp or phone charger into the same wall socket. If the lamp works, the issue isn’t your house power. Next, inspect the Hoover charger cable for any kinks, cuts, or damage to the plug. A damaged cord needs replacement by an authorized service engineer—do not attempt a repair.
Confirm the charger is seated and the indicator lights up. Plug the charger into the vacuum’s port firmly. On most models, a red LED will glow on the charger body or the vacuum itself. The Hoover Freedom FD22G manual specifies the light glows red during charging and turns blue when full. No light at all means no power is reaching the battery.
The part nobody mentions: The charger should feel slightly warm to the touch after 30 minutes. If it stays stone cold, the charger itself is likely dead or not communicating with the battery.
Check the physical battery connection. Turn the vacuum over and locate the battery release catch. Press it and slide the battery pack out. Look for any debris, corrosion, or bent terminals in the vacuum’s battery compartment and on the battery contacts. Wipe the metal contacts clean with a dry cloth and reseat the battery until it clicks firmly into place. Try charging again.
| Step | What to Check | If It Fails |
|---|---|---|
| 1. Power Source | Wall outlet with another device. | Use a different, known-good outlet. |
| 2. Charger & Cable | Visible damage, indicator light. | Order a genuine Hoover replacement charger. |
| 3. Battery Connection | Clean, debris-free terminals. | Clean contacts with isopropyl alcohol and dry cloth. |
| 4. Charger Behavior | Warmth after 30 mins, correct LED color. | A cold charger indicates a fault in the charger or battery. |
Decoding the Lights and Error Codes
Hoover cordless vacuums communicate through indicator lights and, on newer models, an LED display. The colors and flashes are a direct message about battery health.
Learn your model’s light language. A solid red light typically means charging is in progress. A solid blue or white light means the battery is fully charged. On the Hoover H-FREE 500, the battery indicator shows white (70-100% charge), blue (40-70%), red (10-40%), and blinking red (below 10%). If your vacuum shows a solid light but won’t power on, the issue may be with the motor or switch, not the battery.
Error codes are critical. Modern models like the Hoover HF9 have an LED screen that displays specific fault codes.
Error code E2 indicates a battery fault. The HF9 manual instructs you to immediately switch off the product, remove the battery, and contact a Hoover service centre. Continuing to use a vacuum with an E2 code can be unsafe.
Other common codes include E03 for an incorrectly assembled nozzle window and E05 for a general blockage. These error codes are your first clue to whether the problem is truly the battery or another component. If your Hoover vacuum lights are flashing in a specific pattern, note the sequence—it’s a more precise diagnostic than a simple “no power.”
The Two Most Common Battery Killers
Outside of simple failure, two specific behaviors account for most premature battery deaths: using the wrong charger and neglecting the battery during storage.
Using a non-Hoover charger is a gamble. The supplied charger is double-insulated and matched to the battery’s voltage and charging profile. A third-party charger might not provide the correct voltage, or it may lack the proper handshake with the battery’s management system. This can lead to undercharging, overcharging, or no charging at all. The Hoover Freedom manual explicitly states: “Use only the original charger supplied with the appliance.”
Long-term storage drains a battery to zero—permanently. This is the silent killer.
Where this goes sideways: Storing a vacuum with a fully depleted battery for over six months. The Hoover H-FREE 200 troubleshooting guide states: “Batteries cannot be charged. This may be a result of very long storage periods (over half year).”
Lithium-ion batteries have a small self-discharge rate. If left in a drawer or closet for a year, the charge can drop so low that the battery’s protection circuit permanently disables it for safety. The fix is a battery replacement. For long storage, charge the battery to about 50%, remove it from the vacuum, and store it in a cool, dry place.
When a Hoover Battery Is Truly Dead
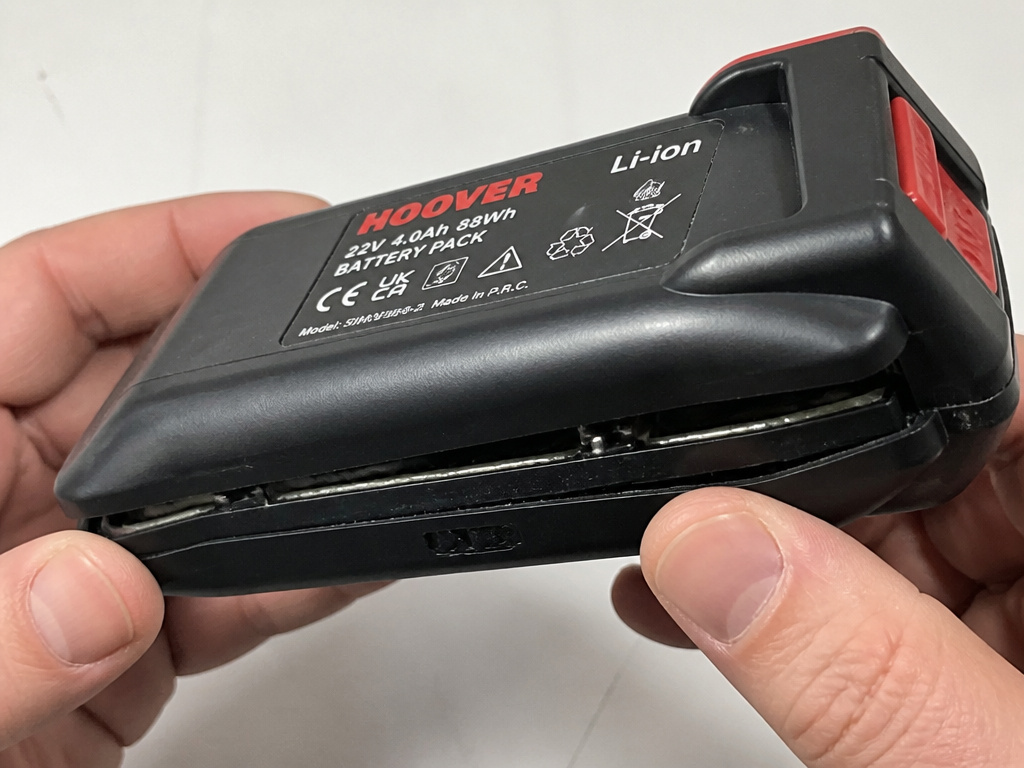 If you’ve ruled out the charger, connections, and storage issues, the battery itself is likely faulty. Here’s how to confirm it and what to do next.
Perform a cross-test if possible. If you have access to a second, known-good Hoover battery of the same model (e.g., the B001 pack for the Freedom series), try it in your vacuum. If the second battery works perfectly, your original battery is dead. Conversely, try your suspect battery in another compatible vacuum. If it fails there too, the diagnosis is confirmed.
Look for physical signs of failure. Remove the battery and inspect it carefully. While rare, a severely failed lithium-ion cell can swell, causing the plastic casing to bulge or distort. Never use a swollen battery. It is a fire risk and should be disposed of immediately at a proper recycling station.
Understand the warranty reality. This is the most important financial spec. * H-FREE 100/200/500 Series: 6-month battery guarantee from date of purchase. * HF9 Series: 2-year battery guarantee. * Freedom Series: Refer to your specific manual; typically aligns with the 6-month policy.
The guarantee language is clear: after the period ends, “the customer is liable for the cost of a new battery.” If your vacuum is within this window and the battery fails, contact Hoover customer service with your proof of purchase. If it’s outside the window, you’re buying a new pack. This makes cordless vacuum battery care a direct money-saving practice.
How to Replace a Hoover Cordless Vacuum Battery
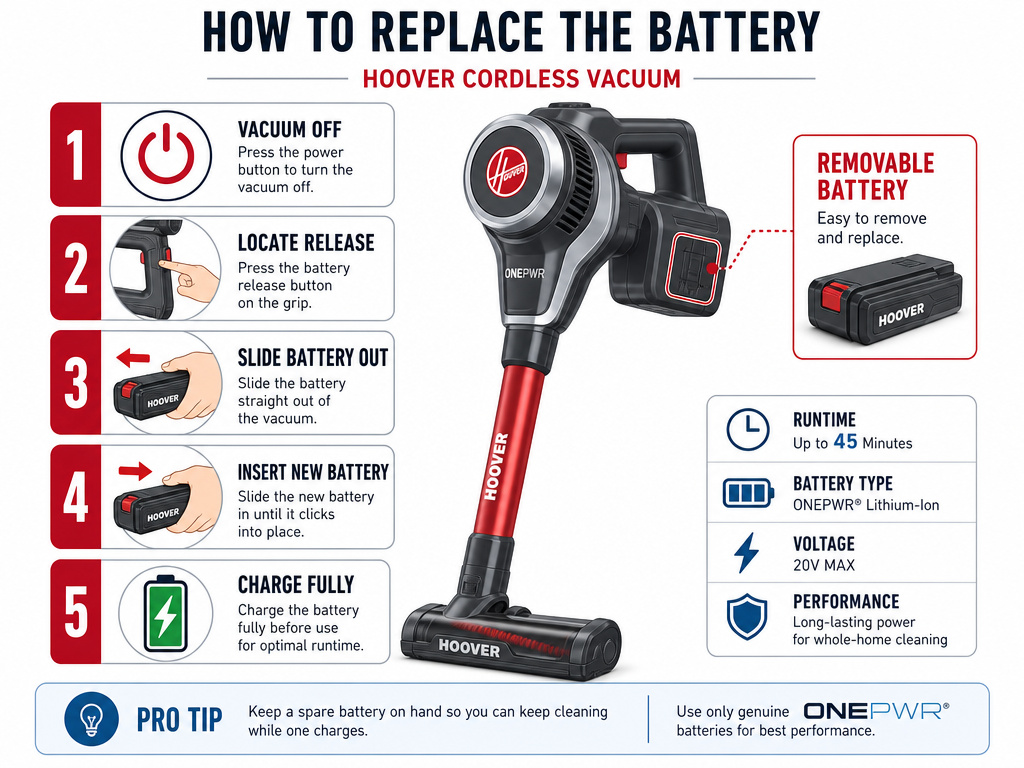 Replacing the battery is a straightforward, tool-free process. Always purchase a genuine Hoover replacement pack for safety and compatibility.
- Ensure the vacuum is off and unplugged. Never remove the battery while the charger is connected.
- Locate the battery release mechanism. On most stick models, this is a button or latch on the underside of the handgrip or main body.
- Press the release and slide the battery out. Apply firm, even pressure. It should slide straight out of its compartment.
- Insert the new battery. Align the contacts and slide the new pack in until it clicks securely into place.
- Charge fully before first use. Consult your manual for initial charge time—it can be up to 24 hours for a new battery in some series.
Genuine batteries ensure the correct voltage, capacity, and safety circuitry. A non-genuine pack might not fit perfectly, could overheat, and will almost certainly void any remaining warranty on your vacuum. For a broader look at your options, our reviews of the best Hoover cordless vacuums compare battery performance across models.
Maximizing Your New Battery’s Lifespan
A new battery is a significant investment. These habits will extend its service life from months to years.
- Avoid full discharges. Try to recharge the vacuum before the battery is completely dead. Lithium-ion cells degrade faster when routinely drained to zero.
- Store it partially charged. If you won’t use the vacuum for a month or more, charge the battery to about 50% and remove it from the vacuum.
- Keep it cool. Never charge the battery in temperatures above 37°C (98°F) or below 0°C (32°F). Avoid leaving the vacuum in a hot car.
- Maintain the vacuum. A clogged filter or full dust cup makes the motor work harder, draining the battery faster. Regularly empty the cordless vacuum and clean the filters to reduce strain.
- Use the right mode. Don’t default to max power on hard floors. Using a lower power setting or automatic mode reduces drain and extends your vacuum runtime per charge.
These steps apply to any cordless vacuum battery, not just Hoover. They’re the difference between replacing the pack every 18 months and getting three or four years of steady service.
Frequently Asked Questions
Why does my Hoover vacuum run for only 2 minutes?
This is almost always a sign of a deeply depleted or failing battery. The battery management system detects insufficient voltage and shuts down to protect the cells. It can also happen if the battery is extremely cold. Let the vacuum warm to room temperature and give it a full, uninterrupted charge. If the problem persists, the battery is likely at the end of its life.
Is the Hoover battery covered under warranty?
It depends entirely on your specific model. Most Hoover cordless vacuum batteries are guaranteed for only 6 months from the date of purchase, as stated in manuals for the H-FREE 100, 200, and 500 series. The newer HF9 series has a 2-year battery warranty. Always check your manual and have your receipt ready when contacting service.
What does it mean if the charger light stays red?
Charger light that stays red for an excessively long time (e.g., over 12 hours) indicates the battery is not accepting a full charge. This could be due to a faulty battery, a bad charger, or an extremely cold environment. Try charging at room temperature. If the light never turns blue/white, the battery is probably dead and needs replacement.
Can I use a different brand’s charger for my Hoover?
No. Hoover explicitly instructs users to “use only the original charger supplied with the appliance.” Third-party chargers may have different voltage, amperage, or communication protocols. Using one can result in improper charging, battery damage, or even a safety hazard. Always buy a genuine Hoover replacement charger.
Before You Go
A non-working Hoover battery usually comes down to a bad connection, a dead charger, or a battery killed by time or neglect. The diagnostic path is clear: check the outlet, inspect the charger and its light, clean the battery contacts, and understand your model’s error codes. Remember the 6-month guarantee clock is ticking from the day you buy it.
If the battery is gone, replacement is a simple slide-out, slide-in process—just buy the genuine Hoover part. To avoid a repeat, charge it before it’s dead, store it partially charged, and keep the rest of the vacuum clean. That’s how you turn a battery from a disposable item into a long-term component.