
The Correct Way to Empty Your Hoover Cordless Vacuum Cleaner
This post contains affiliate links. As an Amazon Associate, we earn from qualifying purchases.
To empty a Hoover cordless vacuum, press the dust cup release button, remove the bin over a trash can, and empty it. Then, remove the filter, wash it in lukewarm water, and let it air dry for a full 24 hours before reassembly. Skipping the dry-out clogs the filter with damp debris and can burn out the motor within weeks.
That 24-hour dry time isn’t a suggestion. It’s printed in the Hoover Freedom FD22G manual because a damp filter acts like a sponge for the next load of dust. The vacuum has to work twice as hard to pull air through the wet mesh, which strains the battery and overheats the motor. You get weak suction today, and a repair bill next month.
What follows: the exact release buttons for three common Hoover cordless lines, the one filter-washing mistake that voids warranties, and what to do when the bin won’t snap shut. You’ll also see why some models demand you call customer service instead of opening them yourself.
Key Takeaways
- The exhaust filter must dry for 24 hours after washing. Reinstalling it damp is the fastest way to lose suction and overwork the motor.
- Always use lukewarm water only on Hoover filters. Hot water or detergents melt the fine mesh and will void your warranty.
- For the Hoover ONEPWR Dust Chaser series, do not attempt to open the unit if it’s been damaged or dropped. The manual states it contains no serviceable parts, you must call their service line.
- If your vacuum has been in storage for over six months and the battery won’t charge, the issue is likely battery self-discharge. Contact Hoover support for a replacement; forcing a charge can damage the circuitry.
- Empty the dust cup after every use or when it reaches the max fill line. Letting it overfill blocks the airflow path and makes the entire job harder.
What Model of Hoover Cordless Vacuum Do You Have?
Your first step is identification. The release mechanism for the dust container isn’t universal across Hoover’s cordless lineup. Using force on the wrong part can break a plastic latch.
Hoover groups its cordless models into a few main families. The Hoover ONEPWR series often has a more integrated design, sometimes with a bagless canister that detaches from the main body with a single button. The Hoover Freedom and Hoover Air lines typically feature a clear, cyclonic dust cup that slides forward from the handheld unit. Older Hoover Capsule or Unplugged models might have a bin that pivots open from the bottom.
Where this goes sideways: Assuming all dust cups release the same way. Pushing on a decorative seam instead of the actual release button can crack the housing. That crack then leaks fine dust back into the motor on every use.
Check for a button labeled with an open trash can icon or the word “Empty.” It’s usually on the back or top of the handheld section. If you don’t see it, your model might use a slide latch or a simple pull-to-release action. The product manual is the final word, search online for your model number if the original is lost.
| Model Family | Common Release Action | Visual Cue |
|---|---|---|
| Hoover Freedom / Air | Press button, slide bin forward | Button on top rear of handheld unit |
| Hoover ONEPWR | Squeeze latches or press large button | Latches on sides of canister |
| Hoover Capsule / Unplugged | Press bottom release, pivot bin open | Lever or button under the cyclone |
The Core Steps for Most Hoover Cordless Models
Once you’ve found the release, the process is similar across bagless Hoover cordless vacuums. The goal is to get the dirt out without letting it get back in.
- Turn the vacuum off and remove it from the charger. This is a safety must. You don’t want the motor accidentally engaging while your fingers are near the brush roll or intake.
- Hold the vacuum over a trash can. Do this indoors. A gust of wind can blow the fine dust you’re trying to discard right back into your face and the room.
- Press the dust cup release button or lever. You’ll feel a click. On a Hoover Freedom model, this is often a button you press down while pulling the bin forward.
- Remove the entire dust container. Some models let you open a flap while the bin is still attached; others require you to detach the whole unit. Take it off completely for a thorough empty.
- Empty the contents into the trash. Tap the bin gently against the inside of the trash can to dislodge clinging debris. For stuck-on hair or dust, use your fingers or a dry brush, never use water on the main bin unless the manual explicitly says you can.
- Close the dust cup flap and reattach the bin. Listen for a solid click. If it doesn’t seat fully, you’ve left an air leak that will kill suction. Check for obstructions in the seal.
This cleaner is supplied with a double insulated battery charger which is only suitable for insertion in a 230V (UK 240V) socket outlet. Plug the charger in to suitable socket outlet and connect the power cord connector to the DC socket on the appliance. When charging the appliance, the power switch must be off.
The step everyone rushes is reassembly. A bin that isn’t locked perfectly straight will wobble loose after a minute of vibration. That leak makes the vacuum scream as it tries to pull air from the room instead of from the floor.
The Non-Negotiable Filter Maintenance (This Is Where Suction Lives)
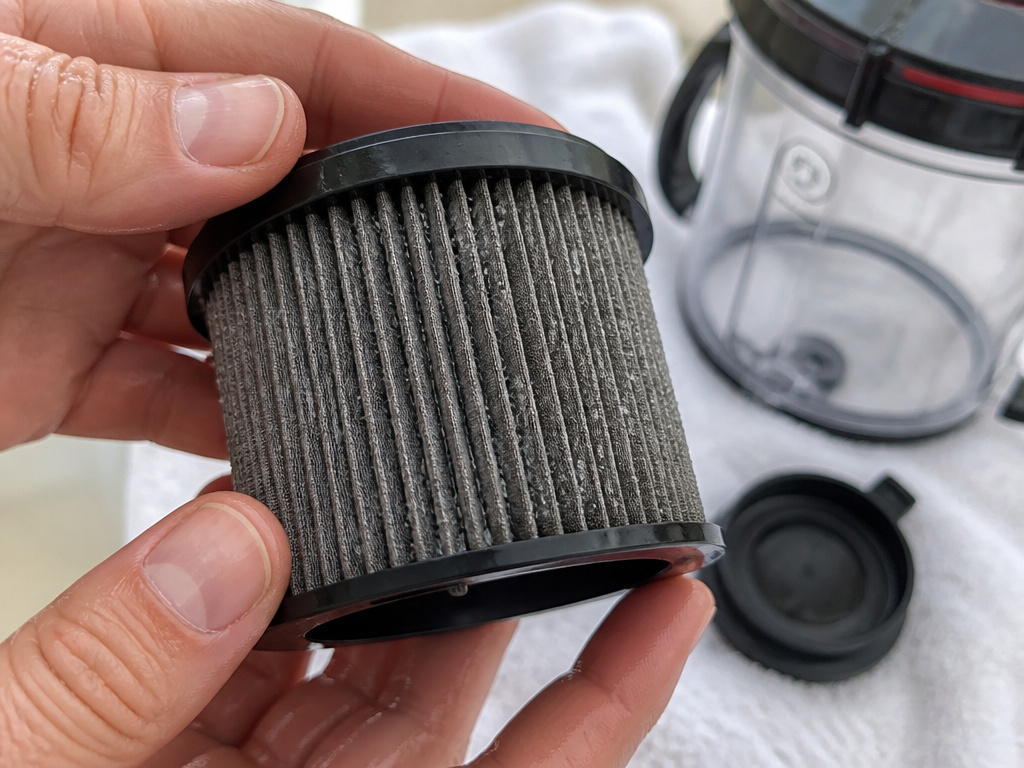 Emptying the bin is only half the job. The filter is what keeps dust out of the motor, and it clogs long before the bin looks full. Hoover’s manuals are unanimous: wash the filter monthly with lukewarm water and let it dry for 24 hours.
For a Hoover Freedom FD22G, the process is specific. You must remove the mesh filter and the exhaust filter. The exhaust filter is the final barrier before the motor, and the manual mandates a 24-hour dry time after washing. Put it back damp, and you’re feeding the motor humid, dense air.
Here’s how to handle the filter on a typical model: * Remove the dust bin as described above. * Locate the filter assembly, usually behind or inside the bin. * Twist the filter counterclockwise or pull it straight out, following the arrows. * Rinse it under a gentle stream of lukewarm water. Don’t scrub. * Shake off excess water and place it on a clean towel in a well-ventilated area. * Wait. A full day.
Common mistake: Washing filters with hot water or detergent. Hot water warps the plastic frame and can melt the HEPA media. Detergent leaves a residue that actually attracts more dust. Both moves void the warranty because they damage the part Hoover relies on to protect the motor.
Why does the dry time matter so much? A damp filter has smaller air passages. The vacuum’s motor has to spin faster to pull the same amount of air, drawing more power from the Hoover vacuum battery and generating more heat. Over weeks, that extra heat degrades internal plastic components and the motor brushes wear down prematurely. Your runtime drops, and the vacuum sounds strained.
What Happens If You Skip the Filter Dry-Out?
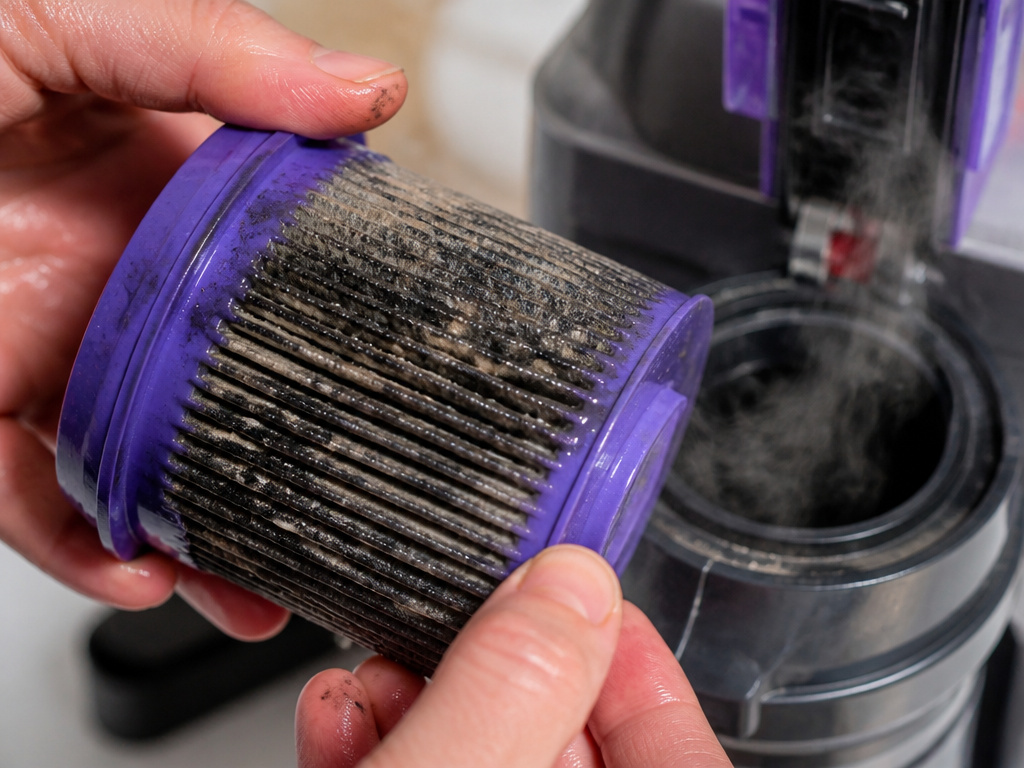 You’ll know within two cleaning sessions. The first sign is a high-pitched whine from the motor as it strains against the restricted airflow. Suction drops noticeably, especially on carpets. The vacuum might overheat and shut off automatically to protect itself.
The long-term damage is worse. Trapped moisture in the filter encourages mold and mildew growth inside the filter chamber. You’ll eventually smell a musty odor when the vacuum runs. That mold spores are then blown back into your home’s air. Furthermore, constant strain can lead to early Hoover battery issues, as the power system is forced to deliver peak current more often.
If you’ve already put a damp filter back in, take it out now. Let it dry completely, even if it means leaving the vacuum disassembled overnight. Running it wet for even one cycle packs the filter with a pasty layer of dust that never truly comes clean.
Handling Special Cases and Stubborn Problems
Not every empty goes smoothly. Sometimes debris blocks the pathway, or a latch won’t engage.
The bin is full, but nothing comes out.
A dense clump of hair and dust is likely lodged in the neck of the bin or the inlet. Don’t shake the vacuum violently. Detach the bin and use a long, flexible object like a straightened coat hanger (carefully) to poke through the inlet from both ends. For a Hoover pet vacuum, this is a weekly occurrence, long hair wraps into a plug.
The dust cup won’t lock back into place.
Check the filter. If it’s misaligned or not fully seated, it will prevent the bin from closing. Remove the filter, reseat it properly, and try again. Also, inspect the bin’s seal for a stray piece of debris, like a staple or a small rock.
A weird smell comes out when vacuuming.
You have a moldy filter or debris trapped in the hose or brush roll. Wash the filter properly and let it dry. Check the hose for blockages and clear the brush roll of wound hair and threads. For persistent smells, some Hoover cordless models have a washable pre-motor filter that often gets missed.
Worth knowing before you start: The Hoover ONEPWR Dust Chaser manual explicitly states the unit “contains no serviceable parts.” If it has been dropped, damaged, or exposed to water, you must call their customer service line. Forcing it open voids all coverage and risks damaging sealed components.
The One Cleaning Step That Applies to Every Model
Regardless of your Hoover, stick, handheld, or upright, there is a universal rule. Always clear the brush roll after vacuuming high-pile carpets or areas with long hair. Turn the vacuum off, flip it over, and remove any wound fibers.
A bound brush roll creates drag. The motor works harder, the battery drains faster, and the belt can stretch or snap. It takes thirty seconds and prevents the most common mechanical failure in cordless vacuums.
For best Hoover cordless vacuum performance, make this part of your routine. Empty the bin, check the filter, clear the brush roll. Do those three things, and the machine will last years longer than the average neglected unit.
Frequently Asked Questions
Can I use my Hoover cordless vacuum without the filter?
No. Never run any Hoover bagless vacuum without its filter. The filter’s job is to stop fine dust from entering the motor chamber. Running without it will suck abrasive dust directly into the motor bearings and electrical components, causing irreversible damage within hours. The manuals for the Freedom and Capsule models explicitly warn against this.
How often should I empty my Hoover cordless vacuum?
Empty the dust cup after every use or whenever you see debris reach the “max fill” line. For light weekly cleaning, that might mean every other session. If you’re using a Hoover pet vacuum or cleaning up a major spill, empty it immediately after. A overfull bin restricts airflow completely, causing the motor to overheat.
Why is there still dust in the air after I empty it?
You’re likely emptying it too aggressively or in a breezy area, causing fine dust to become airborne. Always empty the bin slowly and directly into a trash bag, preferably holding the bin inside the bag. Also, if your filter is old, damaged, or not seated correctly, it can allow dust to bypass it and be blown out the exhaust.
My vacuum’s suction is weak even after I empty it. What’s wrong?
The problem is almost always the filter. It is either still damp from washing, needs a wash, or is damaged and needs replacement. A clogged filter is the number one cause of lost suction. Second, check for a blockage in the hose, nozzle, or brush roll. Finally, inspect the bin seal to ensure it’s creating an airtight closure.
What do I do with a Hoover cordless vacuum that won’t charge?
First, ensure you’re using the correct charger and that the outlet works. If the vacuum has been in storage for over six months, the lithium-ion battery may have self-discharged too deeply. The Hoover Freedom manual notes that batteries cannot be charged after “very long storage periods (over half year)” and to contact customer service for a replacement. For other Hoover cordless vacuum battery problems, check our dedicated troubleshooting guide.
Before You Go
Emptying a Hoover cordless vacuum isn’t just about dumping dirt. It’s a maintenance check that keeps the motor cool, the battery healthy, and your air clean. The 24-hour filter dry time is the rule most owners break, and it’s the one that costs them a working vacuum a year later.
Stick to lukewarm water for the filter. Clear the brush roll every time. And if you have an ONEPWR model that’s taken a hit, put down the screwdriver and call the pros. Your future self, and your vacuum, will thank you.