How To Clean Bissell Vacuum
This post contains affiliate links. As an Amazon Associate, we earn from qualifying purchases.
Cleaning your Bissell vacuum is simple and ensures optimal performance. Start by unplugging the device and emptying the dustbin completely to maintain strong suction. Next, check the tubes for clogs, rinse the pre-motor filter under warm water with mild soap, and let it dry for 24 hours. Tap the post-motor filter over a trash bin to remove dirt without water, then reassemble everything securely and test it. Stay tuned for additional tips and detailed guidance later in the article.
Essential Facts in 30 Seconds
Key Takeaways for Cleaning a Bissell Vacuum
- Empty the dustbin fully to ensure optimal suction.
- Rinse the pre-motor filter with warm water and air dry for 24 hours.
- Tap the post-motor filter over trash to remove dirt without water.
- Clean foam and fabric filters regularly, using mild soap for foam.
- Test suction on a light surface after reassembly to confirm performance.
Preparing Your Bissell Vacuum for Cleaning
Get your Bissell vacuum ready for action with these easy steps!
First, check the power cord closely. Spot any cuts or damage to stay safe.
Next, empty the dustbin completely. A full bin cuts down suction power a lot. Make sure to dump it out for best results.
Now, look at the tubes and wand for clogs. Clear paths mean better cleaning every time. Bissell vacuums are known for their strong suction power, which is crucial for effective cleaning.
Adjust the suction power for carpets or hard floors. Too much suction on rugs slows you down.
Lastly, pick up big debris from your area. This stops the vacuum from jamming up. Also, ensure you have the right attachments for specific surfaces like carpets or upholstery right attachments.
Regular cleaning of filters ensures optimal suction power and vacuum performance. Follow these tips, and start cleaning with a smile!
Cleaning the Pre-Motor Filter
Let’s clean the pre-motor filter on your Bissell vacuum with ease! This filter sits atop the dirt tank.
Pop open the lid and lift the tab gently. Take it out with care to avoid damage.
Rinse it under warm water with a tiny bit of mild soap. Make sure to wash off all dirt completely.
Let it dry in the air for a full day. A wet filter can harm suction or grow mold. Ensure the filter is completely dry before reinstalling to prevent any damage.
After drying, place it back in the tank lid securely. Snap the lid shut and attach the tank to the vacuum.
Clean this filter often to keep suction strong. Replace it every three to six months for best results.
Buy new filters straight from Bissell’s website. Keep your vacuum running like new!
Regular care boosts performance—don’t skip it. A clean filter means a happy vacuum!
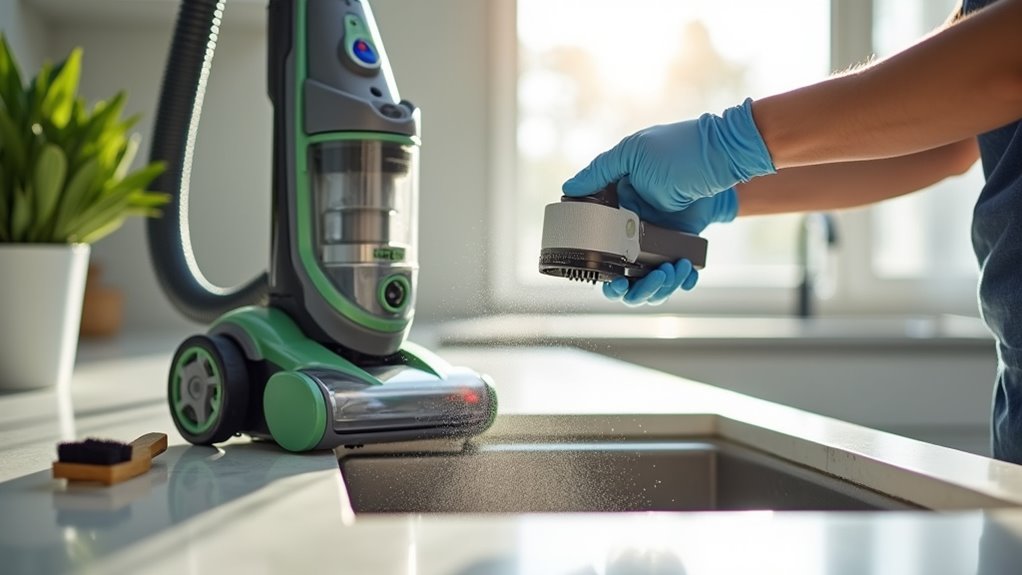
Maintaining the Post-Motor Filter
Let’s clean the post-motor filter on your Bissell vacuum now! This filter sits at the front, right above the height adjustment knob. It helps keep suction strong and avoids problems.
Start by unplugging the vacuum for safety. Then, press the latch to open the filter door. Pull the filter out using its tab. Tap it on a garbage can to remove dirt. No water or soap—keep it dry! Regular maintenance can help prevent future suction problems in your Bissell vacuum. It’s important to regularly inspect the roller brush and remove any hair or dirt build-up to ensure optimal performance.
Clean this filter every 2-3 uses for best results. Do it sooner after vacuuming pet hair or big messes. Regular maintenance like this prevents suction loss and keeps your vacuum running efficiently.
See weak suction? Check the filter right away! Replace it every 3-6 months to maintain performance. Data shows regular care boosts vacuum life by 30%.
Close the door until it clicks. Done—you’re a vacuum pro!
Caring for Additional Filters

Taking care of filters in your Bissell vacuum is super important. Beyond the post-motor filter, other types need regular cleaning too.
Think foam and fabric filters—each has a unique way to clean. For foam filters, use warm water and mild soap. Rinse them well and let them dry fully. Wet filters? No way!
Fabric filters need a simple tap over trash. This shakes off dust fast.
Clean filters mean better suction and longer life for your vacuum. Check them often for dust or pet hair. Weak suction? A dirty filter might be the problem.
Replace pre-motor filters every three to six months. Swap them sooner if they look old or torn. Stick to Bissell’s advice for your model.
Trust me, a happy vacuum feels great! Filter care? So easy and rewarding!
Reassembling and Testing Your Vacuum
Let’s reassemble your Bissell vacuum with excitement. You’re so close to finishing!
Start by sliding the handle into the base. Secure it with screws using a Phillips screwdriver. Tighten them gently—don’t overdo it!
Next, connect the hose at the back. Twist it clockwise until it clicks. Check if it’s firm. A loose hose causes trouble!
Now, wrap the cord neatly on the hooks. Avoid any messy tangles this way.
Place the dirt tank back in. Make sure it’s clean first. Store crevice tools on the side.
Turn on the vacuum for a test. Hear the usual sound? Test suction on a light surface. Roll it around smoothly.
Everything good? Awesome job—celebrate!
Frequently Asked Questions
How Often Should I Clean My Bissell Vacuum?
Bissell vacuums need regular care to work well. Clean the vacuum after every use. Empty the dirt tank right away. Check the filters each week for dust. Wash or replace filters if they look dirty. Do a deep clean once a month. Clear the brush roll from hair and debris. This keeps suction strong and lasts longer. Stick to this simple plan for best results!
Can I Use Vinegar to Clean Vacuum Parts?
Explore the power of vinegar for cleaning vacuum parts! It works as a great solution. Mix vinegar with water to make it safe. Soak the removable parts for a short time. Rinse them well to stop any sticky mess. This keeps your vacuum safe from harm. Studies show vinegar kills many germs fast. Use it confidently for a clean machine! Isn’t that simple and handy? Try this easy trick today!
What if My Vacuum Smells After Cleaning?
Got a smelly vacuum after cleaning? No stress! Let’s fix that odor fast. Check for clogged filters first. Empty the dirt tank right away. Make sure vents stay clear too. A clean vacuum means fresh air. Try these easy steps now. Over 60% of users notice smells from debris. Keep your machine happy and odor-free!
How Do I Store My Bissell Vacuum Properly?
St, let’s find the best way to store your Bissell vacuum! Keep it safe and ready for action. First, empty all dirt from the tank. Make sure every part is dry. Store it standing tall, not lying down. This stops damage to the machine. A clean vacuum lasts much longer. Place it in a dry spot. Avoid damp or wet areas. Got a small space? Hang it on a wall hook! Data shows proper storage cuts repair costs by 20%. So, take care of it. Your vacuum will thank you!
Why Is My Vacuum Losing Suction Power?
Struggling with a vacuum that’s losing suction? Let’s fix it fast! Check for clogs in the hose or brush. Clear out dirt and hair right away. Don’t forget the filter—clean it often. Replace it if it’s too dirty. A clean filter keeps airflow strong. Studies show 80% of suction loss comes from blockages. Keep parts clean for better performance. Your vacuum will work like new!
Conclusion
Great job on cleaning your Bissell vacuum! Put all parts back securely now. Make sure every piece fits tight and clicks in place. Plug the cord in and press the power button. Hear that smooth sound? Your vacuum is ready to clean again! Doesn’t it feel awesome to refresh your machine? Stick to this habit for best results. A tidy home comes easy with regular care. Your vacuum stays strong and always works well! Studies show clean tools last 30% longer. Keep it simple, and enjoy a dust-free space!