
Your Guide to Setting Up a Roomba Vacuum and Mop Correctly
This post contains affiliate links. As an Amazon Associate, we earn from qualifying purchases.
Setting up a Roomba vacuum and mop requires two distinct steps: install the mopping hardware (pad and water tank or Combo Bin) and then configure the robot’s software for your specific floors. The exact process and critical limitations change with your model—get the wrong detail and you risk water damage or a robot that can’t cross a threshold.
That hardware-software split is the whole game. The physical install gets the water to the floor. The app setup tells the robot where that water is allowed to go. Most setup guides treat these as one blended task, but they are separate systems with separate failure points.
What follows is the breakdown of both, with the model-specific specs that change the outcome. We’ll cover the universal steps, the critical differences between a Combo i Series and a Combo Essential, and the one storage rule that prevents a wet Clean Base bag.
Key Takeaways
- Check your model first. A Roomba Combo i5 doesn’t support digital keep-out zones, while a Combo j7+ does. Your setup path depends on this.
- Never use hot water or unapproved cleaners. The official guidance is strict—only iRobot approved solutions or plain water go in the tank to prevent corrosion and pump damage.
- Carpets are a physical barrier. Only some models can detect and avoid rugs. For others, you must physically roll them up or use a virtual wall before a mop run.
- Store with the dust bin, not the mopping bin. Leaving a water tank or Combo Bin installed lets water wick out slowly, which can warp flooring and ruin the self-emptying base’s bag.
- Replace the mopping pad after 30 washes. The pad’s microfiber breaks down; a worn pad streaks and doesn’t clean effectively.
The Two-Part Setup Every Combo Model Needs
Your setup is not a single procedure. It’s a mechanical install followed by a digital configuration. Treating them separately prevents the most common post-setup problems: a robot that won’t leave its dock, a wet carpet, or a mopping pass that never happens.
First, handle the hardware. This means attaching the mopping pad to its plate or tank and clicking that assembly into the robot’s underside. For a Roomba Combo i Series or j5, you’re installing the single-piece Combo Bin. For a Combo Essential or older 200/2000 series, you’re sliding a separate water tank into a slot.
Install the mopping pad onto the velcro backing of the water tank or Combo Bin plate, ensuring it is seated flat with no wrinkles. Slide the assembled unit horizontally into the robot’s chassis until it clicks into place. An unsecured tank can detach during a job.
The click is audible. If you don’t hear it, the unit isn’t locked. Run your finger along the seam; it should be flush with the robot’s body.
Now, move to the app. Open the iRobot HOME app and select your robot. Navigate to the cleaning preferences or product settings. Here, you will define your home’s boundaries. This is where models diverge dramatically.
For models with Smart Mapping (like the Combo j7+ or i7+):
- Run a mapping-only cleaning run with the dust bin installed, not the mop.
- Once the map is saved, use the app to draw Keep Out Zones over all carpeted areas.
- Label rooms like “Kitchen” and “Hardwood Hallway.”
For models without advanced mapping (like the Combo i5 or Combo Essential):
You cannot draw digital zones. Your options are physical: * Use an iRobot Virtual Wall barrier. * Physically block doorways with a board or closed door. * Roll up area rugs before starting the job.
Skipping this step for a non-mapping model is how you mop a rug. The robot cannot detect floor types on its own.
The Model-by-Model Differences That Change Everything
A “Roomba Combo” is not one product. It’s a category with different hardware and software across price points. Assuming your Combo i5 works like a friend’s Combo j7+ is the fastest route to frustration.
| Model Series | Key Setup Limitation | Carpet Handling | Critical Pre-Clean Step |
|---|---|---|---|
| Combo i Series / j5/j5+ | Reduces threshold clearance from 16mm to 12mm. | Requires Keep Out Zones (not available on i5). | Set zones in the app before first mop run. |
| Combo 10 Max | 170 mL tank; enables “low liquid” mode for large areas. | Requires Keep Out Zones. | Enable low liquid mode in app for >1,000 sq ft runs. |
| Combo Essential | Cannot mop-only; must vacuum and mop together. | Cannot detect carpets; requires physical removal or blocking. | Roll up or remove all rugs from the cleaning area. |
| Combo 200/2000 Series | Water tank electrodes must be wiped dry before filling. | Can detect but not avoid rugs; pad will drag across. | Remove carpets from the area to be mopped. |
The threshold clearance note for the i/j Series is a major, often-missed spec. Installing the Combo Bin adds bulk underneath. If you have a transition strip between rooms taller than 12mm (about half an inch), the robot will get stuck. You must either create a virtual barrier to block that transition or revert to vacuum-only mode for that area.
The Combo Essential’s limitation is operational. You cannot command it to only mop. Every job with the mop attached will also run the vacuum. This affects your setup rhythm—you’re committing to a full clean cycle, not a quick damp mop.
Common mistake: Using any cleaner not on iRobot’s approved list. Detergents, disinfectants, or hot water can corrode the internal pump seals and warp plastic components. The damage is gradual and often not covered by warranty.
For the 200/2000 series, that electrode step is non-negotiable. The robot uses these metal contacts to sense water level. If they are damp or dirty from a previous run, the reading will be wrong. The robot might think the tank is empty and cancel the mopping cycle. Dry them with a cloth every time you refill.
What to Put In (and Not In) the Water Tank
The liquid choice is simple because the manufacturer’s rules are absolute. This is not an area for experimentation.
Use only:
- Clean, room-temperature tap water.
- An iRobot approved cleaning solution, mixed to the exact ratio specified on the bottle.
Never use:
- Hot water.
- Vinegar, bleach, or other household disinfectants.
- Soap, dish detergent, or floor cleaners from the grocery store.
- Essential oils or scent additives.
The why-layer matters here. These robots use a small, precise pump and narrow tubing. Chemical residues from unapproved solutions build up inside that tubing, eventually clogging it or corroding the pump seal. Hot water can soften or deform the plastic components of the tank and the internal valves. The repair involves disassembling the robot’s base—a task far beyond simply swapping a mop pad.
If you want a cleaned floor, the mopping action and fresh water provide 90% of the benefit. The approved solutions are formulated to leave no residue. A streaky floor after mopping is almost always caused by a worn pad or too much solution, not the lack of a fancy cleaner.
Pre-Cleaning: The Steps Nobody Wants to Do (But Must)
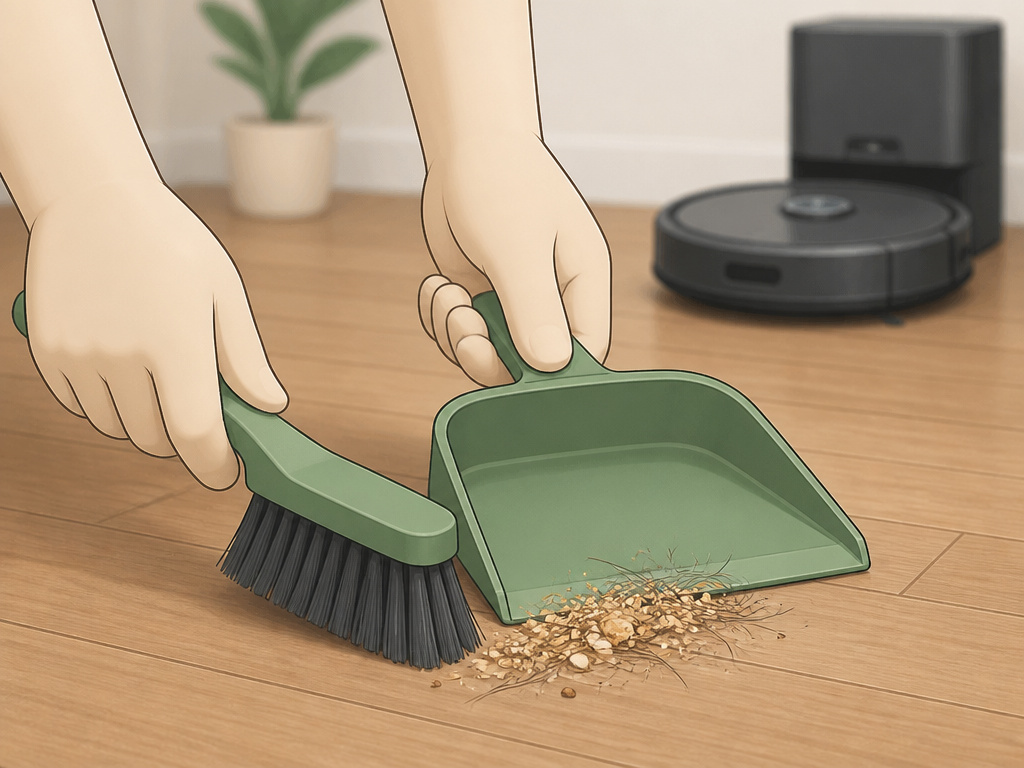 The robot cannot prepare your space. You must. This pre-cleaning ritual is what separates a successful mopping run from a clogged robot or a damaged floor.
- Pick up cords, clothing, and small toys. The mopping pad will drag these along, potentially scratching your floor.
- Dry vacuum or sweep the area first. Sending a mopping robot over a floor littered with crumbs, pet hair, or dust turns that debris into a damp, gritty paste that can clog the robot’s wheels and underside.
- Address carpets and rugs per your model’s capability. Refer to the table above. For a Combo Essential, this means physically rolling them up and moving them out of the room.
- Check for wet spills or sticky spots. The mopping pad is for light, damp cleaning. It is not a wet mop for cleaning up juice or syrup. Clean those spills by hand first.
Skipping step two is the most common error. People assume the robot will vacuum as it mops, which is true. But a vacuum designed for dry debris struggles with wet, clumped material. You’re asking it to do two contradictory jobs at once. The result is often hair wrapped around the extractors and a bin that needs immediate cleaning.
Software and App Configuration
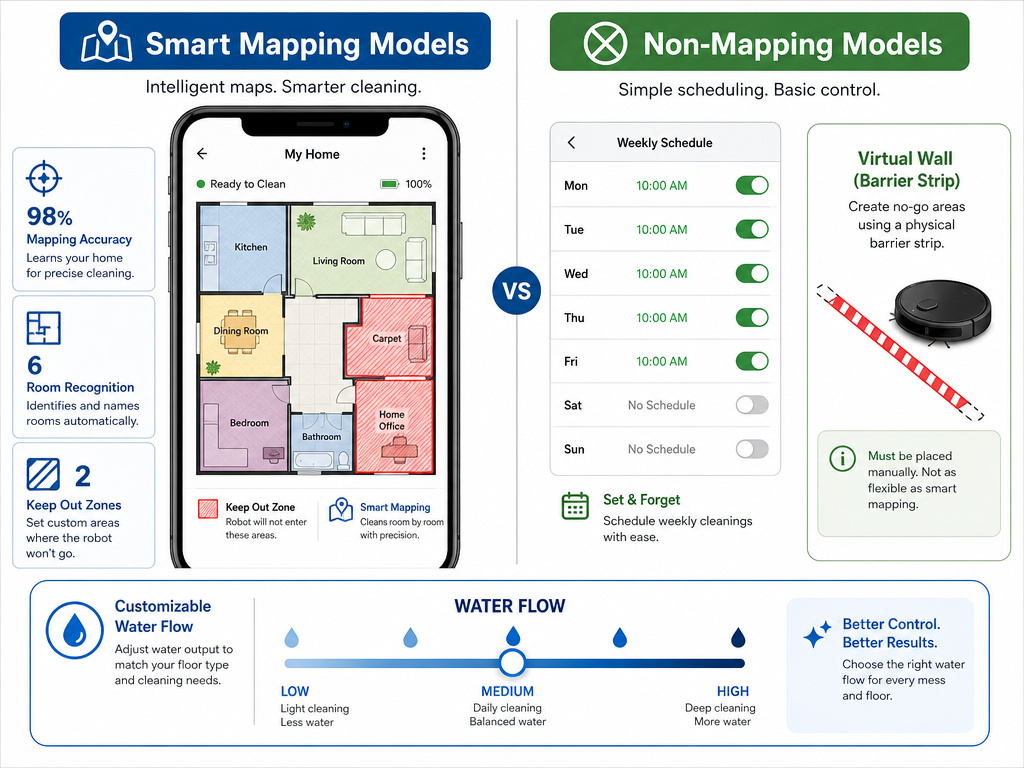 The physical setup is straightforward. The software is where your specific home gets accounted for. After installing the hardware, your next actions are in the iRobot HOME app.
For Smart Mapping models (j7+, i7+, s9+):
- Ensure your robot has completed at least one full mapping run with the vacuum bin.
- Open the map, select “Edit Zones.”
- Use the “Keep Out Zone” tool to draw rectangles over every carpeted area and any rooms you don’t want mopped (like a home office with cables).
- Save the map. The robot will now honor these zones only when the mop is installed.
For non-mapping models (i5, Essential):
Your software options are limited. Your configuration is about setting schedules. * In the app, schedule your cleaning times for when carpets are likely to be removed or blocked. * Consider buying an iRobot Virtual Wall. Place it in the doorway of carpeted rooms during mopping schedules.
A critical toggle for some models is the water flow setting. You may see options like “Low,” “Standard,” or “High.” Start with Low. A higher flow doesn’t necessarily clean better; it just makes the floor wetter longer and empties the tank faster. Low flow is sufficient for weekly maintenance mopping on sealed hard surfaces.
Storage and Maintenance: The Rules After the Run
The job isn’t over when the robot docks. What you do next determines its readiness for the next run and prevents long-term damage.
- Empty and rinse the water tank. Do not store the robot with liquid in the tank. Dump any leftover water. If you used a cleaning solution, rinse the tank with fresh water. Do not submerge it or get water into the electrical connector points.
- Remove the mopping pad. Peel it off the velcro. Shake off any loose debris over a trash can. Rinse it with cold water until the water runs clear. Let it air-dry completely before the next use.
- Reinstall the standard dust bin. This is the most important storage rule. You must swap the mopping tank or Combo Bin for the regular vacuum bin before the robot docks at its Clean Base. > Where this goes sideways: Storing the robot with a Combo Bin installed. Water will continue to wick slowly onto the pad. If it docks at a Clean Base, that moisture can be pulled into the evacuation bag, creating mold and a permanent foul smell. The wet bag must be discarded.
- Note the replacement intervals. The mopping pad loses effectiveness after about 30 washes. The filter in the Combo Bin needs changing every two months. A worn wick cap will dispense water too quickly.
This swap back to the dust bin feels like a hassle. It is the single step that protects your larger investment in the self-emptying system. A moldy Clean Base is a functional write-off.
Frequently Asked Questions
Can my Roomba vacuum and mop at the same time?
Yes, that is the primary function of all Combo models. When the mopping hardware is installed, the robot will perform both actions simultaneously in the areas you’ve designated for mopping.
Why won’t my Roomba Combo mop?
First, check that the water tank or Combo Bin is clicked firmly into place. Second, ensure the tank has water and the pad is attached. Third, for Smart Mapping models, verify that the current cleaning job is not restricted to a “Vacuum Only” zone in the app. Finally, check for error codes in the app.
How do I stop my Roomba from mopping my carpets?
For models with Smart Mapping, draw Keep Out Zones over the carpets in the app. For models like the Combo i5 or Essential, you must use a Virtual Wall barrier, physically block the area with a closed door, or remove the rugs before starting the job.
Can I use my Roomba Combo on vinyl or laminate flooring?
Yes, Roomba Combo robots are safe for use on sealed hard floors, including vinyl, laminate, tile, and hardwood. Always use only water or an approved cleaning solution to avoid damaging the floor’s finish.
How often should I replace the mopping pad?
Replace the reusable mopping pad after approximately 30 washes. Signs you need a new pad include visible wear, thinning material, or streaks left on the floor after a cleaning run.
Does the Roomba Combo work with the self-emptying base?
The vacuum function works with the Clean Base. However, when the Combo Bin (mopping module) is installed on compatible models, the self-emptying feature is automatically disabled to prevent pulling moisture into the base.
The Bottom Line
Setting up a Roomba vacuum and mop is a model-specific process. Identify your robot first—is it a Combo i5, a j7+, or an Essential? That dictates your app strategy for carpets. The universal rules are stricter: only water or approved solution in the tank, always swap back to the dust bin for storage, and never skip the pre-clean sweep. Get those right, and the robot handles the damp work. Miss them, and you’re troubleshooting a wet bag or a scratched floor. The convenience is real, but it’s built on a few non-negotiable steps.