
Dyson Vacuum Filter Light Flashing: The 24-Hour Dry Rule Fix
This post contains affiliate links. As an Amazon Associate, we earn from qualifying purchases.
Your Dyson vacuum filter light flashing signals one of three things: a physical blockage in the airway, a filter that’s dirty or still wet, or a sensor error from dust or improper seating. The machine cuts power to protect its motor, so the light is a mandatory stop sign, not a suggestion.
That 24-hour drying rule in the manual isn’t a suggestion either. It’s the spec that keeps moisture out of the electronics. Skip it, and the light stays on because the damp filter chokes airflow and tricks the pressure sensor.
What follows: the official reset sequence from Dyson’s service manuals, the model-specific drying times most articles miss, and the one power mode that cooks a filter in under six months.
Key Takeaways
- The filter light flashes because airflow is restricted; the three universal causes are a clog, a wet/dirty filter, or a misaligned/dusty filter sensor.
- Dyson mandates a 24-hour air-dry for most filters (12 hours for the DC35); using a hair dryer or oven voids the warranty and can melt the filter media.
- Boost or Max mode overheats the filter on cordless models; continuous use burns the fine mesh, turning it hard and triggering the light permanently.
- The machine has a thermal cut-out that requires a 1-2 hour cool-down if blocked, and a 3°C (37.4°F) temperature lockout that prevents operation in cold garages.
- If the light persists after a correct reset, check for fine dust on the small filter sensor near the cyclone, a cotton swab dipped in isopropyl alcohol cleans it.
What the Flashing Filter Light Actually Means
The light isn’t reporting on the filter’s cleanliness. It’s reporting on air pressure. A sealed Dyson vacuum works like a closed loop: the motor pulls air through the floor head, up the wand, into the cyclone bin, through the filter, and out the exhaust. Any restriction in that path drops the pressure downstream of the motor.
A sensor measures that pressure drop. When it exceeds a set threshold, because the filter is clogged with dust, sodden with water, or because a sock is stuck in the wand, the control board flashes the light and reduces power. This is a thermal protection circuit. Let the motor strain against a blockage, and its windings overheat within 90 seconds. The flashing light is the first warning; a total shutoff is the next.
The filter warning system is a pressure-based safeguard, not a maintenance reminder. It triggers when real-time airflow drops below the motor’s safe operating minimum, regardless of how clean the bin looks.
This is why a seemingly clean vacuum can flash. The restriction might be a single hair wrapped around the brush bar axle, a pebble lodged in the cleaner head inlet, or a damp filter that simply can’t pass air at the required rate.
The Step-by-Step Reset Protocol
Follow this sequence exactly. Jumping to Step 3 before completing Step 1 is the most common reason the light comes right back on.
Step 1: Power Down and Cool Off
Unplug the vacuum or remove the battery. If the unit was just running and shut off on its own, it may have tripped the thermal cut-out. The manual states to leave it to cool down for 1-2 hours before proceeding. This isn’t just about comfort; the sensors need to reset to baseline temperature.
Step 2: The Full Blockage Hunt
You are looking for anything that physically blocks the tube. Start from the top and work down. – Remove the filter. Check the filter housing for debris. – Detach the wand from the main body. Shine a flashlight through it. Look for compacted dust or small objects. – Inspect the cleaner head. Remove any hair or string from the brush bar. Check the inlet opening for obstructions. – Empty the bin completely. Check the cyclone shroud and the bin inlet for a clump of dust.
Common mistake: Only checking the obvious spots. The blockage is usually at a junction, where the wand meets the body, or where the cleaner head attaches to the wand. A long, flexible object like a zip tie is perfect for poking through these channels.
Step 3: Filter Inspection and Wash
If the filter looks grey or has a visible dust cake, it needs washing. This is non-negotiable. 1. Rinse under cold tap water only. No soap, detergent, or cleaning agents. 2. Run water through the open end until it runs completely clear. 3. Gently squeeze and twist to remove excess water. Do not wring or distort the shape.
Step 4: The Critical Dry
Place the filter on its side in a well-ventilated area at room temperature. Do not use heat.
| Dyson Model Series | Official Dry Time | Why It Matters |
|---|---|---|
| DC35 (older cordless) | 12 hours | Shorter dry time due to smaller filter media. |
| DC37C, CY23, V7, V8, V10, V11, V15 | 24 hours | Standard for most full-size and cordless filters. Thicker material holds water. |
| Any model with a HEPA filter | 24 hours minimum | The dense HEPA paper takes the longest to dry internally. |
A filter can feel dry to the touch on the outside but still be damp inside the pleats. Refitting it wet forces moisture into the motor chamber. That causes two problems: immediate low airflow (triggering the light) and long-term corrosion on electrical contacts.
Step 5: Reassembly and Test
Ensure every click is firm and tactile. Reattach the wand to the body until it clicks. Twist the filter clockwise until it clicks and stops. A half-seated filter is the top cause of a persistent light after cleaning. Reconnect power and test for 30 seconds. The light should stay off and suction should feel strong.
Why Your Filter Fails (Beyond Dirt)
Dirt is the expected enemy. These are the unexpected ones that break the cycle.
Boost Mode Is a Filter Killer
Cordless Dyson models like the V10 and V11 have a boost or max mode. It’s for short bursts on high-pile rugs. Run it continuously on any surface, and you pull an immense amount of air through the filter at high speed. The friction heats the fine particles trapped in the filter.
Where this goes sideways: Continuous boost mode bakes dust into the filter mesh. Over weeks, the filter media hardens and loses porosity. It will look clean but feel stiff. Airflow drops permanently, and the light flashes because the filter is physically damaged, not dirty. The fix is a new filter and staying in Eco or Medium mode.
The Hidden Filter Sensor
On models like the Cyclone V10, a small optical or pressure sensor sits near the filter housing. Its job is to detect if the filter is missing. Fine dust can coat this sensor, making it think the filter is never correctly installed. The light flashes even with a brand-new, perfectly seated filter.
Cleaning it is simple. Use a dry cotton swab or one lightly dampened with isopropyl alcohol to wipe the small sensor window. Let it dry for a minute before reassembly.
Temperature Lockouts
Dyson manuals explicitly warn not to use or store the vacuum below 3°C (37.4°F). The battery chemistry can’t deliver power safely, and the motor bearings are lubricated for room temperature. If you store your cordless Dyson in a cold garage overnight, it may flash a warning light and refuse to start until it warms up indoors. This is often mistaken for a filter error.
Flashing Light vs. Other Warning Lights
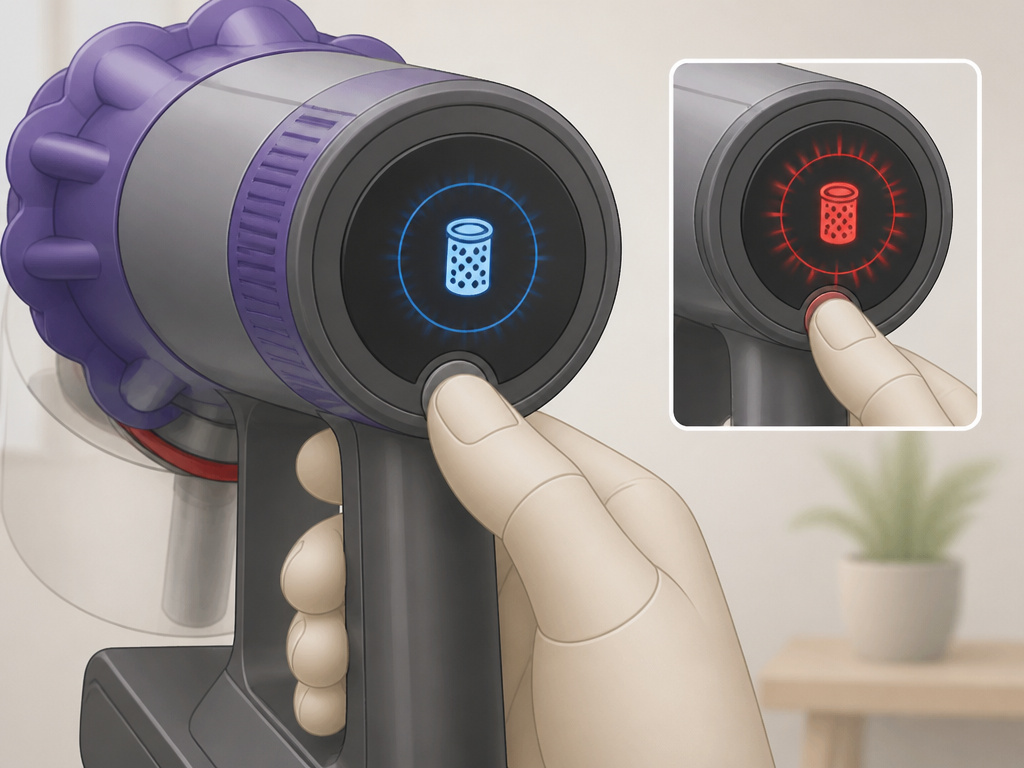
A flashing filter light is specific. Other lights indicate different system failures. Misdiagnosing them wastes time.
| Light Behavior | Typical Color | What It Means | Immediate Action |
|---|---|---|---|
| Slow, steady flash | Blue/White (Filter icon) | Filter/Maintenance Alert | Check for blockages, wash filter. |
| Rapid flash (with trigger pressed) | Blue | Low battery | Place on charger. |
| Rapid flash (on charger) | Red/Amber | Battery fault or temperature error | Ensure room is >3°C, try different outlet, battery may need replacement. |
| Solid light, no power | Any | Thermal cut-out active | Unplug, let cool for 2 hours, check for severe blockage. |
If you see a rapid red flash, the problem is almost certainly with the battery or charger, not the filter. No amount of filter cleaning will fix it.
When the Standard Fixes Don’t Work
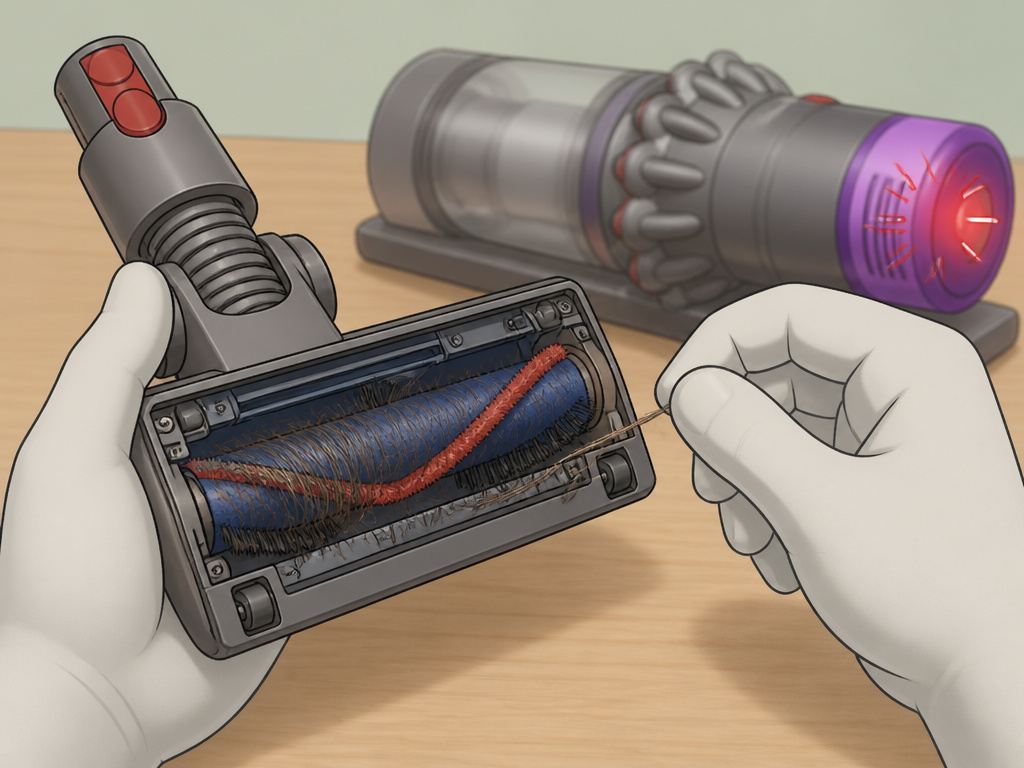
You’ve washed, dried for 24 hours, cleared every tube, and the light still blinks. Now you move to advanced troubleshooting.
1. The Motorhead Brush Bar Check
A seized brush bar creates drag that the motor interprets as a blockage. Unplug the vacuum. Manually spin the brush bar in the cleaner head. It should turn freely. If it’s jammed, remove the soleplate to clear wrapped hair and string.
2. Electrical Reset (Cordless Models)
Remove the battery from the vacuum body. Press and hold the power trigger for 10-15 seconds to discharge any residual current. Reinstall the battery. This clears transient errors in the control board.
3. Inspect the Bin Seal and Cyclone
Over time, the rubber seal on the bin lid can degrade or collect grit. A broken seal leaks air, dropping pressure and triggering the sensor. Wipe the seal clean. Also, detach the cyclone from the bin if your model allows it. Check for cracks or damage.
4. The Last Resort: Sensor Bypass?
There is no safe, recommended way to bypass the filter sensor. Attempting to do so disables the primary thermal protection for the motor. A motor replacement costs more than a new vacuum. If you’ve reached this point, the official path is to contact Dyson Support. If the vacuum is out of warranty, a certified repair center can diagnose whether the sensor itself is faulty, a rare but possible occurrence.
How to Prevent the Flashing Light For Good
Maintenance is predictable. Build these three habits.
Schedule the Filter Wash
Mark a monthly reminder. For normal home use, once a month is the official frequency from Dyson. If you have pets, shed a lot, or vacuum construction dust, make it every two weeks. Use cold water only. Never use a washing machine or dishwasher.
Enforce the 24-Hour Dry
After washing, place the filter in front of a fan or a dehumidifier. Moving air is better than still air. It can cut drying time by a third, but still wait the full 24 hours before reinstalling.
Mind the Mode and Temperature
Use boost mode in 5-10 second bursts only. Store your cordless Dyson indoors, not in a car or garage. Let a cold vacuum acclimate to room temperature for an hour before charging or using it.
TL;DR: The light means stop. Find the clog, wash the filter in cold water, dry it for a full 24 hours with moving air, and click every part back together firmly. If it still flashes, clean the hidden sensor and check the brush bar. Boost mode is for rugs, not runtime.
Frequently Asked Questions
Why does my Dyson filter light keep flashing after cleaning?
The filter is likely still damp inside the pleats, or it wasn’t clicked into place fully. Ensure a full 24-hour dry at room temperature and listen for the definitive click when reinstalling. Also, check for a secondary blockage you missed, like in the wand elbow.
Can I use a hair dryer to dry my Dyson filter faster?
No. Direct heat can warp the plastic filter cage and melt the fine filter media, ruining it. It also voids the warranty. Use moving air from a fan, not hot air.
Is a flashing filter light covered under Dyson’s warranty?
No. Dyson’s warranty specifically excludes problems caused by blockages or lack of maintenance. Clearing blockages and washing the filter is the owner’s responsibility, as stated in every manual.
How do I know if my Dyson filter is damaged, not just dirty?
Damaged filter feels stiff and rigid, even when dry. A healthy filter is pliable. Damage is usually caused by heat (from overuse of boost mode) or improper cleaning (using hot water or chemicals).
My Dyson is flashing and making a whistling noise. What’s wrong?
High-pitched whistle paired with a flashing light almost always indicates a partial blockage, often in the wand or cleaner head. The whistle is air rushing through a narrow gap. Follow the blockage-hunt procedure in Step 2.
Before You Go
That flashing light is a simple logic gate: Is air flowing? If no, flash. Your job is to restore the airflow path. The sequence never changes, cool, clear, clean, dry, click. The 24-hour dry is the hinge point most people fudge. Don’t.
If you’ve walked through every step here and the light persists, the issue has moved from maintenance to repair. The next step is a professional diagnostic for the pressure sensor or motor. For persistent loss of suction or other overheating issues, the root cause may be deeper. But for the vast majority, a cold water wash and a patient dry is the only fix you’ll ever need.