
Your Guide to Roomba Vacuum Error Codes & Exact Solutions
This post contains affiliate links. As an Amazon Associate, we earn from qualifying purchases.
Roomba vacuum error codes are specific numeric or alphanumeric alerts that diagnose a hardware, sensor, or software issue, ranging from a simple bumper misalignment to a failed vacuum motor. The exact meaning and fix depend entirely on your Roomba’s model series, as codes like Error 36 or Error 1026 only appear on specific machines.
That model dependency is where most troubleshooting guides fall short. They treat Error 6 as a universal “cliff sensor” alert, but on dark hardwood or a deep-pile rug, the same code can trigger because the surface absorbs too much infrared light. The robot thinks it’s hovering over a cliff.
What follows is a decoder that ties errors to your specific Roomba. You’ll learn the four-step process to identify any code, the model-specific meanings most lists skip, and the physical fixes that actually reset the error instead of just clearing the alert.
Key Takeaways
- Identify your model series first. An Error 36 on a Roomba 200 series means a DustCompactor arm is stuck; that code doesn’t exist on an i Series.
- Dark floors trigger false cliff sensor errors. If your Roomba reports Error 6, 7, or 15 on a dark surface, it’s likely a false positive, not a hardware failure.
- Charging errors 106 and 107 are temperature warnings. Error 106 means the battery is too hot to charge; Error 107 means it’s too cold. Let the robot reach room temperature.
- Software update interruptions cause Error 29. Never start a cleaning job while the robot’s indicator light is pulsing green, which signals an update in progress.
- Non-authentic batteries trigger Error 117. Third-party batteries often lack the proper chip for communication, leading to persistent charging faults.
The 4-Step Decoding Process
Start by finding your Roomba’s model number. It’s on a label underneath the robot, usually formatted as something like “Roomba 694” or “Roomba i3+”. This tells you the series.
Error codes are diagnostic signals, not random numbers. Each code corresponds to a specific subsystem, the bumper, a wheel encoder, the vacuum motor, or a communication bus, that has reported a value outside its expected operating parameters.
Once you have the series, follow this sequence.
- Note the exact code and any sounds. Does the robot play the “uh-oh” tone twice? Does a voice say “Error 6”? Write down the full code.
- Check the robot’s physical state. Is it stuck under furniture? Are the wheels or side brush tangled with hair? Is the bin full or the filter clogged?
- Consult the correct error chart. Use the iRobot support page for your specific series. A code for a 600 series has a different meaning than the same number for an i Series.
- Perform the reset. After cleaning or fixing the issue, the standard reset is to hold the CLEAN button for about 10 seconds until the robot beeps. For persistent errors, a full reboot (removing the battery for 2 minutes) clears the memory.
| Step | Action | If Skipped |
|---|---|---|
| 1. Identify Model Series | Locate label under robot. | Applying a fix for the wrong model can worsen the problem. |
| 2. Observe Code & State | Write code; check for obstructions. | You might fix the wrong component, wasting time. |
| 3. Find Model-Specific Chart | Use iRobot’s official support site. | The “fix” you find may be for a different hardware version. |
| 4. Perform Correct Reset | Hold CLEAN or remove battery. | The error may reappear immediately on next start. |
If the error returns after a proper reset, the issue is likely a failing part, not a temporary obstruction.
Model-Specific Error Code Meanings
Generic lists are useless here. An Error 36 only exists on the Roomba 200 and 2000 series. It points to a jammed DustCompactor arm inside the bin. On a Roomba i Series, you’ll never see it.
Where this goes sideways: Assuming Error 47 is a universal charging fault. On the 100/1000 and 200/2000 series, Error 47 is an “Invalid Calibration” that requires a remote sensor update from iRobot support. No amount of home troubleshooting will clear it.
This table shows how critical model context is.
| Error Code | Primary Meaning | Specific Model Series | Notes |
|---|---|---|---|
| Error 36 | Bin Full / DustCompactor Fault | Roomba 200/2000 only | The internal compactor arm is jammed. |
| Error 47 | Invalid Calibration | Roomba 100/1000, 200/2000 | Requires iRobot customer support for a remote fix. |
| Error 68 | Camera Failure | Roomba Plus 500 only | Robot’s navigation camera isn’t sending data. |
| Error 1026 | Mop Stuck | Roomba Plus 400, Plus 500 | Left or right mopping pad is tangled or caught. |
| Error 1029 | Incompatible Map | Roomba Plus 400, Plus 500, Max 700 | Corrupted smart map; delete and recreate it in the app. |
| Error 517/672 | Basin Overflow | Max 700, Plus 400, Plus 500 | Pad-washing basin has overflowed. |
| Error 756 | No Pad Attached | Roomba Max 700 Series | Combo mopping pads are not detected. |
| Error 26 | Vacuum Problem (Stall) | Roomba i Series | Vacuum motor stalled, often from a clogged filter. |
| Error 27 | Vacuum Problem (Over-temp) | Roomba i Series | Vacuum motor overheated; check for impeller damage. |
For Wi-Fi connected models like the i Series or j Series, always check the iRobot HOME App first. It provides the most precise error description and often offers one-tap solutions like “Clear Map” for Error 32, which is a smart map mismatch.
Common Error Code Fixes You Can Do Now
Many codes stem from simple maintenance oversights. These fixes apply across most models.
Error 5, 6, 7, 15 (Cliff Sensor Errors)
Clean the four infrared cliff sensors on the underside of the robot with a dry cotton swab. Dust and dirt block the signals. If your floors are dark, the robot may falsely trigger these codes. You can temporarily cover the sensors with masking tape for a test run, but don’t make this a permanent solution.
Error 9 (Bumper Stuck)
Tap the front bumper firmly a few times. This often frees a micro-switch that’s stuck. If the error persists, inspect the bumper. Like in the YouTube transcript, the plastic tabs that secure it can pop out. Push each tab back into its slot until it clicks.
Error 11 (Side Brush Error)
Remove the side brush and clear any hair or string wrapped around its axle. Spin it by hand to feel for grit. A worn side brush with bent fins can also cause this.
Error 26 & 27 (Vacuum Motor Errors)
This is almost always a airflow blockage. Remove the bin, take out the filter, and tap it clean. Check the bin’s air channels for debris. For Error 27 specifically, the motor has overheated. Let the robot sit powered off for an hour to cool down before checking for a deeper clog.
Easy to miss: The filter compartment itself. On i Series models, a poor seal where the filter sits lets debris bypass the filter and jam the impeller. Remove the filter and use a flashlight to look inside the cavity.
Charging Errors (43, 106, 107, 117)
Clean the metal charging contacts on both the robot and the Home Base with a pencil eraser. Ensure the robot is seated correctly on the base. Errors 106 and 107 are environmental, move the Home Base away from heat vents or cold drafts. Error 117 strongly suggests a non-iRobot battery.
When Software Is the Problem
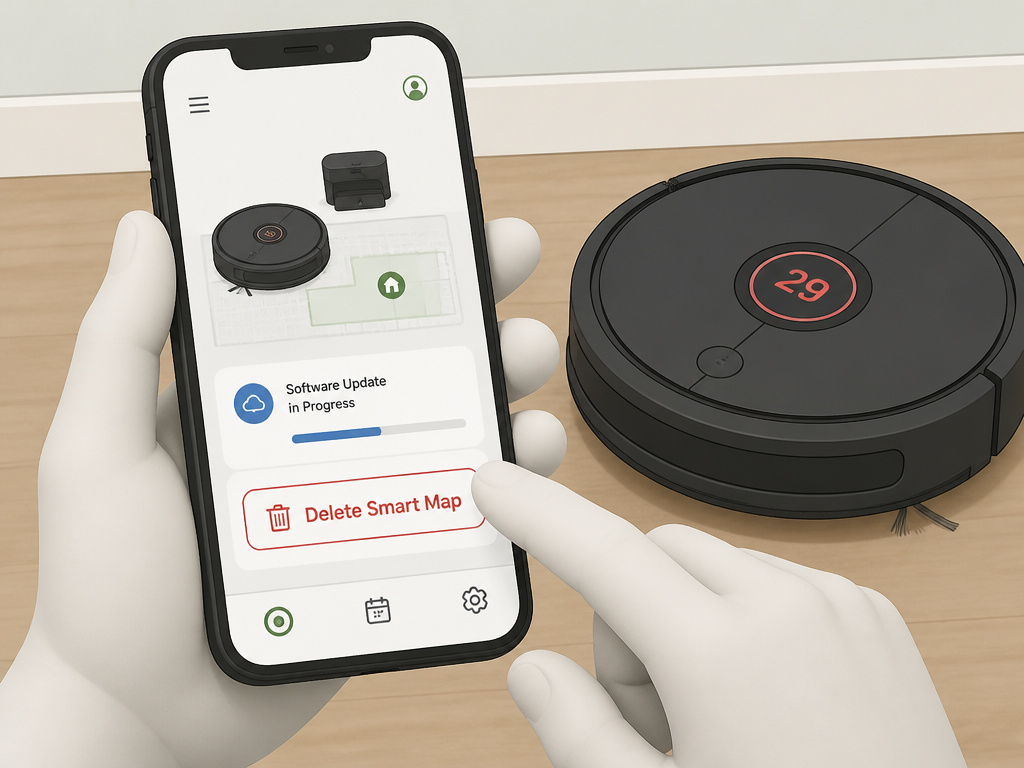
Not every error is a hardware fault. Software glitches and user actions cause specific codes.
Error 29
This occurs if you start a cleaning cycle while a software update is in progress. The indicator light pulses green during an update. Always wait for the update to finish.
Error 32
Your robot’s internal map no longer matches the map saved in the iRobot HOME App. Delete the existing Smart Map in the app and let the robot create a new one by running a full cleaning mission.
Error 266
This is a subscription-model alert. Certain newer Roomba models require an active iRobot HOME App setup and, in some cases, a subscription plan to operate. The robot will not start without it.
The fix for these is in the app, not your toolbox. A simple robot reboot (power cycle) often resolves temporary software communication glitches that trigger vague alerts.
Advanced Diagnostics and Part Replacement
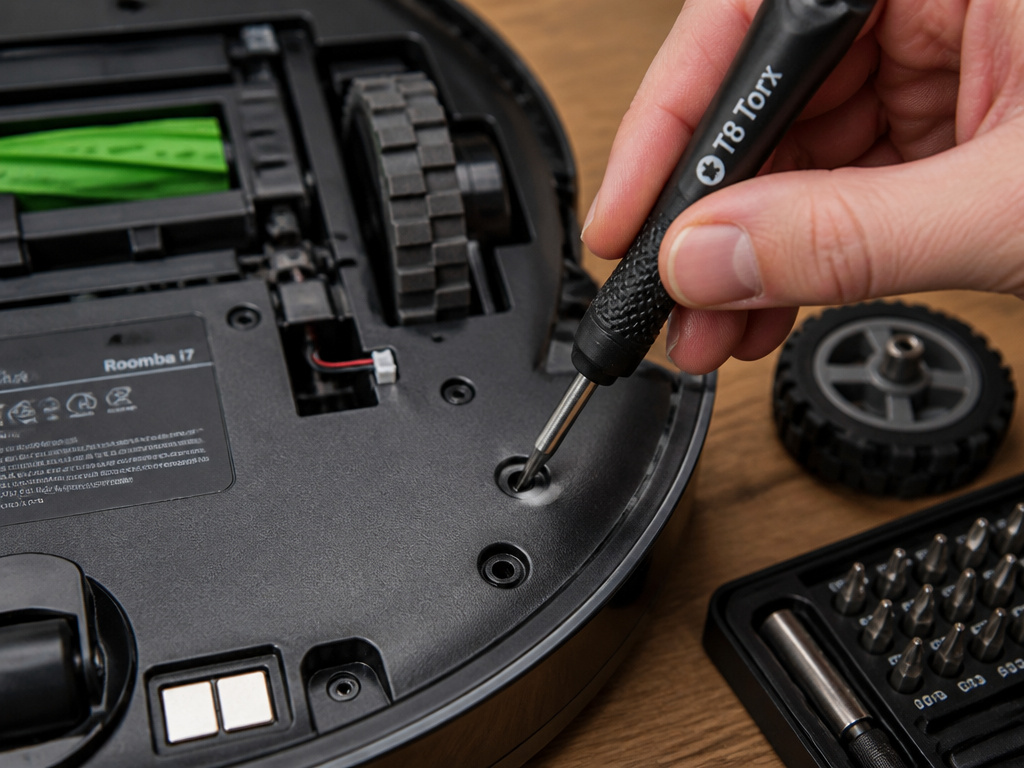
If cleaning and resets don’t work, the error points to a failing component. Here’s how to narrow it down.
Wheel and Encoder Errors (e.g., Error 6 for left wheel)
Remove the wheel by prying out the center cap and unscrewing the axle. Check for hair wrapped tightly around the axle inside the wheel module. Spin the wheel by hand; it should turn freely with slight resistance from the encoder. If it’s gritty or loose, the wheel module needs replacement.
Bumper and Sensor Assembly Errors
The front bumper has several micro-switches and infrared sensors. A persistent bumper error after reseating the tabs often means a faulty switch or a broken wire in the harness. This requires opening the chassis.
Vacuum Motor Failure
After confirming no clogs, listen to the robot when it starts. A healthy vacuum motor has a distinct, steady whirr. A failing motor may whine, grind, or not start at all, immediately throwing an Error 26 or 27. Replacement involves removing the bottom plate and disconnecting the motor housing.
Replacing major parts like the vacuum motor or a wheel module is straightforward but requires a set of Torx security screws (size T8 or T10). A cheap electronics screwdriver kit has these. Don’t strip the screws by using the wrong driver.
Before ordering any part, double-check your model number. A wheel module for a 600 series is different from one for an 800 series, even if they look similar.
Frequently Asked Questions
What does it mean when my Roomba beeps twice?
Two “uh-oh” beeps accompanied by a flashing red light indicate a general error. The robot will then usually announce a specific error code or flash a pattern on its status light. Check the app or count the light flashes to get the exact code.
Why does my Roomba keep saying “Error 6” on a flat floor?
This is often a false trigger on dark-colored floors or very dark area rugs. The cliff sensor’s infrared beam gets absorbed instead of reflected, making the robot think there’s a drop. Clean the sensors first. If the problem continues, you can test by placing the robot on a light-colored mat.
Can I reset all Roomba error codes?
Most transient errors clear with a soft reset (hold CLEAN for 10+ seconds). For deeper errors, a hard reset by removing the battery for 2 minutes clears the volatile memory. This will also delete your Wi-Fi settings and scheduled cleanings, so you’ll need to set up the robot again.
Is Error 117 always a bad battery?
Not necessarily “bad,” but likely “non-authentic.” Error 117 indicates the robot cannot communicate with the battery’s management chip. Third-party batteries often lack this chip. The robot may still charge and run, but it will throw this error consistently. The only guaranteed fix is an official iRobot battery.
How do I find the error code if my Roomba isn’t talking?
For models without voice, the status light blinks a pattern. A common pattern is long blinks for the tens digit and short blinks for the ones digit. For example, two long blinks followed by six short blinks means Error 26. Consult your model’s manual for its specific blink code chart.
Why won’t my error code clear after I’ve fixed the problem?
The error is stored in the robot’s memory until a reset is performed. You must complete the fix, clearing the brush, untangling the wheel, and then perform the appropriate reset (soft or hard) for the robot to recognize the problem is gone and clear the code from its system.
The Bottom Line
Roomba error codes are precise, but their meaning is locked to your robot’s model series. Start every diagnosis by confirming your series number. Most codes resolve with basic cleaning: sensors, wheels, brushes, and filters. The stubborn ones, persistent motor errors or calibration faults, point to part failures or software needs beyond a simple reset.
Your first stop should always be the official iRobot support page for your specific model. That page has the exact error chart engineers wrote for your hardware. Use it, fix the physical problem, reset the memory, and your robot will almost always get back to work.