
Quick Fix for Roomba Vacuum Error 11: Clear Your Motor Now
This post contains affiliate links. As an Amazon Associate, we earn from qualifying purchases.
Roomba vacuum error 11 means the vacuum motor is not activating due to a blockage or sensor fault. To clear it, power off the robot, remove and inspect the bin and filter for clogs, clean the vacuum motor intake, and reboot. For Roomba j Series models, manually rotating the motor’s metallic shaft can free a stuck scroll.
That motor blockage is almost always a physical one. A hair wrap around the fan, a piece of gravel jammed in the scroll, or a filter so packed with dust it chokes airflow — the error triggers when the onboard sensor detects insufficient suction within the first minute of a cleaning cycle.
What follows is the model-by-model breakdown iRobot’s support pages gloss over. You’ll get the five-minute fix that works 80% of the time, the bizarre manufacturer-approved “drop it” step for j Series robots, and the one replacement part that actually solves the problem when cleaning doesn’t.
Key Takeaways
- Error 11 translates to “vacuum motor not activating” on i, j, and s Series models; on older 800/900 Series, it points to a faulty bin vacuum sensor.
- The first and most effective fix is a physical inspection and clearing of the vacuum path, focusing on the bin filter and the motor intake scroll.
- For Roomba j Series and Combo 10 Max, iRobot’s official guide includes an optional step to drop the robot from a 1-foot height onto a hard surface to dislodge a stuck scroll.
- A failed Cleaning Head Module (which houses the motor) is the most common reason for a persistent Error 11 after all cleaning steps are done.
- Rebooting the Roomba by holding the CLEAN button for 20 seconds is a required reset after any physical repair; skipping it often leaves the error active.
What Roomba Error 11 Really Means (It’s Not One Thing)
The number is consistent, but the underlying cause shifts between Roomba generations. Treating a modern j Series the same as an old 800 Series will waste an hour.
For i Series, j Series, Combo 10 Max, and s Series robots, the error is direct: vacuum motor not activating. The robot’s software checks for expected motor RPMs immediately on startup. If the motor doesn’t spin or can’t reach speed due to a physical blockage, Error 11 flashes. Your job is to find what’s jamming it.
For the older 800 Series and 900 Series, the error points to the system differently. Here, Error 11 indicates a problem with the vacuum sensor in the dust bin or the bin’s vacuum function itself. The AeroForce bin on these models has an integrated airflow sensor. When that bin is cracked, the filter is irreversibly clogged, or the sensor port is blocked, the robot throws Error 11. It’s less about the main motor and more about the sealed pathway to it.
Where this goes sideways: Assuming a dirty filter is the only cause. On a j Series, a single pebble or hardened mud clod stuck in the fan scroll will trigger Error 11 through a clean filter. The motor strains, the sensor trips, and the robot quits.
Model-by-Model Error 11 Definitions
This table is your translation guide. Match your Roomba’s series to the official diagnosis.
| Roomba Series | Official Error 11 Meaning | Primary Component at Fault |
|---|---|---|
| i Series, e Series | Insufficient airflow / Vacuum motor not activating | Bin filter, Cleaning Head Module |
| j Series, Combo 10 Max | Airflow trouble / Vacuum motor not activating | Debris in fan/scroll, Cleaning Head Module |
| s Series | Vacuum motor not functioning properly | Vacuum motor, motor assembly |
| 800 Series, 900 Series | Vacuum sensor in dust bin not working | AeroForce bin, bin filter, sensor |
The “Cleaning Head Module” is iRobot’s term for the entire motor and brush deck assembly. It’s a single, replaceable unit. If your Roomba is not vacuuming after clearing all blockages, this module is the likely culprit.
The 5-Minute Fix for Most Roomba Error 11 Cases
Start here before you order parts or call support. This sequence resolves the majority of Error 11 instances caused by routine clogs.
- Power Down and Remove the Bin. Turn the Roomba over and press the bin release latch. Take the bin and filter out completely. This is non-negotiable.
- Inspect the Filter and Bin Intake. Hold the filter up to a light. If you can’t see light through it, it’s done. Tap it out over a trash can, but replacement is better than cleaning for a fully packed filter. Look inside the empty bin’s intake port for any large debris.
- Clear the Vacuum Motor Intake. With the bin removed, look into the cavity on the robot. You’ll see the plastic scroll leading to the vacuum motor fan. Use a flashlight. Look for hair, string, or small debris wrapped around the scroll or lodged in the fan blades. A pair of long-nose tweezers is the right tool here.
- Reboot the Roomba. Place the cleaned or new filter and bin back into the robot. Turn it right-side up. Press and hold the CLEAN button for 20 seconds until the robot beeps and all lights cycle. This clears the error from memory and forces a new system check.
- Start a Test Clean. Place the Roomba on its dock and press CLEAN. Listen closely. You should hear the distinct whir of the vacuum motor engaging immediately. If it starts and runs without error, you’re done.
The part nobody mentions: The reboot in Step 4 isn’t a suggestion. The error code is latched in the robot’s memory. If you fix the clog but don’t reboot, the Roomba will still display Error 11 because it hasn’t re-tested the motor circuit.
The Tools You Actually Need
You don’t need a specialty kit. These four items handle 95% of cases: – Long-nose tweezers or a dental pick (for hair extraction) – A can of compressed air (for dust in the scroll) – A replacement HEPA-grade bin filter (like the iRobot OEM filter) – A flashlight or your phone’s light
Skipping the compressed air and just blowing into the intake can work, but your breath adds moisture. That moisture combines with dust to make paste in the scroll over time. Use the canned air.
The Roomba j Series Specific Procedure (Including the “Drop It” Step)
The j Series and Combo 10 Max have a more complex vacuum assembly. IRobot’s official 2025 support guide includes a troubleshooting step you won’t find for any other model. If the basic clean doesn’t work, follow this exact sequence.
After removing the bin and filter, you must remove the Cleaning Head Module. It’s held by a few screws. Once out, inspect the fan and scroll assembly for debris. Use compressed air here.
Now, locate the metallic silver shaft at the center of the vacuum motor. This is the motor axle. The official instruction is to rotate this shaft three full rotations clockwise, then three counter-clockwise. You’re manually freeing the fan scroll. If it rotates smoothly, reassemble and reboot.
From iRobot’s j Series Error 11 guide: “If the vacuum motor cannot be rotated manually… Elevate the robot 1 foot off a hard surface (be sure it is a surface or item of furniture that you are willing to potentially scratch or damage, such as a work bench) and drop it.”
That is not a paraphrase. It’s a direct manufacturer-recommended step to dislodge a severely stuck scroll. The impact can break loose debris that manual rotation and compressed air cannot. After the drop, attempt the rotation again. If it moves, reassemble. If not, the motor or scroll is mechanically seized and the Cleaning Head Module needs replacement.
This specific j Series quirk highlights why generic advice fails. A general “check for clogs” article won’t tell you to drop your $800 robot. Understanding your specific model’s list of Roomba errors is the difference between a quick fix and a fruitless afternoon.
When Cleaning Isn’t Enough: The Parts That Fail
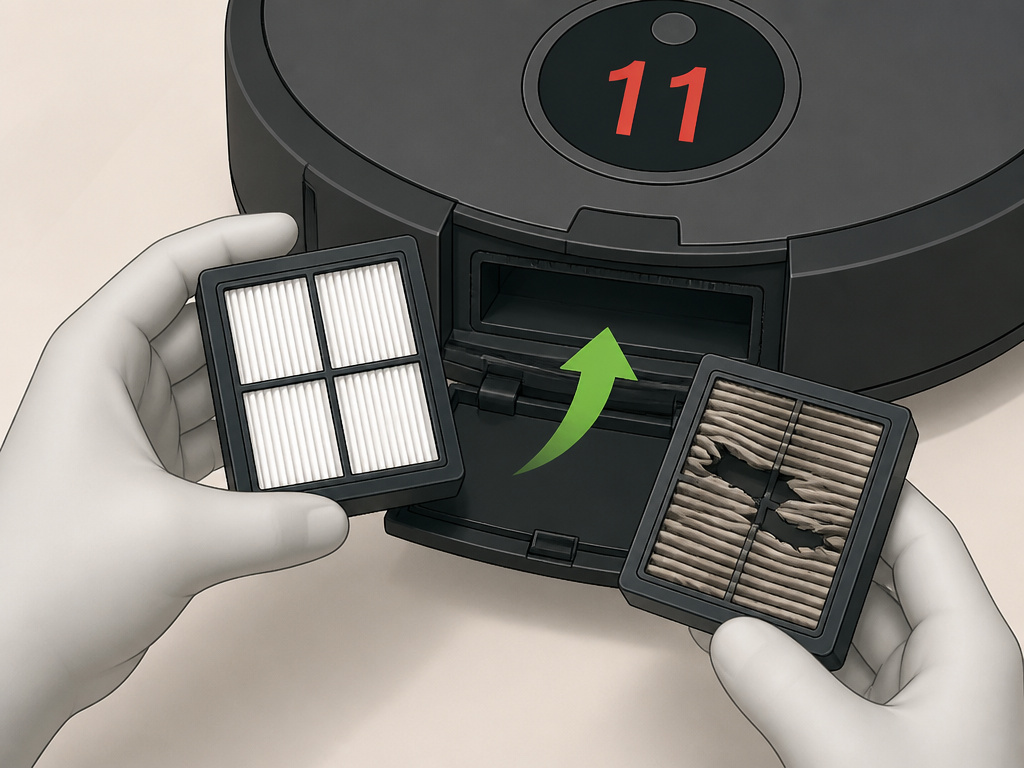
If you’ve done the full clean, the reboot, and for j Series, the rotation (and maybe the drop), and Error 11 returns, a component has failed. You’re now in replacement territory.
The Bin Filter (All Models)
A filter can look clean but be internally collapsed or have a torn seal. Air bypasses the filter medium, the sensor reads low flow, and the error triggers. Always try a brand new, OEM filter before condemning the motor. Non-OEM filters are often too restrictive or don’t seal properly.
The AeroForce Bin (800/900 Series)
For these older models, the bin itself is a wear item. The plastic latch that seals it to the robot can warp. The internal sensor port gets clogged permanently. If Error 11 persists on an 800/900 Series with a new filter, the bin is the default replacement. It’s cheaper than a motor.
The Cleaning Head Module (i, j, s, e Series)
This is the single most common final fix. The module contains the vacuum motor, the fan scroll, and the mounting interface. Motors burn out. Bearings seize. The entire module swaps out with a few screws. Brands like iRobot and reputable third parties like iFixit sell them. Replacing this is almost always more cost-effective than trying to source and install a bare motor.
| Symptom After Cleaning | Likely Failed Part | Test Before Buying |
|---|---|---|
| Error 11 returns immediately on startup | Cleaning Head Module | Listen for any motor hum. If silent, module is dead. |
| Error 11 occurs only after 5+ minutes of cleaning | Clogged filter or partial blockage | Run without filter (briefly). If error stops, filter is bad. |
| Error 11 intermittent, comes and goes | Loose connection or failing bin sensor (800/900 Series) | Reseat bin repeatedly. Check bin seal for cracks. |
| Vacuum motor sounds strained, then error | Debris still in scroll or failing motor bearings | Re-inspect scroll with tweezers. If clear, motor is failing. |
Diagnosing a persistent error requires this kind of process-of-elimination. It’s the same logic used for related issues like Error 14 (bumper) or Error 6 (wheel), where a physical check precedes part replacement.
How to Prevent Roomba Error 11 From Coming Back
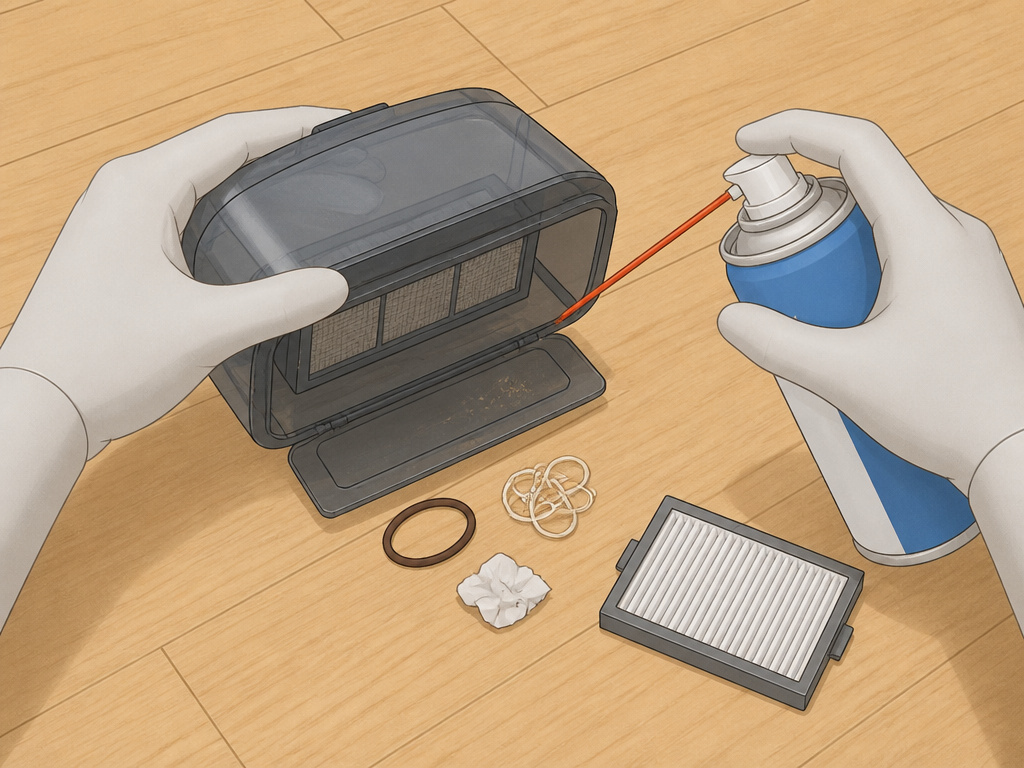
Prevention is about managing what your robot ingests. Error 11 is a maintenance error more than a random failure.
Run a Pre-Vacuum Inspection.
Do a two-minute walk of the area before sending the Roomba out. Pick up strings, hair ties, pet toys, and shreds of paper. These are the prime culprits that bypass the side brush and get sucked directly into the main intake.
Establish a Filter Replacement Schedule.
Don’t wait for the error. Mark your calendar. For a single-pet home, replace the bin filter every 3 months. For multiple pets or high-dust environments, swap it every 6-8 weeks. A fresh filter maintains proper airflow and keeps the motor from overworking.
Clean the Vacuum Path Monthly.
Even with a good filter, fine dust builds up in the scroll. Once a month, remove the bin and use the canned air to blast out the intake cavity. This takes 60 seconds and prevents the slow buildup that eventually triggers the sensor.
This routine maintenance is what separates a robot that lasts five years from one that has a persistent charging error 43 or vacuum error within two. The machine is durable, but it’s not self-cleaning.
Frequently Asked Questions
Can I use my Roomba if it has Error 11?
No. The robot will not start a cleaning job. It’s in a protective lockout to prevent the vacuum motor from overheating or damaging itself against a total blockage. You must clear the error before it will run again.
Is Error 11 a serious problem?
Usually not. It’s most often a maintenance alert, not a sign of catastrophic failure. The serious end of the spectrum is a burnt-out vacuum motor, which requires a part replacement costing between $50 and $150. Most times, it’s a $10 filter.
Why does my Roomba keep getting Error 11 every week?
This indicates a chronic environment or maintenance issue. You likely have a high-shedding pet, lots of long human hair, or carpet fibers that are constantly clogging the system. Upgrade to a higher-capacity filter, perform the weekly vacuum path cleaning, and strongly consider a different top Roomba vacuum model rated for pet hair, which often has more suction and a better-sealed air path.
Will resetting my Roomba fix Error 11?
Reboot (holding CLEAN for 20 seconds) will clear the error from memory only if the physical blockage is also removed. If the clog remains, the error will reappear within seconds of the motor trying to start. The reset is the final step after the fix, not a fix itself.
How much does it cost to fix Error 11?
Costs range from $0 (cleaning a clog) to the price of a new robot. A new OEM filter is about $10-$15. A replacement Cleaning Head Module for an i or j Series runs $80-$120. A service visit from iRobot, if out of warranty, often costs more than the module itself. Always attempt the physical fix first.
Before You Go
Roomba vacuum error 11 is a traffic light, not a dead end. It tells you the vacuum system can’t breathe. Your response is straightforward: find the blockage, clear it, and reset the robot. Remember the model-specific quirks—the j Series might need a drop, the 800 Series needs a bin check. Keep a spare filter on hand and clean the intake monthly. For the one case in ten where the motor itself is gone, the Cleaning Head Module is a single-screw solution. Your robot will be back on duty before the day is out.