
Solving Roomba Error Code 5: The Right Wheel Jam Problem
This post contains affiliate links. As an Amazon Associate, we earn from qualifying purchases.
Roomba vacuum error code 5 means one of two things: a jammed right wheel preventing movement, or a complete loss of electrical current from the charging dock. The wheel jam is far more common and is fixed by removing debris, manually spinning the wheel, and testing the wheel drop switch for a click.
That split is the whole problem. Most guides treat Error 5 as a single fault, but iRobot’s own charts separate a mobility fault from a power fault. Getting it wrong means you clean a wheel that spins freely while the real issue is a dead battery connection.
What follows: the step-by-step fix for a stuck right wheel, the diagnostic to tell a wheel error from a charging error, and the two hardware failures that end the DIY path.
Key Takeaways
- Error 5 on most Roomba models (105, 205, 405, 505, 705, i-Series) points specifically to the right wheel.
- A separate “Charging Error 5” indicates no electrical current from the dock, requiring contact cleaning and battery checks.
- Green or copper-colored charging contacts are corroded and cannot be cleaned, the dock or robot needs replacement.
- Using aftermarket batteries can cause charging errors and voids your iRobot warranty.
- The wheel drop switch must produce a faint click when pressed; if it’s silent, the switch is broken.
Error 5 Means Your Right Wheel Can’t Turn
For the Roomba 105, 115, 205, 405, 415, 505, 705, and i Series robots, Error 5 has one official meaning: the right wheel isn’t turning. The robot’s sensors detect resistance or a complete stall on that side and halt operation to prevent motor damage. It’s a mobility fault, not a software glitch.
The cause is almost always physical obstruction. Hair, string, and carpet fibers wrap around the wheel axle inside the wheel well. Over weeks, this wrap tightens into a dense plug that binds the wheel against its housing. The motor strains, the sensor trips, and the error sounds.
Where this goes sideways: Assuming both wheels are the problem. Cleaning only the left wheel or both wheels equally wastes time. The error code is specific, start with the right side.
The 3-Minute Right Wheel Fix (Step-by-Step)
This sequence clears 80% of Error 5 occurrences. You need a flashlight, a pair of tweezers or needle-nose pliers, and a dry cloth.
- Power down and flip the robot. Press the clean button to turn the Roomba off. Turn it upside down on a towel or soft surface.
- Inspect the right wheel well. Shine your light into the cavity around the right wheel. Look for the grey rubber tire and the central plastic axle. Debris collects between the tire and the black housing.
- Remove visible debris. Use tweezers to pull out hair and string wrapped around the axle. Pull gently straight out; don’t yunk sideways. Clear everything from the well.
- Manually spin the wheel. Grasp the rubber tire and spin it firmly with your fingers. It should rotate freely with no grinding, catching, or sticky spots. Spin it at least ten full rotations.
- Press the wheel up and down. Push the wheel assembly into its socket and release it. Do this 5-6 times. You’re listening for a very faint click with each press. That click is the wheel drop switch engaging, if it’s silent, the switch may be broken.
- Clean the left wheel for good measure. While you’re down there, quickly clear the left wheel well. It doesn’t cause Error 5, but bound left wheels cause other issues like a Roomba circling pattern.
- Restart and test. Place the Roomba on the floor, press CLEAN, and observe. It should drive straight. If Error 5 returns immediately, the problem is deeper.
TL;DR: Debris, spin, click test. Missing the click means switch failure.
When the Simple Fix Fails: The Wheel Module Check
If the wheel spins freely by hand and the click is present but Error 5 persists, the issue is internal. The wheel module, a motor, gears, and sensor in one sealed unit, has likely failed. This is common after 3-4 years of daily use or if the robot frequently drove over thick cords.
You have two paths here. The first is a module replacement, a moderate DIY job. The second is contacting iRobot support, which will ask for your serial number and proof of purchase if under warranty. Before you call, know that other mobility faults like Error 6 point to the left wheel, and Error 11 points to the side brush, knowing the exact code saves time.
| Symptom After Cleaning | Likely Cause | Next Step |
|---|---|---|
| Wheel spins freely, click is heard | Debris cleared, software glitch | Perform a hard reset (hold CLEAN for 10 seconds) |
| Wheel spins freely, no click heard | Wheel drop switch failure | Replace wheel module or seek professional repair |
| Wheel binds or grinds when spun | Bearing failure or internal gear damage | Replace wheel module |
| Error returns after 5 minutes of cleaning | Motor overheating or intermittent sensor fault | Replace wheel module |
When Error 5 Means No Power (Charging Error 5)
A separate “Charging Error 5″ exists for all Roomba and Braava models. The robot displays this when it detects no electrical current flowing from the home base dock. This is a power fault, not a wheel fault. Your robot might beep five times or show a specific charging error message.
The root cause is a broken circuit. Dirt on the metal charging contacts creates insulation. A damaged contact fails to spring up and make connection. A failing or aftermarket battery cannot accept a charge. The dock’s own power supply can die.
Common mistake: Trying to clean charging contacts that are already corroded through. If the metal looks green or copper-colored, it’s oxidized. Cleaning won’t restore conductivity.
Diagnosing and Fixing Charging Error 5
Start with the simplest point of failure and move inward: the dock, the contacts, then the battery.
- Check the dock’s power. Ensure the home base is plugged into a live outlet. Try a different outlet. Listen for a faint hum from the base (some models have it).
- Clean the charging contacts. Power off the robot. Locate the three metal contacts on the underside of the Roomba and the corresponding pins on the dock. Wipe each firmly with a dry cloth or a dry rubber eraser. Do not use liquids.
- Inspect for physical damage. Look closely at the contacts. Are they bright silver? Good. Are they discolored, green, blue, or copper? That’s corrosion. Are any pins on the dock bent or stuck down? Damage here requires part replacement.
- Reseat the battery. Open the battery compartment (usually requires a screwdriver). Remove the battery and firmly re-insert it, ensuring the connectors snap into place.
- Test with a known-good battery. If you have access to another compatible, genuine iRobot battery, swap it in. Charging errors are a known symptom of aftermarket batteries.
If your Roomba’s battery won’t charge after these steps, the problem may be with the battery itself or the internal charging board. Our guide on troubleshooting a Roomba battery that won’t charge covers the deeper diagnostics.
The Two Hardware Failures That End DIY
Most Error 5 codes are fixable. Two specific hardware failures are not, and attempting a repair can cause further damage.
Corroded Charging Contacts: When the metal charging contacts on the robot or dock oxidize (turn green), the material itself loses conductivity. You cannot scrub it back to silver. The part must be replaced. For the home base, this often means replacing the entire dock.
Failed Wheel Drop Switch: This tiny switch inside the wheel module tells the robot the wheel is properly seated. When it fails, the robot thinks the wheel is permanently “dropped” or stuck, triggering Error 5. You heard no click during the press test. The switch is soldered onto the wheel module’s circuit board; replacing it requires micro-soldering skills. Swapping the entire wheel module is the practical solution.
These failures shift the job from cleaning to component replacement. For most owners, that’s the threshold between a free fix and a service call.
How to Talk to iRobot Support (And What They’ll Ask)
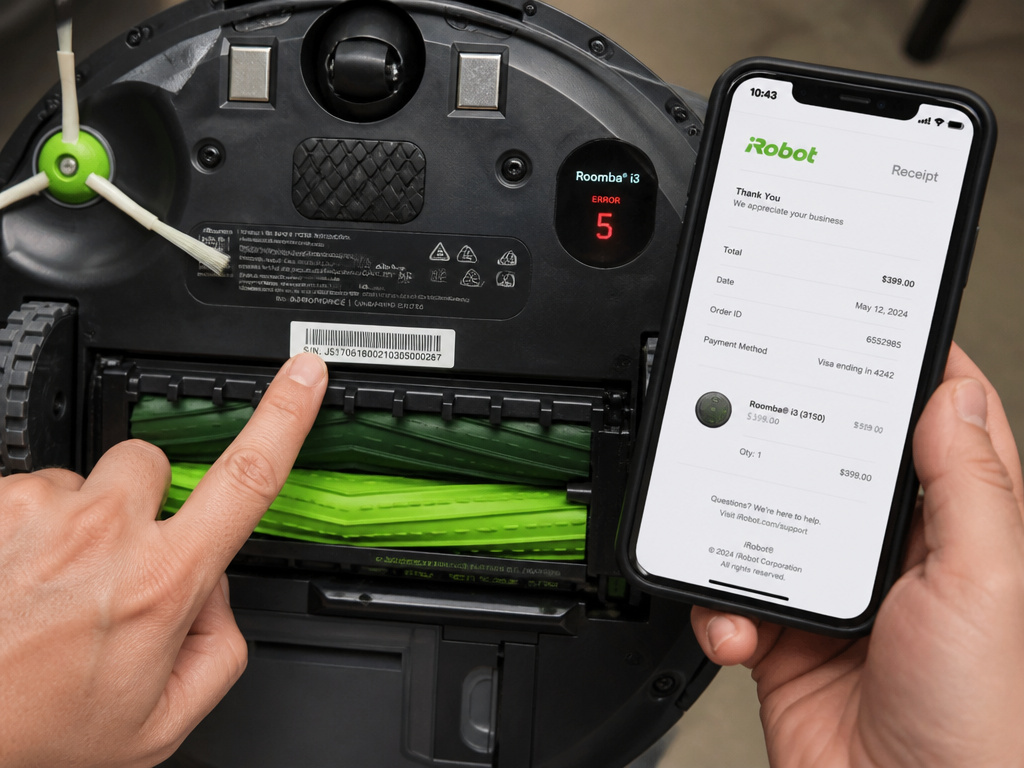 If your Roomba is under warranty or you’ve hit a hardware wall, contact iRobot. Being prepared makes the process faster. They will ask for three things every time:
- The robot, charged and present. They’ll likely ask you to try a hard reset while on the phone.
- The robot’s serial number. Find this on a label on the underside of the robot, often near the dustbin cavity.
- Proof of purchase. A receipt or invoice from an authorized retailer. A credit card statement usually isn’t enough.
Worth knowing before you start: Using a non-genuine iRobot Lithium-Ion battery voids the warranty. Support can detect aftermarket batteries and may deny a warranty claim for any related error, including Charging Error 5.
Have your notes ready. Tell them the exact error, the steps you’ve already taken (e.g., “cleaned the right wheel, heard no click from the drop switch”), and when the problem first started. This demonstrates you’ve done basic troubleshooting and moves the conversation to solutions.
Frequently Asked Questions
Does Roomba Error 5 always mean the right wheel?
For the Roomba 100, 200, Plus 400/500, Max 700, and i Series, yes, iRobot’s error chart lists “Right Wheel Jammed.” For older 500, 600, 700, 800 series, the code is less specific but still typically points to wheel movement. Always check the right wheel first.
Can a bad battery cause Error 5?
Failing or aftermarket battery can cause Charging Error 5, which is a “no current” fault. It will not cause the “right wheel jammed” Error 5. If your robot shows a charging error, suspect the battery or contacts before the wheels.
My wheel spins freely. Why does Error 5 keep coming back?
Silent wheel drop switch is the usual culprit. If pressing the wheel in and out produces no faint click, the switch is broken. The robot senses this as a permanent wheel fault. The next most likely cause is an intermittent failure inside the wheel module’s motor or sensor, which requires replacement.
How do I reset my Roomba after fixing Error 5?
For a wheel-jam Error 5, simply pressing CLEAN after clearing the debris is usually enough. If the error persists, perform a hard reset: press and hold the CLEAN button for about 10 seconds until the robot beeps. Release, then press CLEAN to start a new cleaning cycle. For a full list of reset procedures for other issues, see our page on Roomba error codes.
Is Error 5 the same as Error 6 or Error 11?
No. Each points to a different component. Error 5 is the right wheel. Error 6 is the left wheel. Error 11 is the side brush. Treating them as the same will lead you to clean the wrong part.
The Bottom Line
Roomba Error 5 splits into two distinct problems. The common one is a physical jam of the right wheel, solved by removing hair and testing the wheel click. The less common one is a complete break in the charging circuit, fixed by cleaning contacts and checking the battery.
Start with the wheel. If it spins cleanly and clicks, move to the charging system. If you find green contacts or a dead switch, that’s your answer. Most times, it’s just a clog. Don’t let a five-cent wrap of string turn into a $100 service call. Clear the well first.